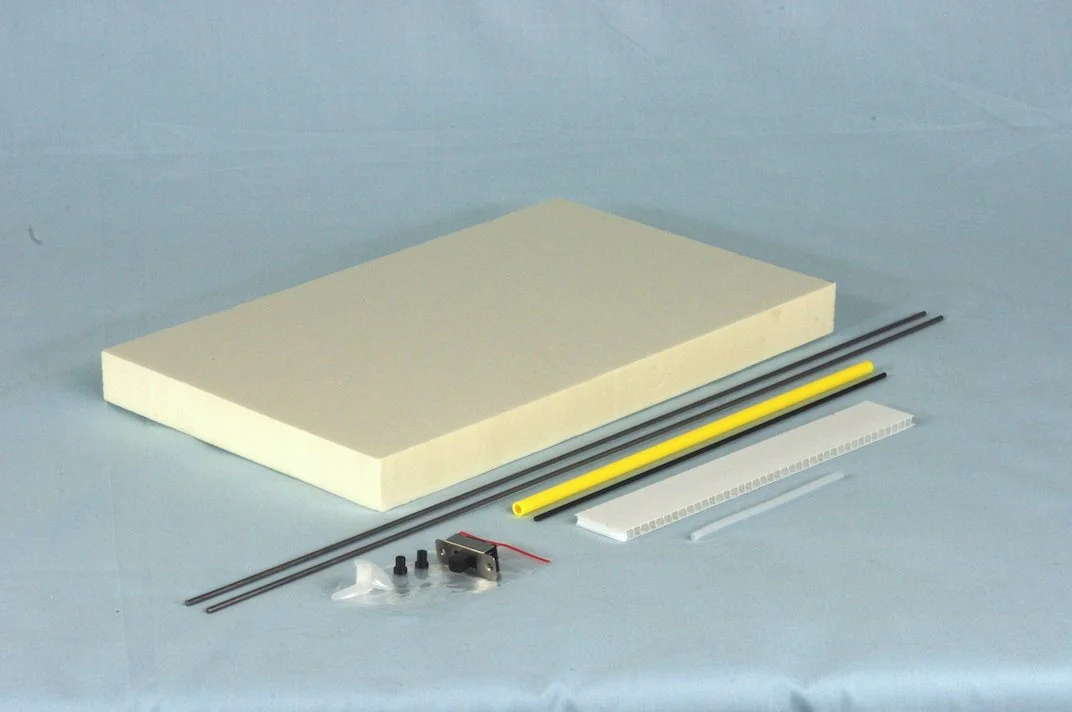
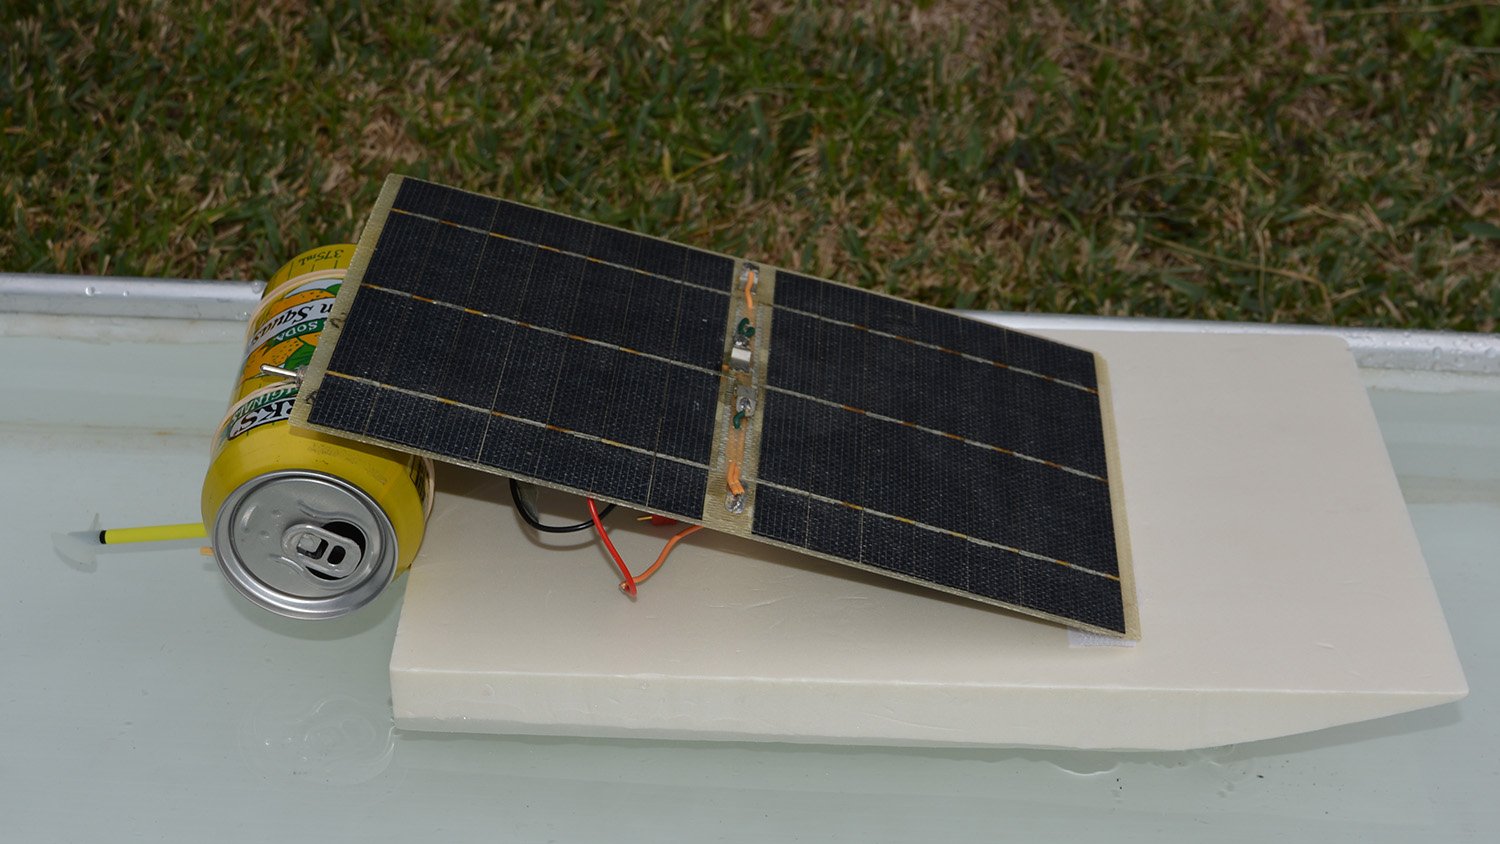
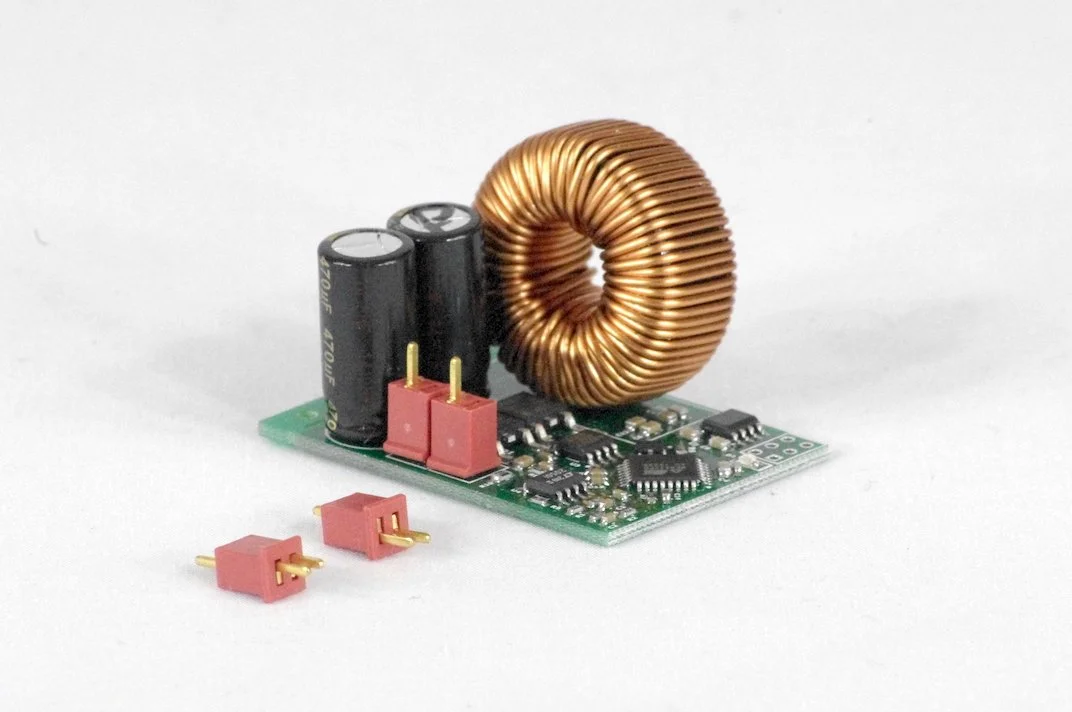
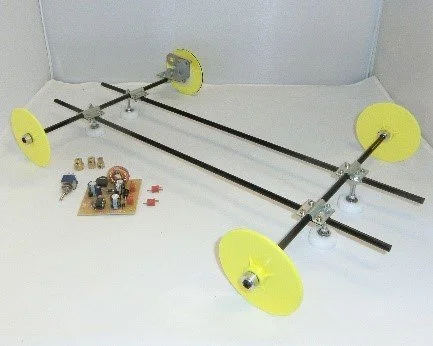
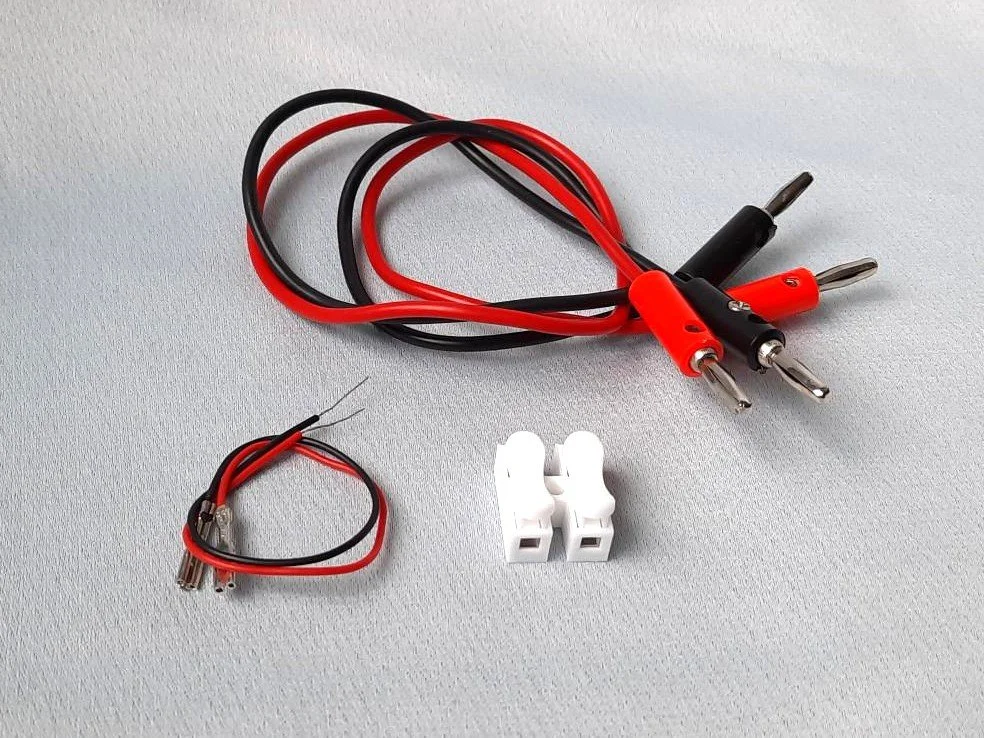
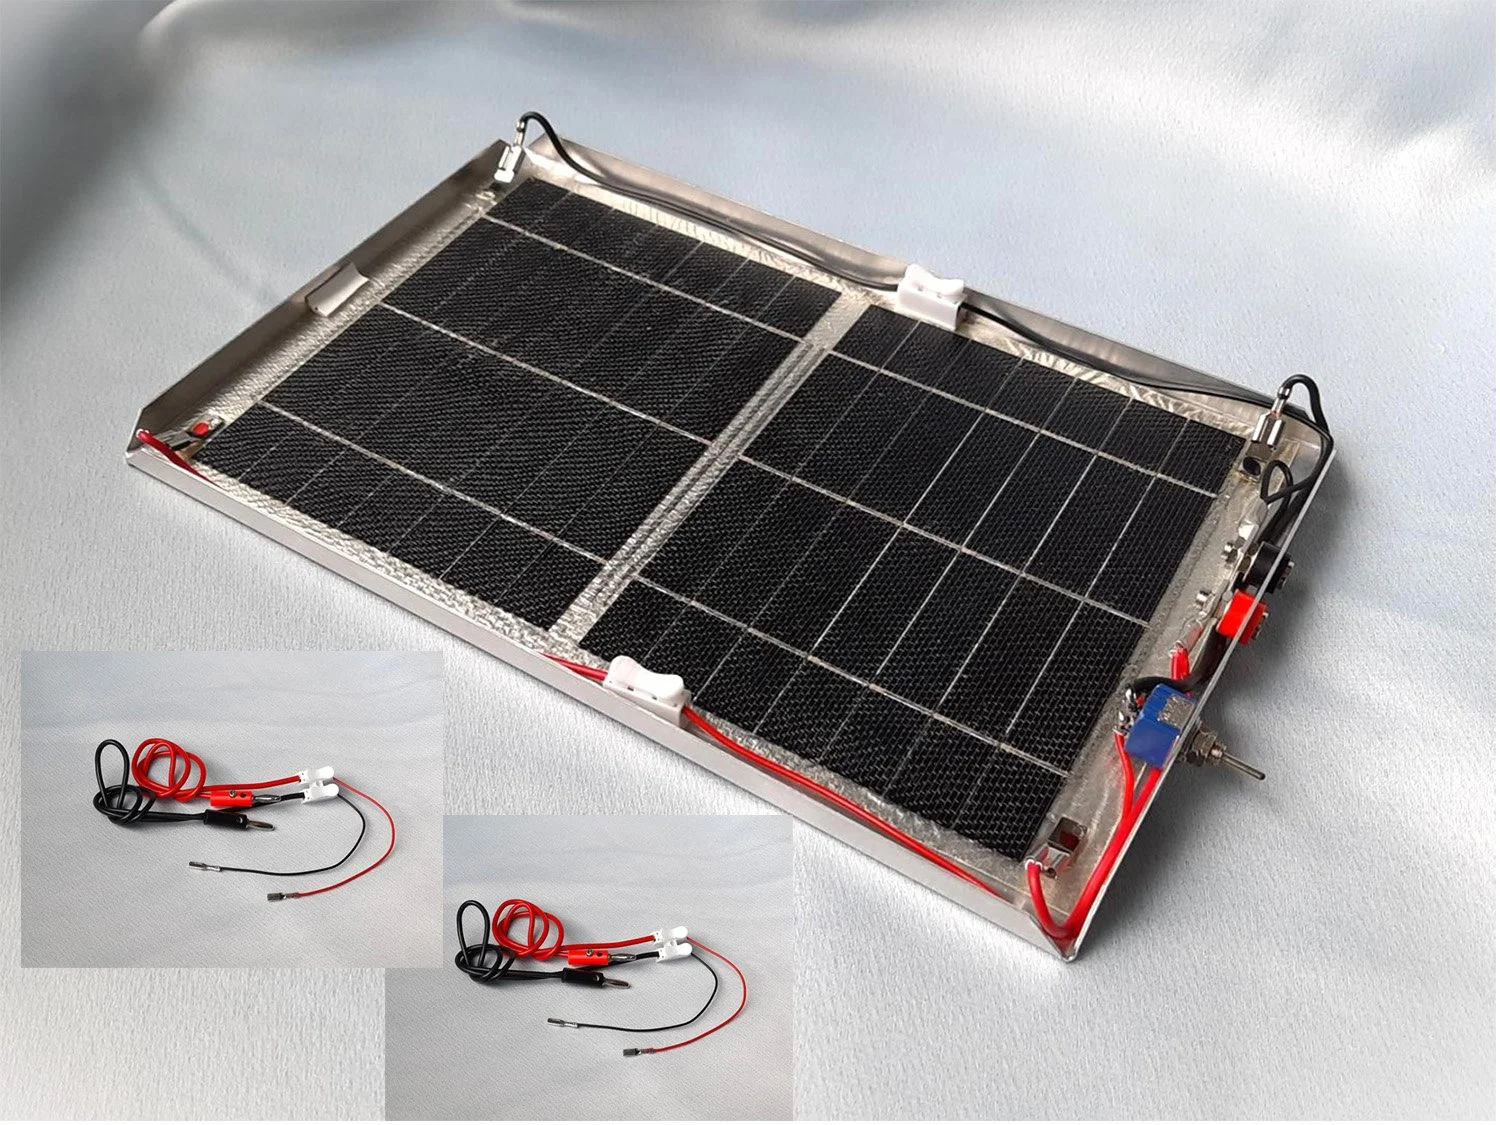
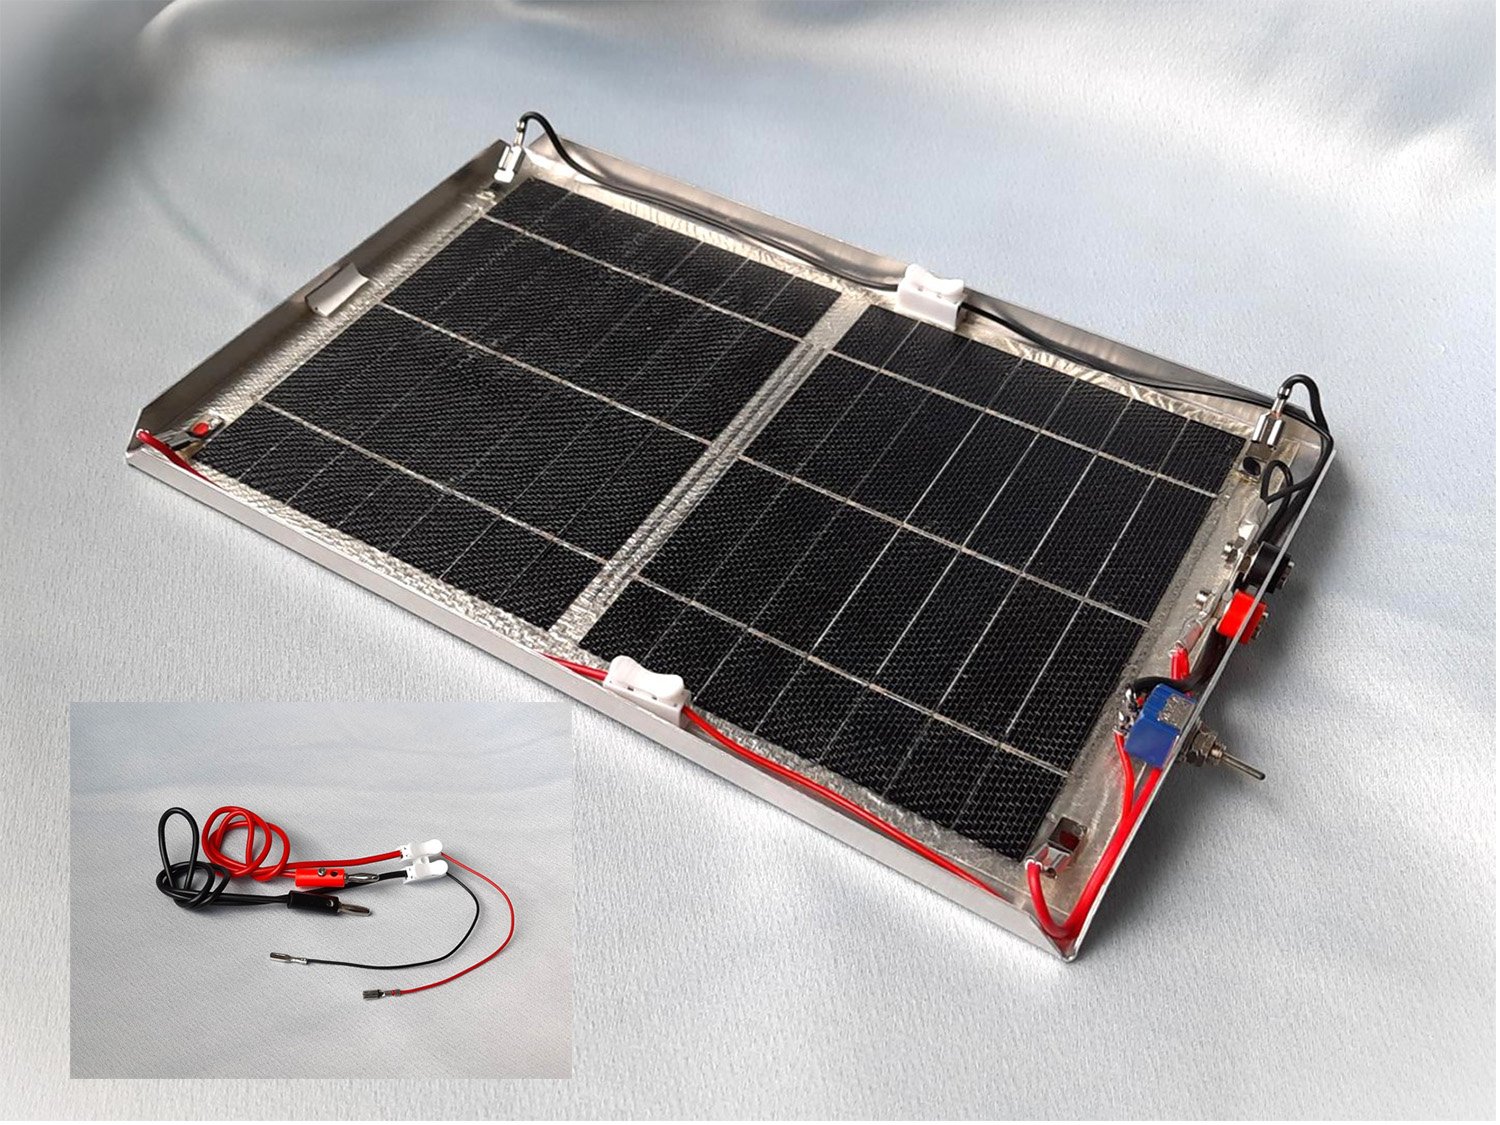
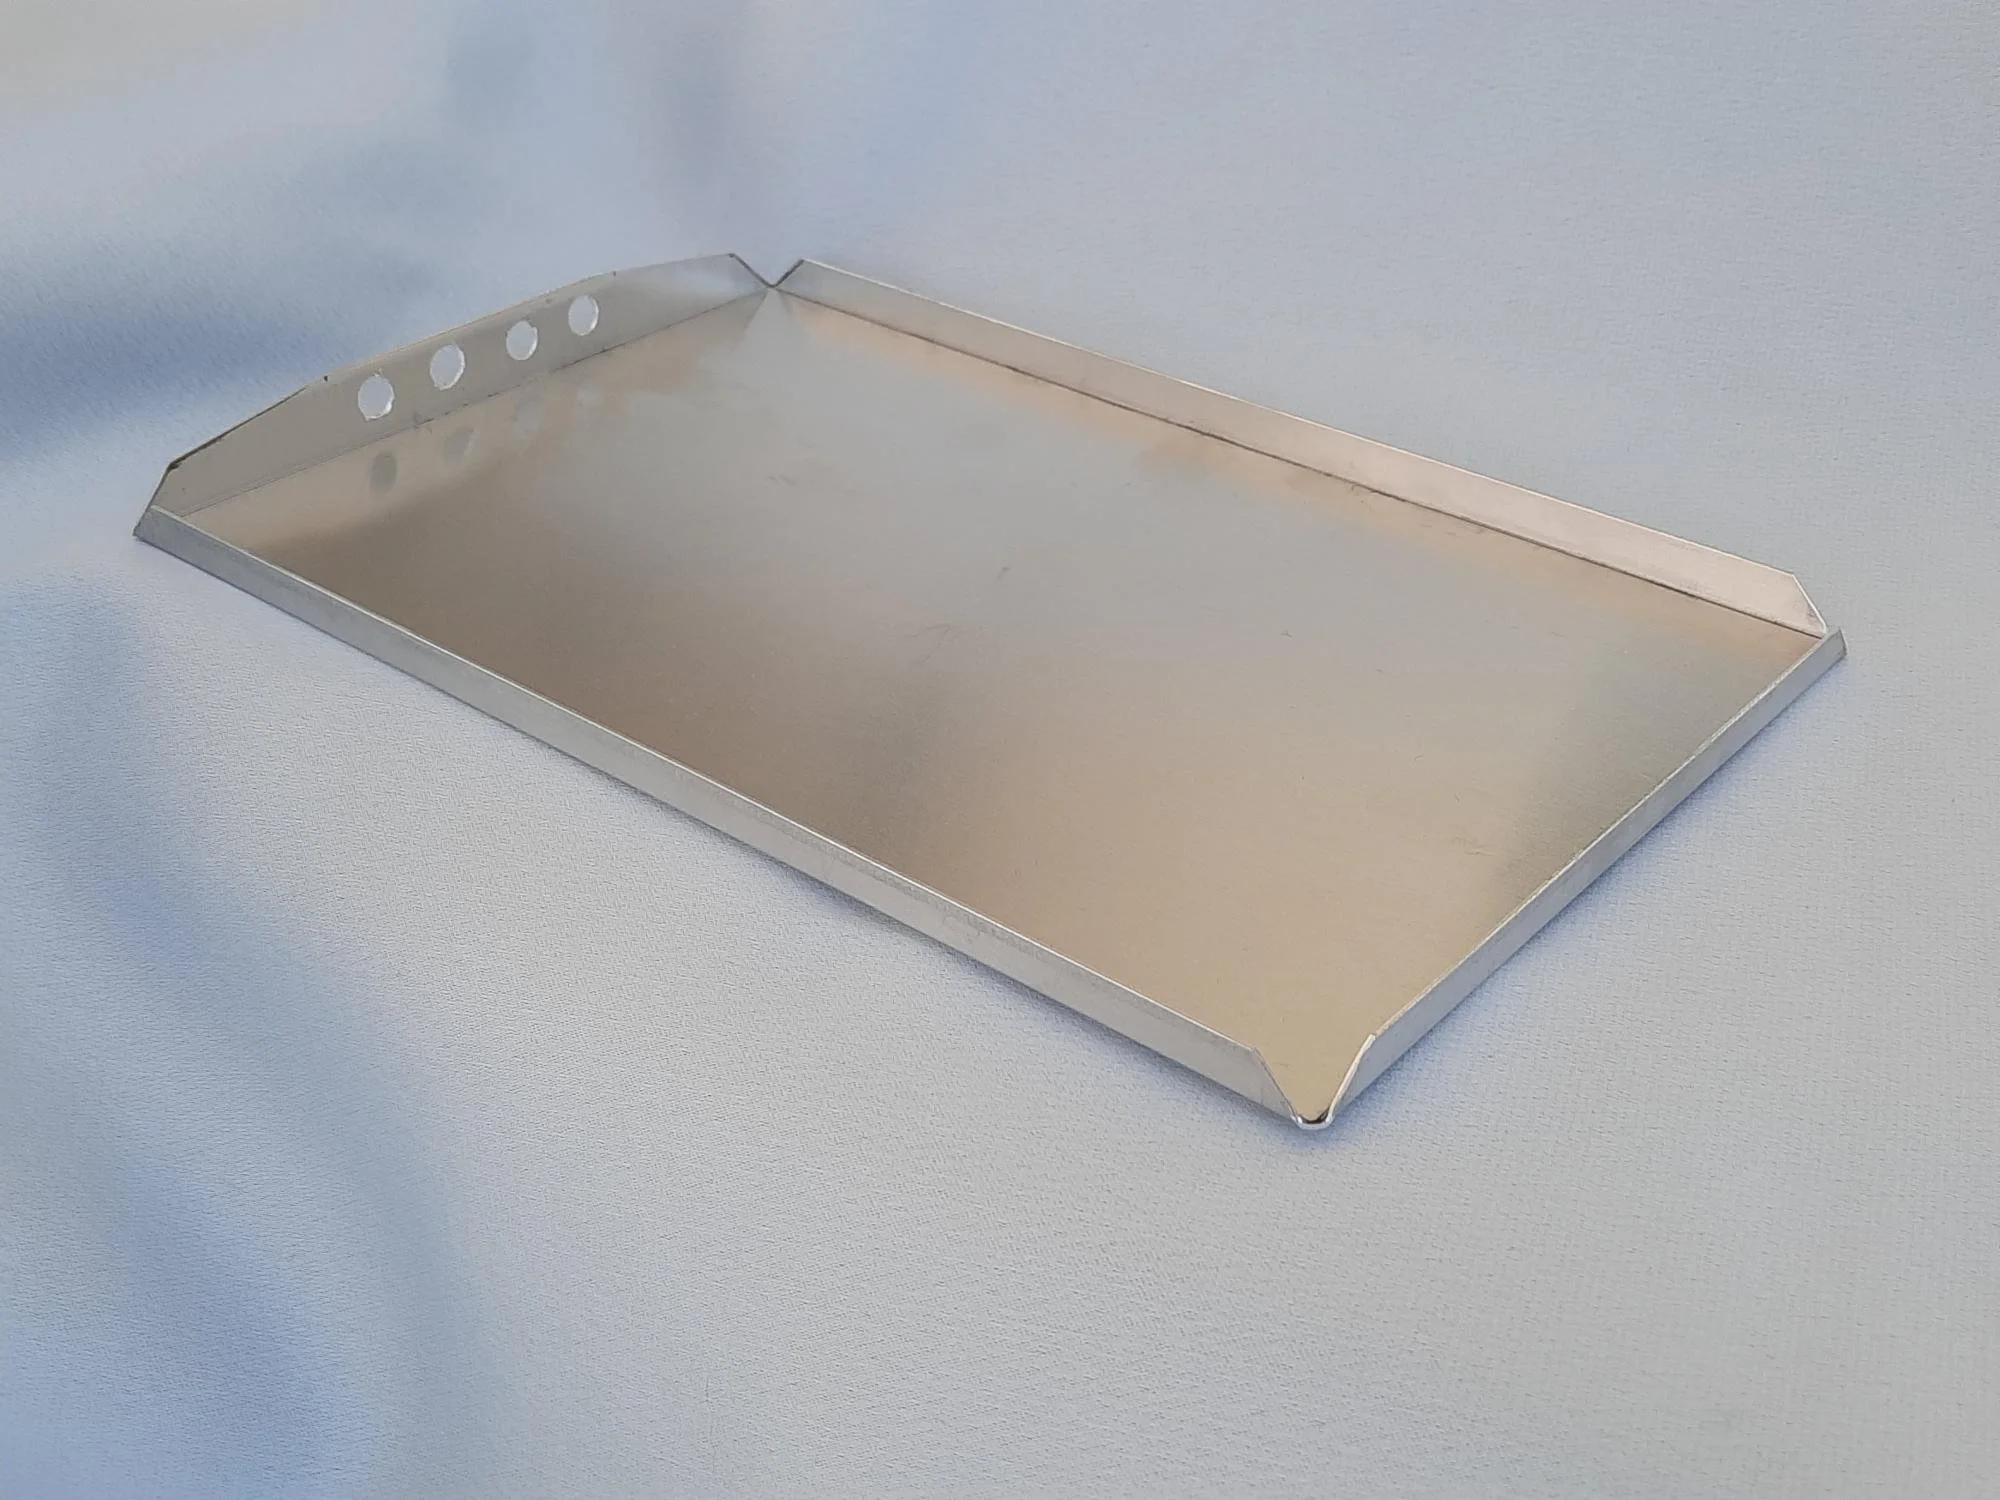
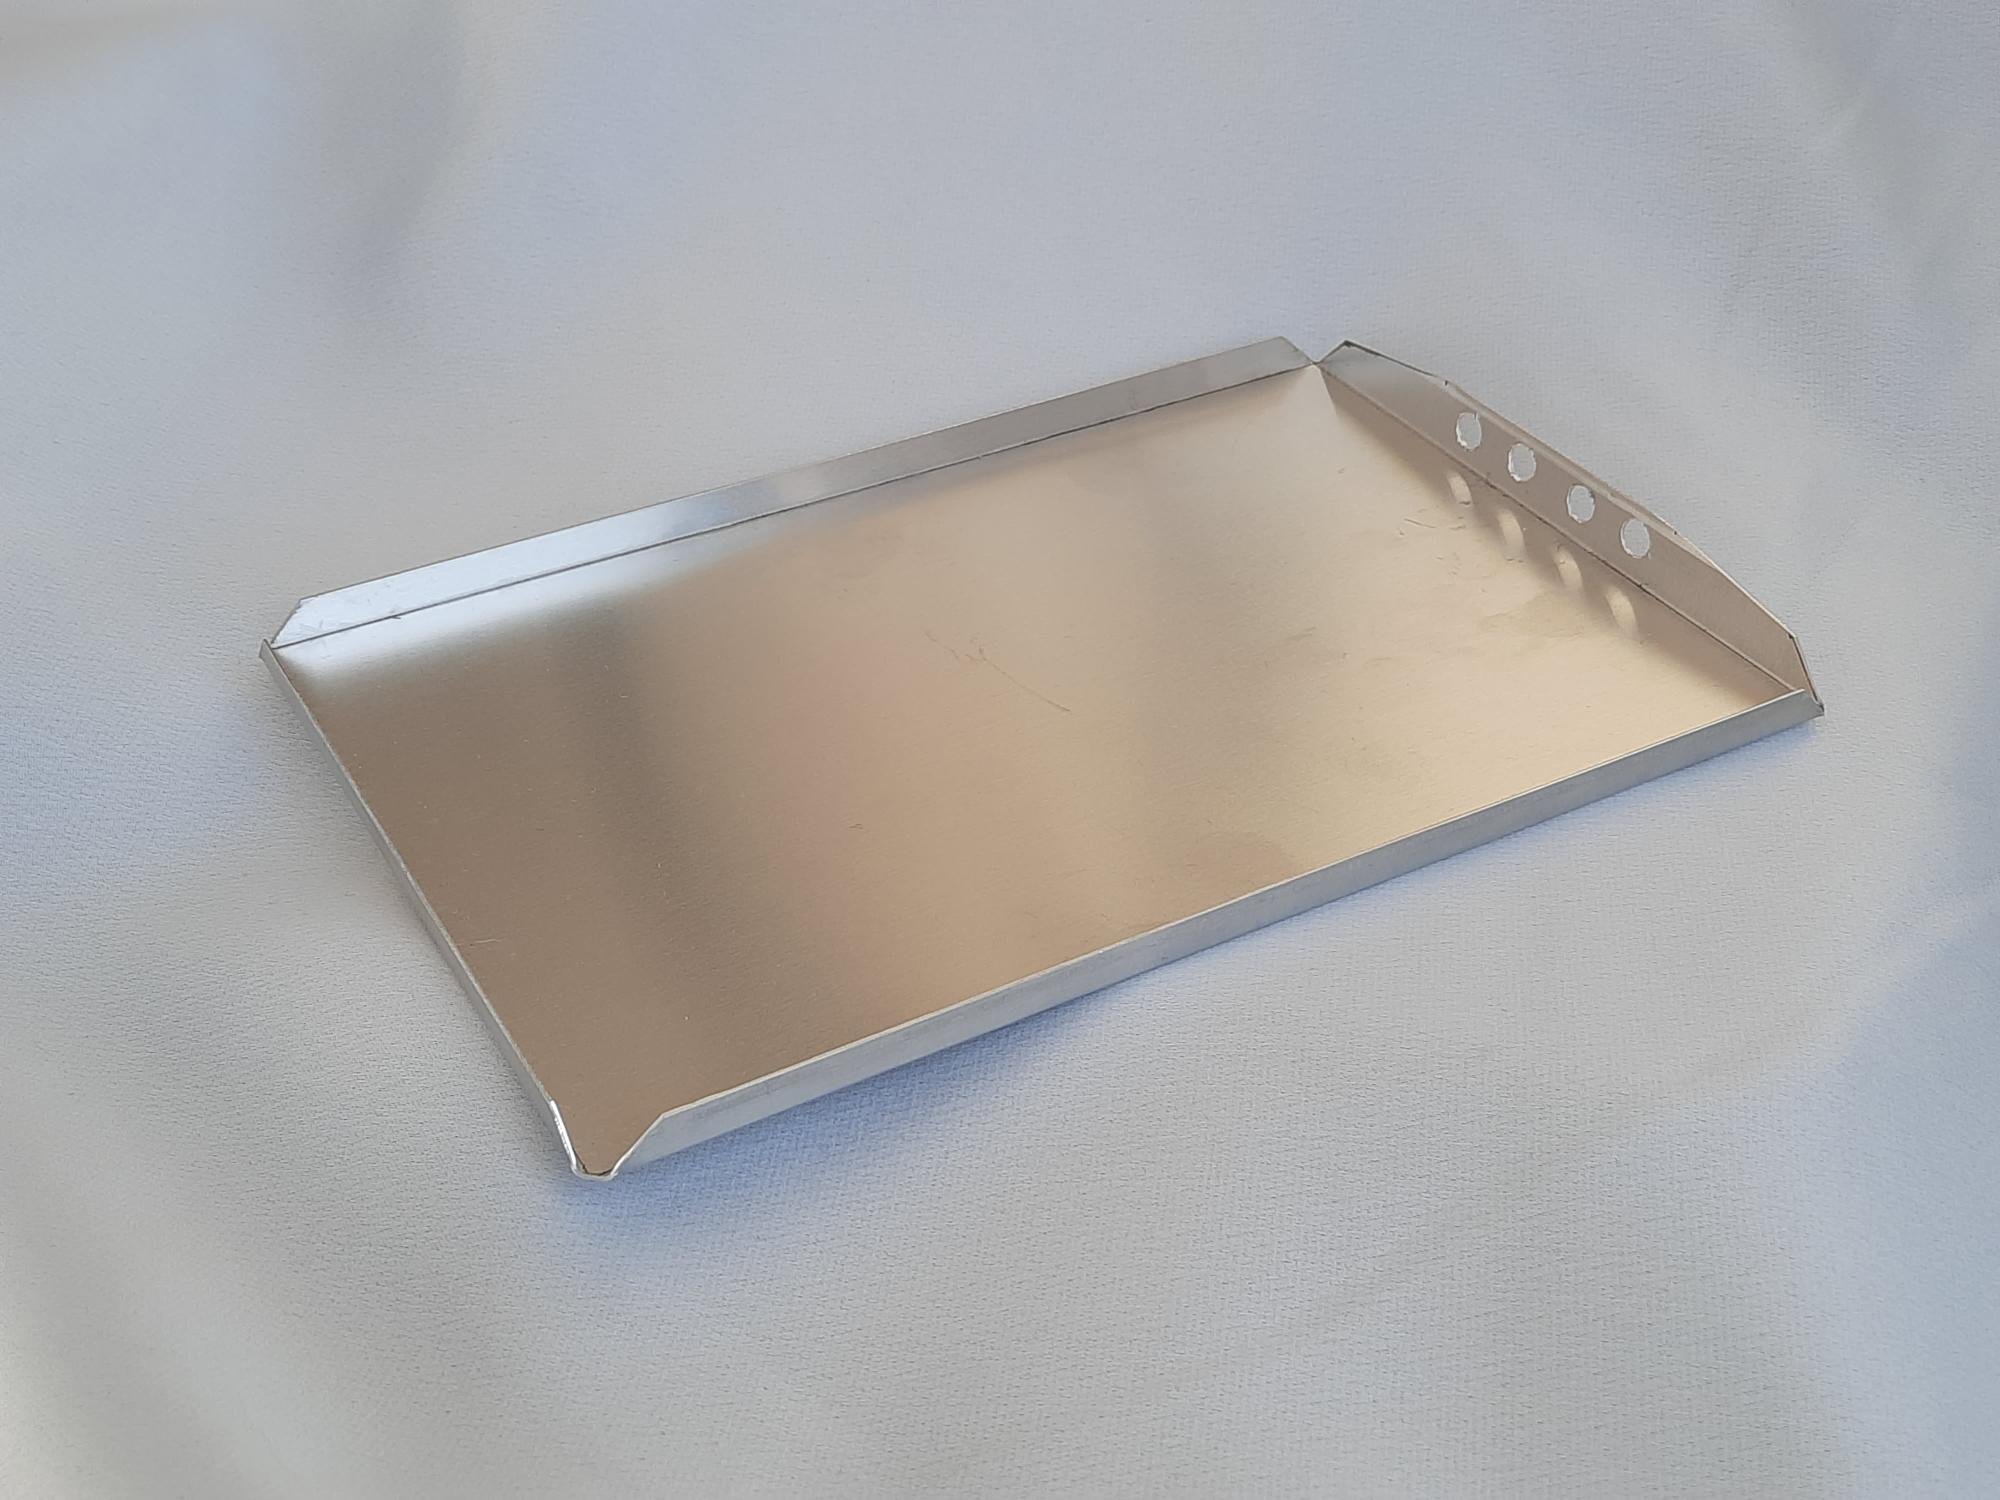
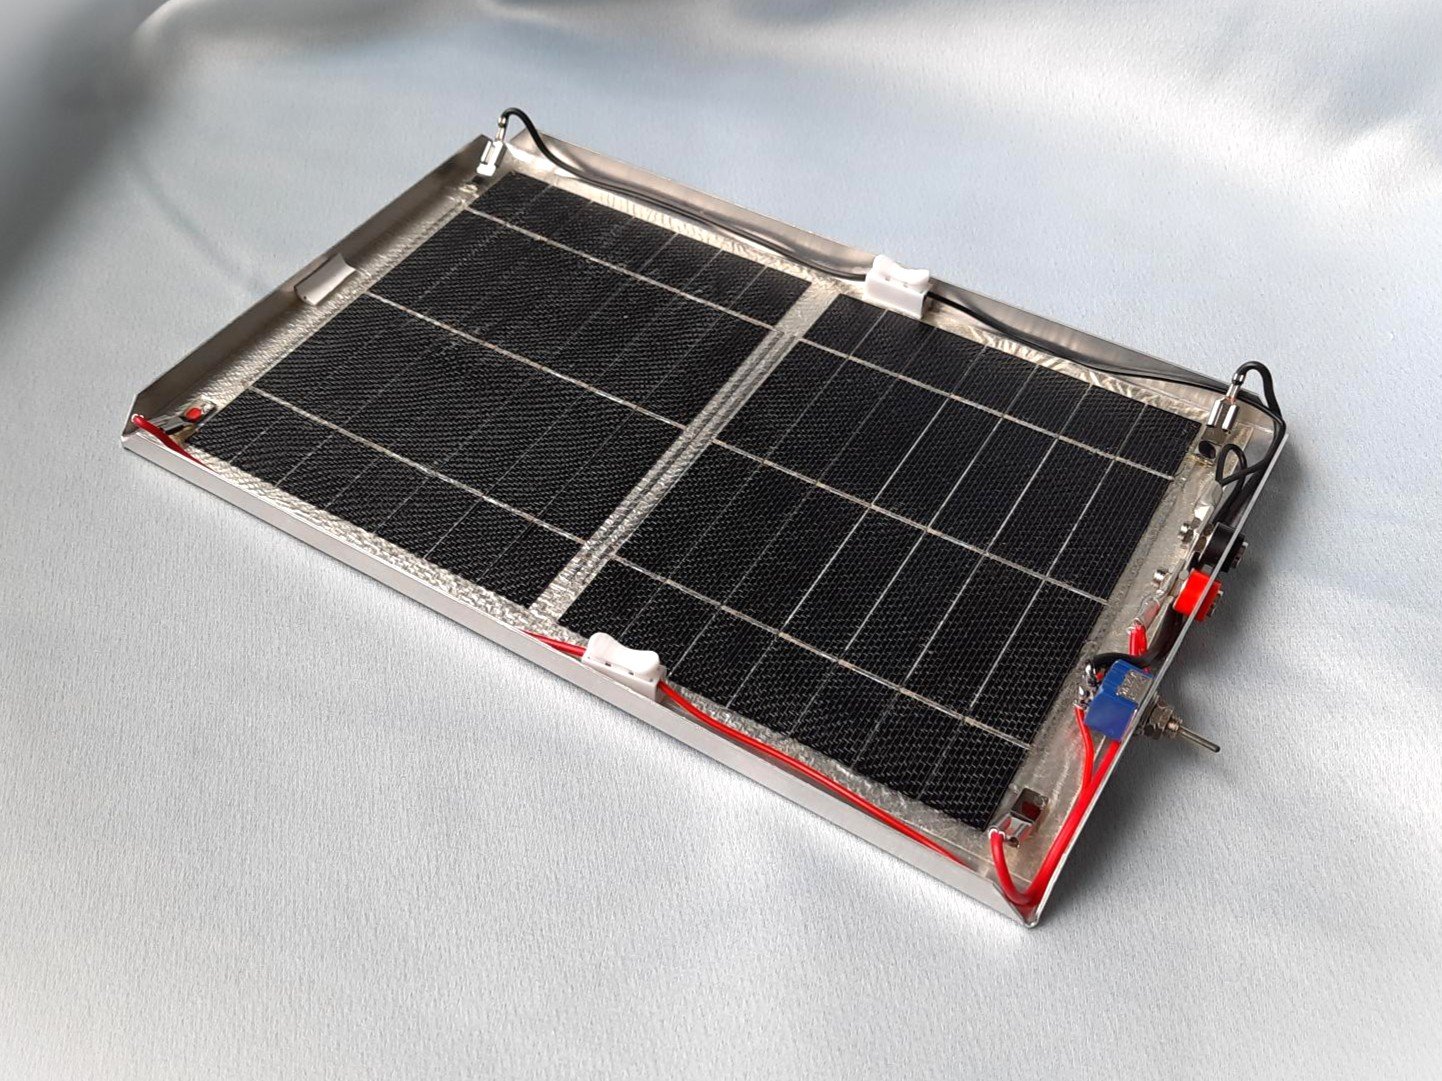
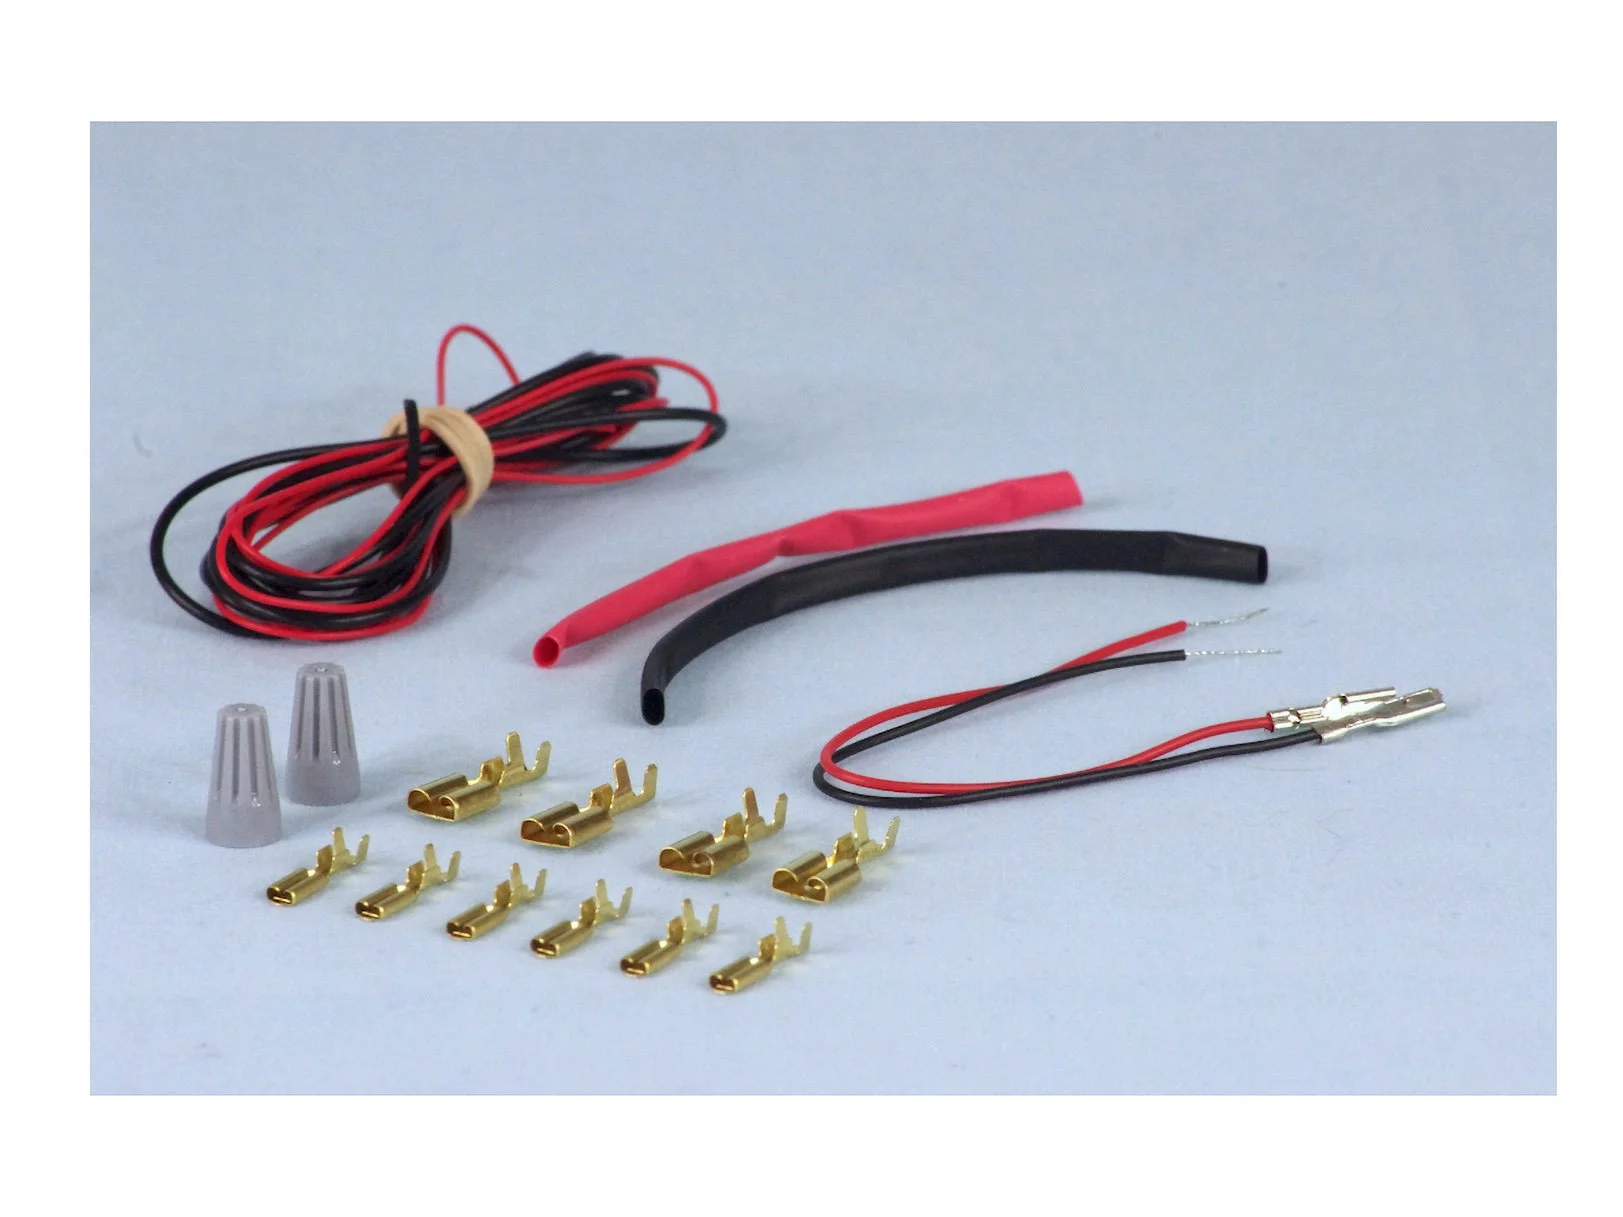
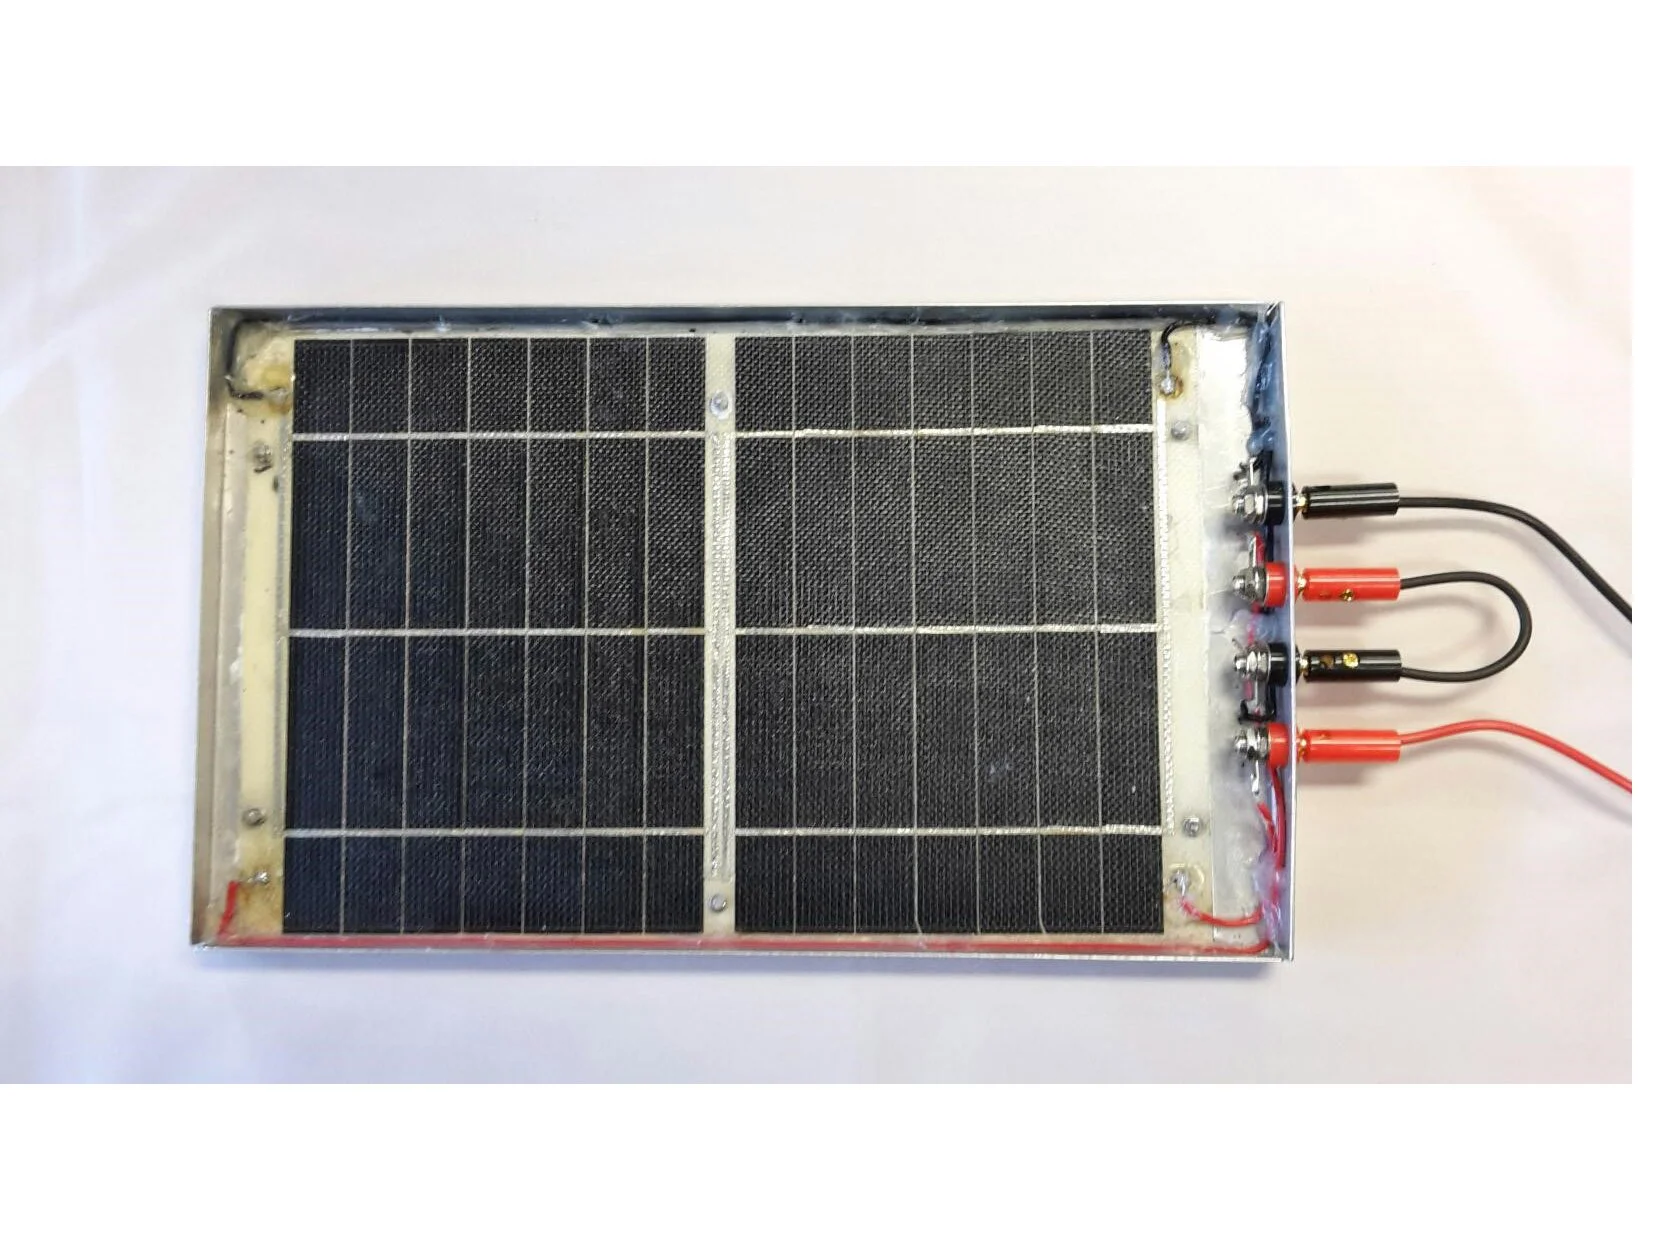
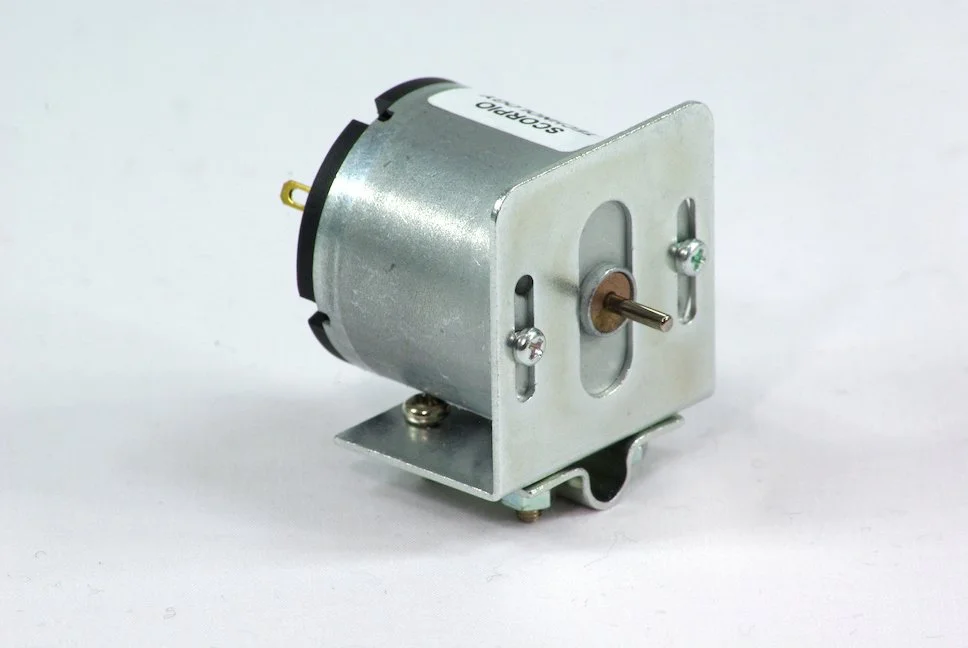
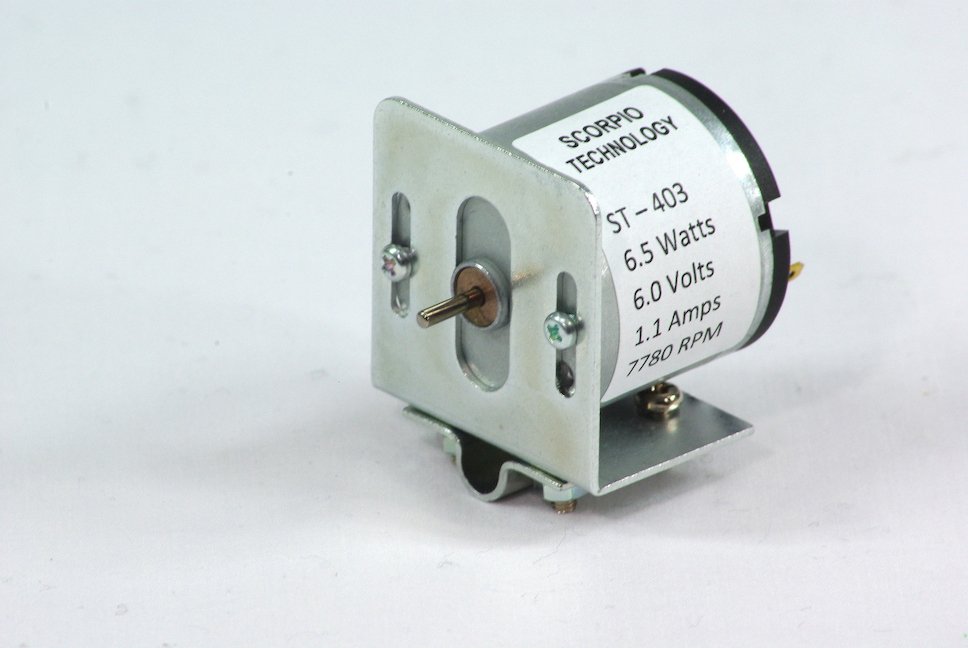
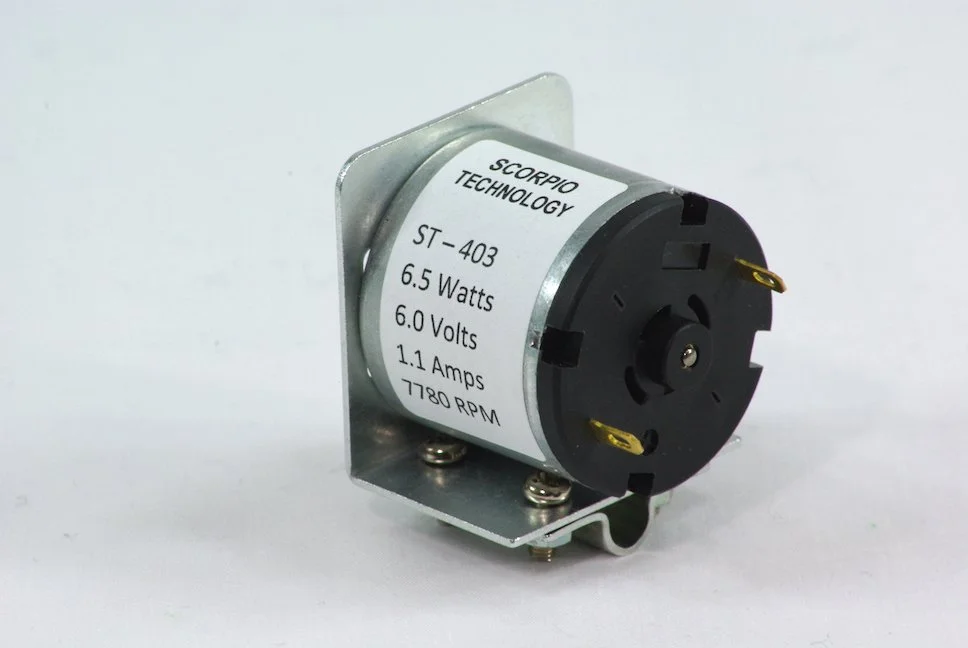
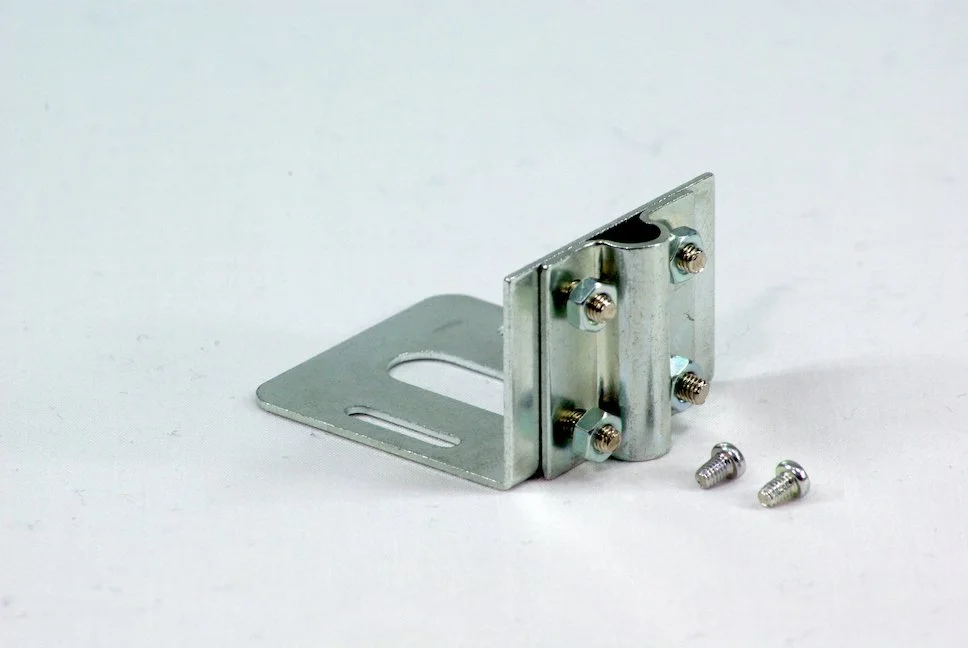
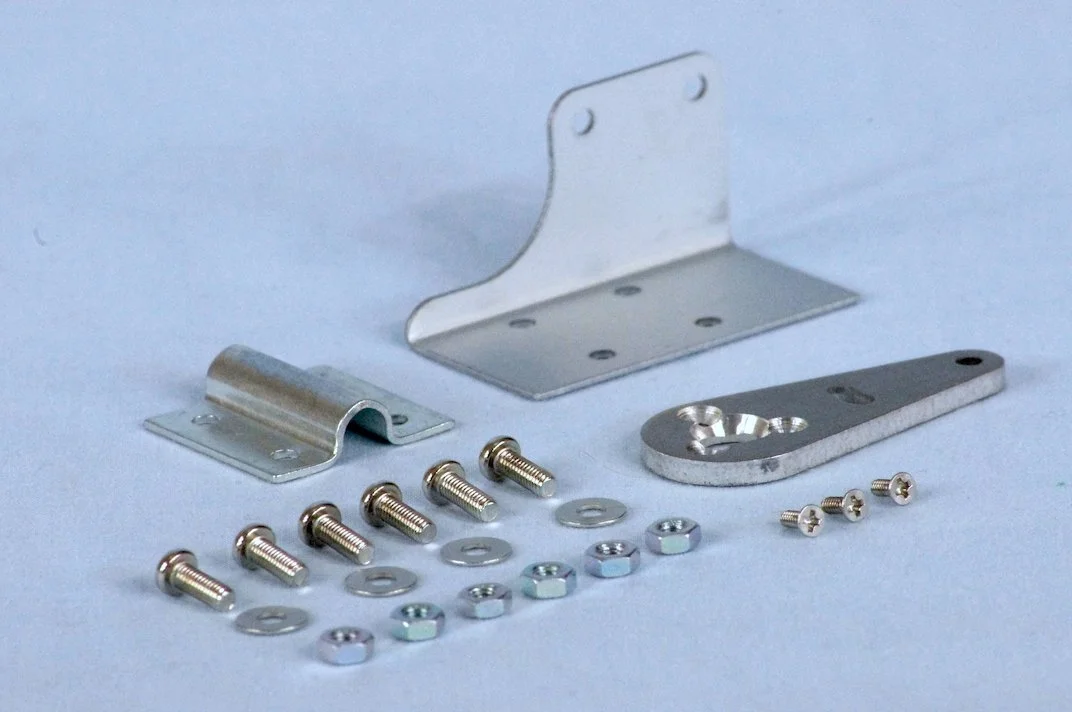
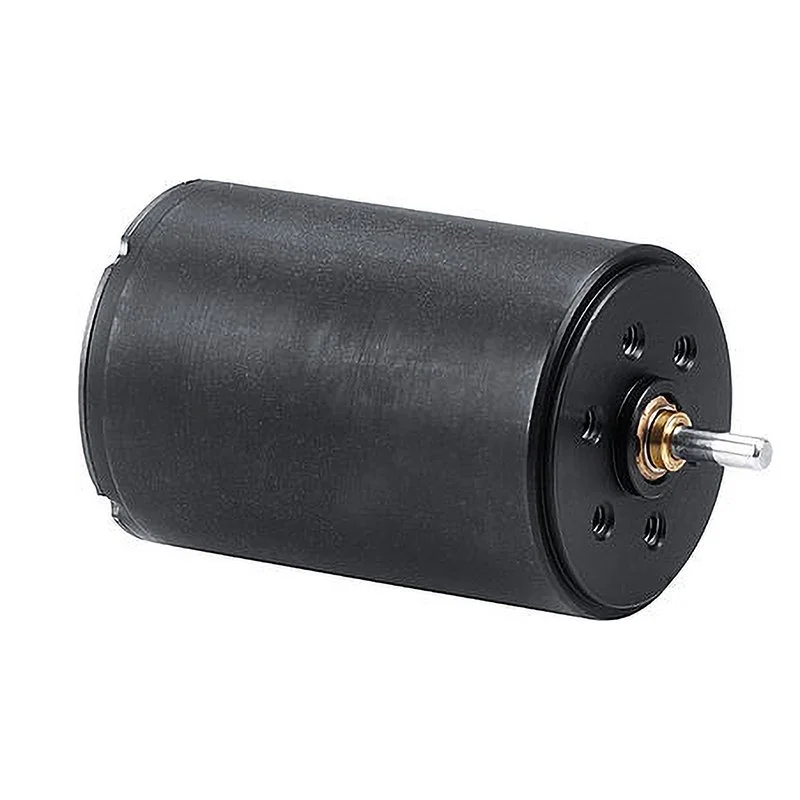
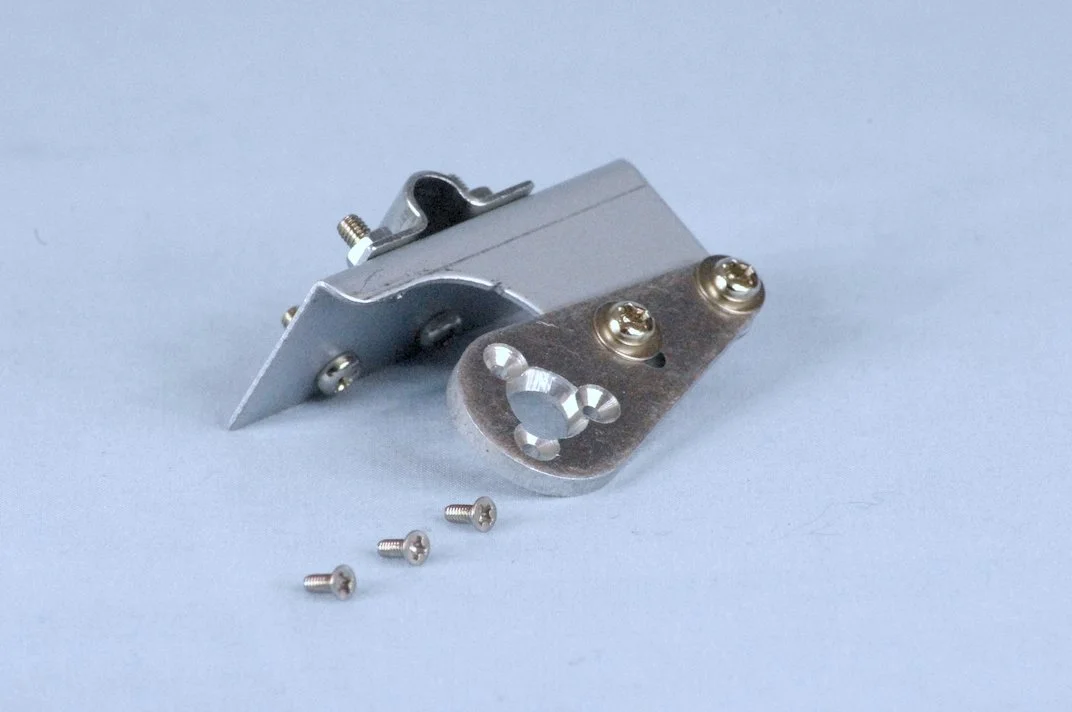
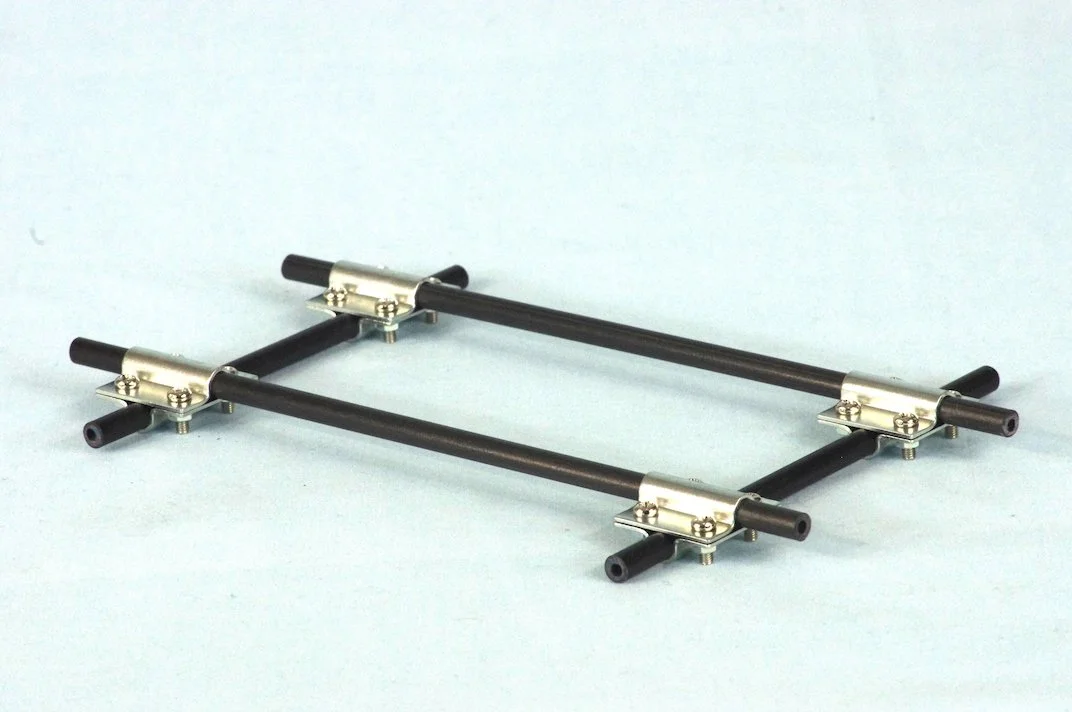
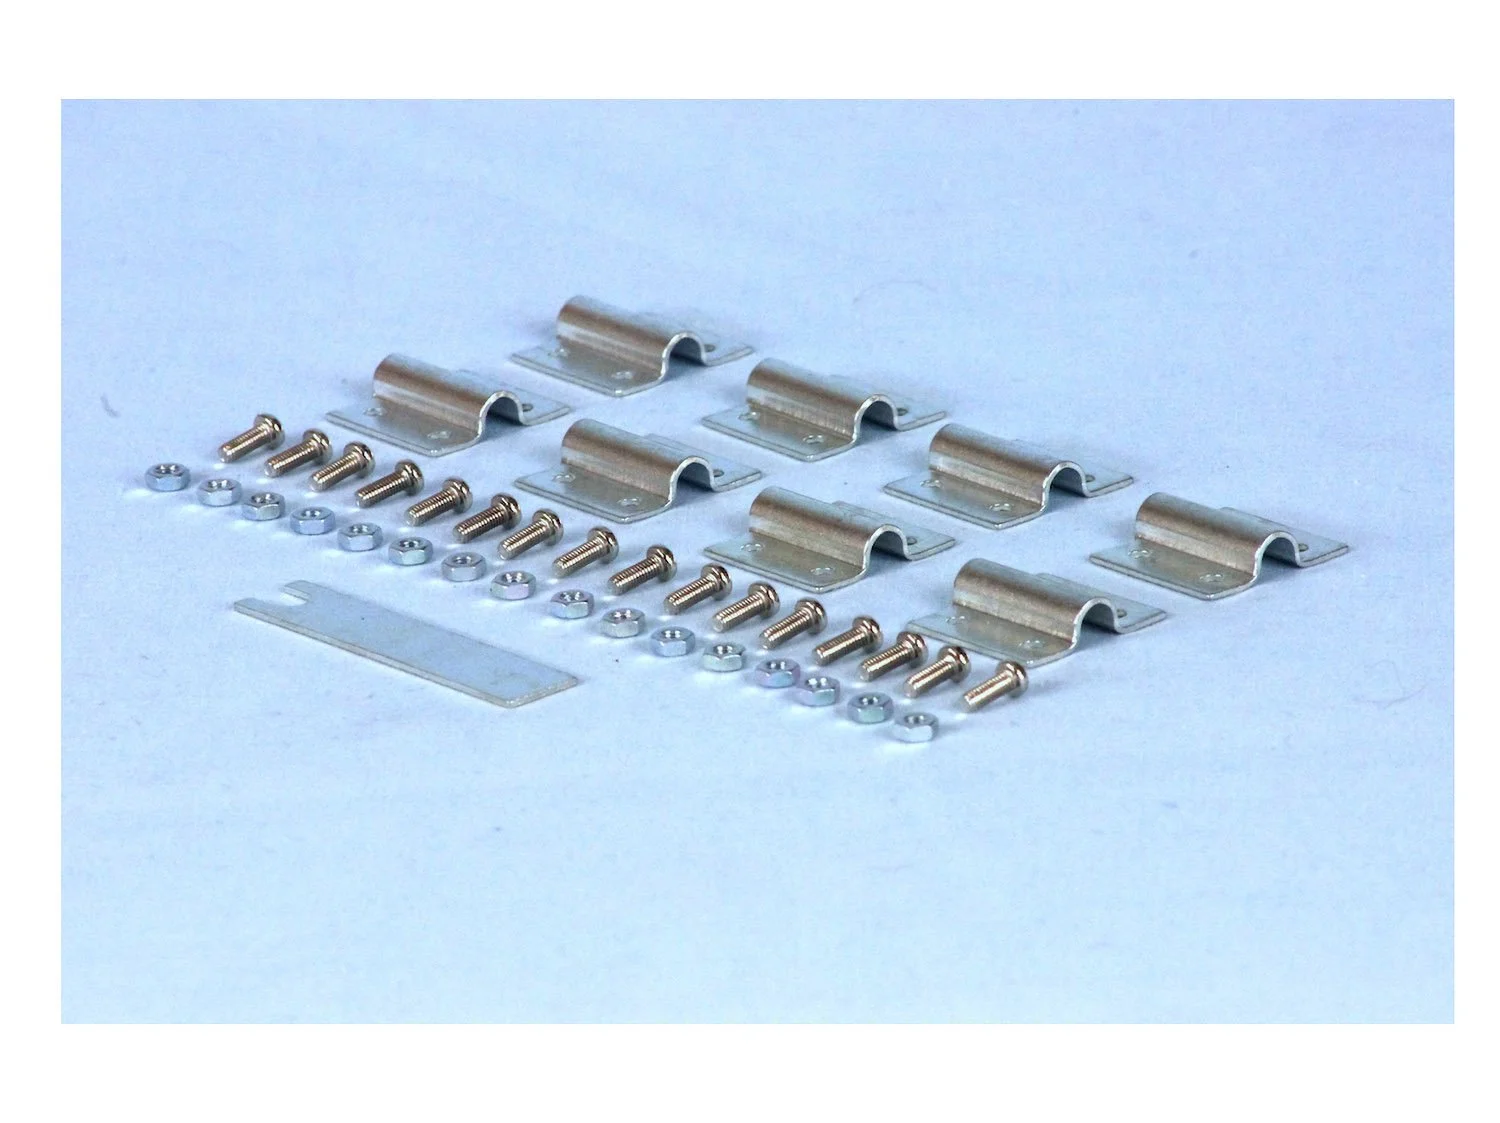
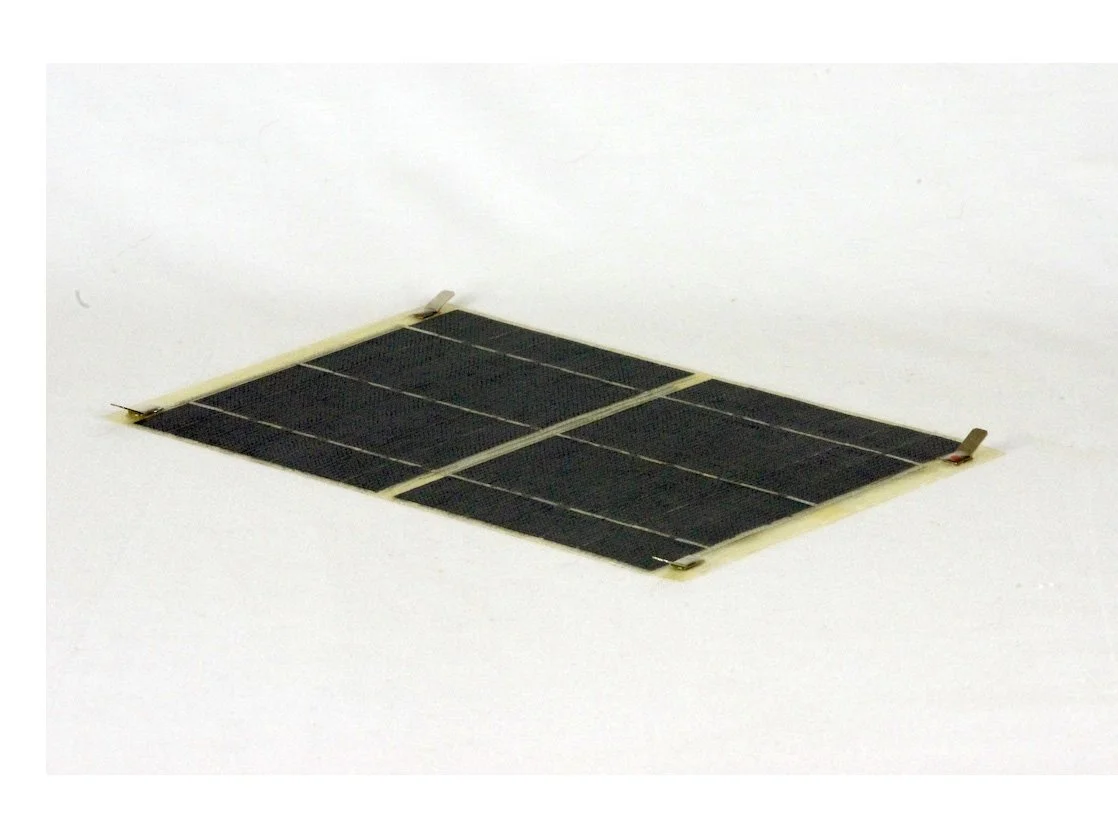
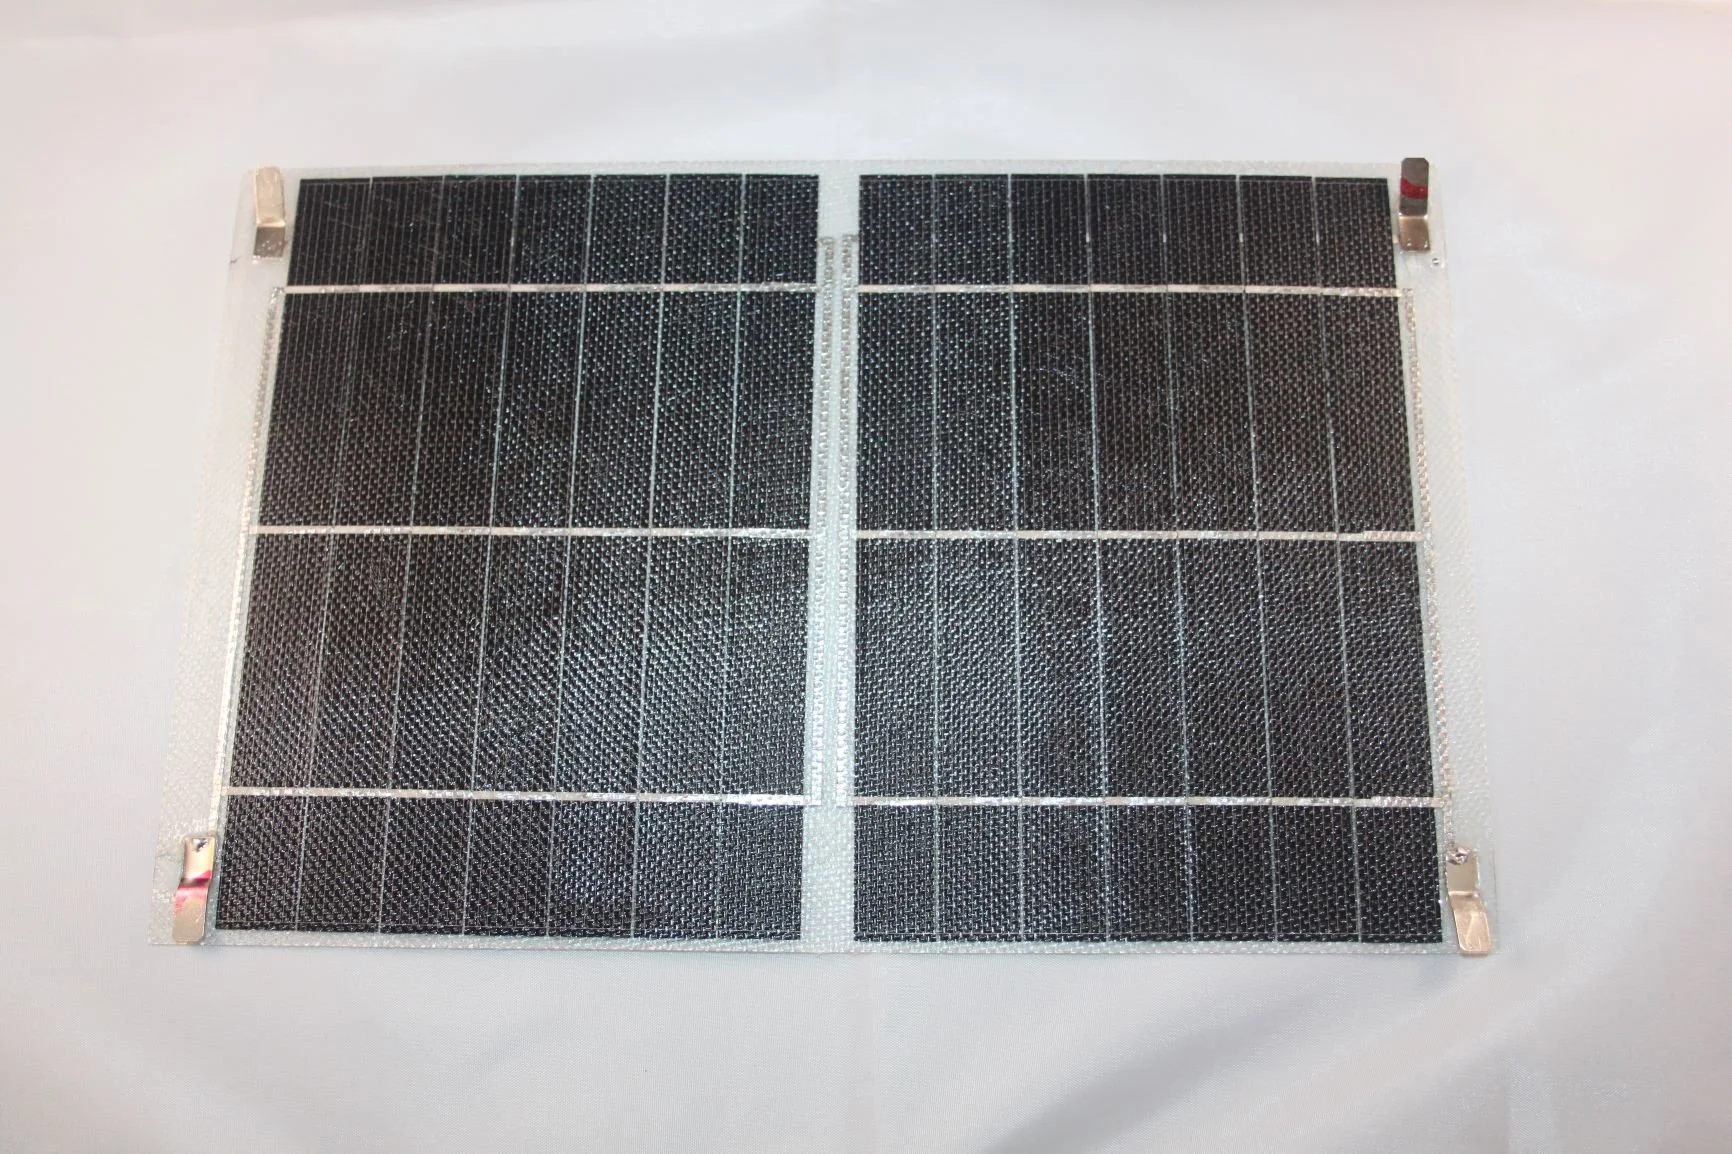
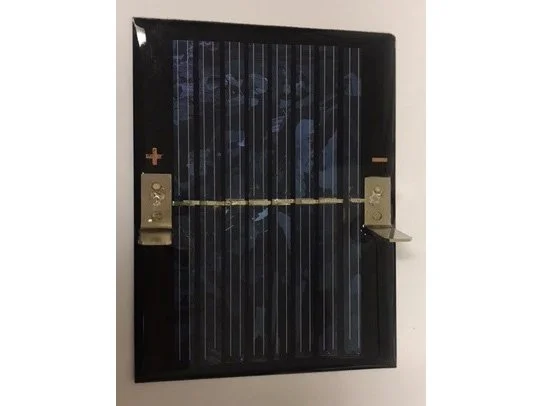
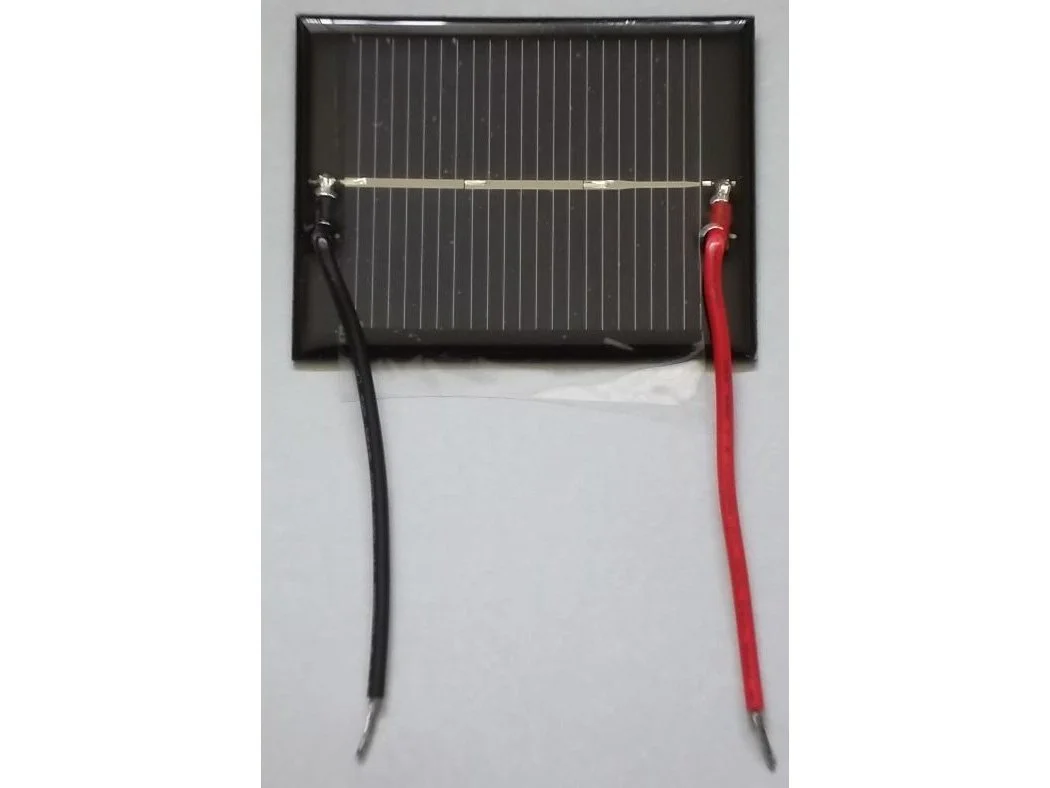
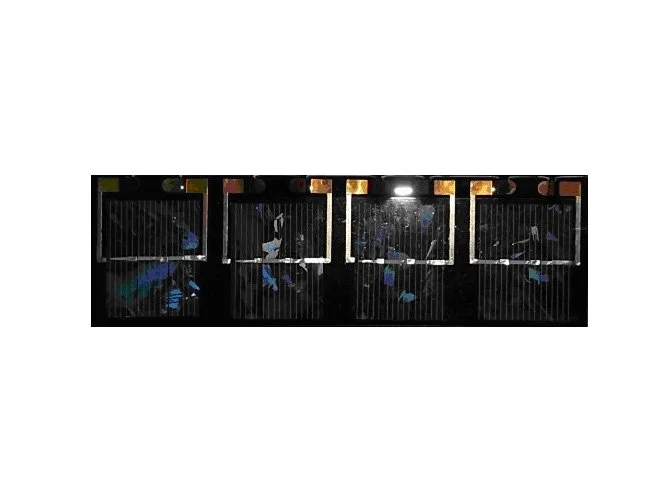
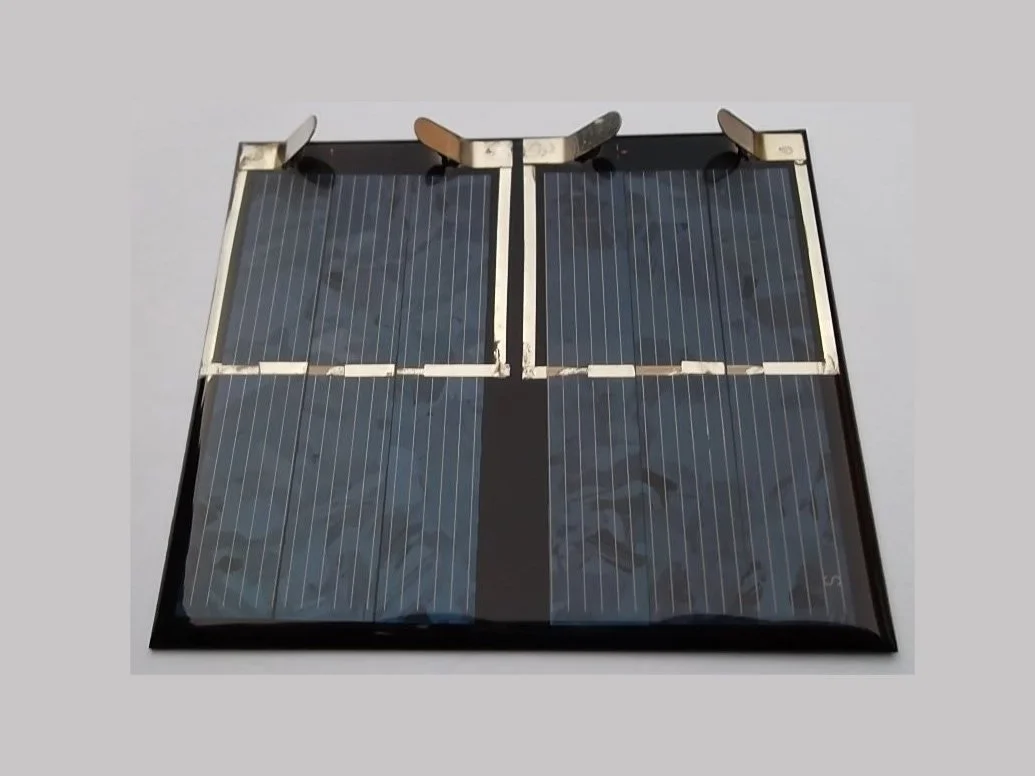
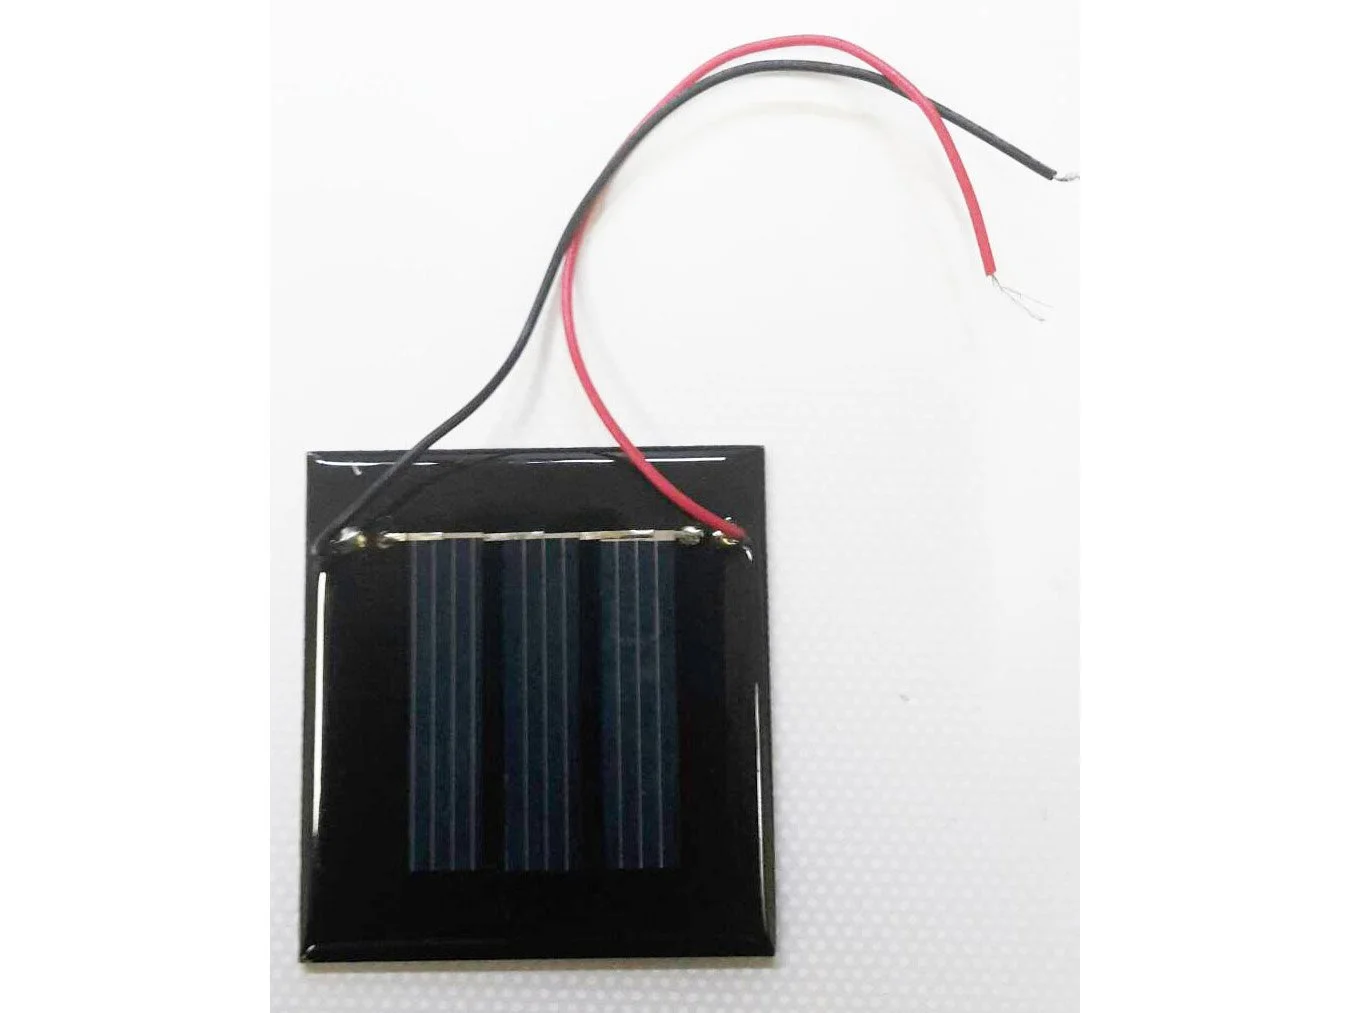
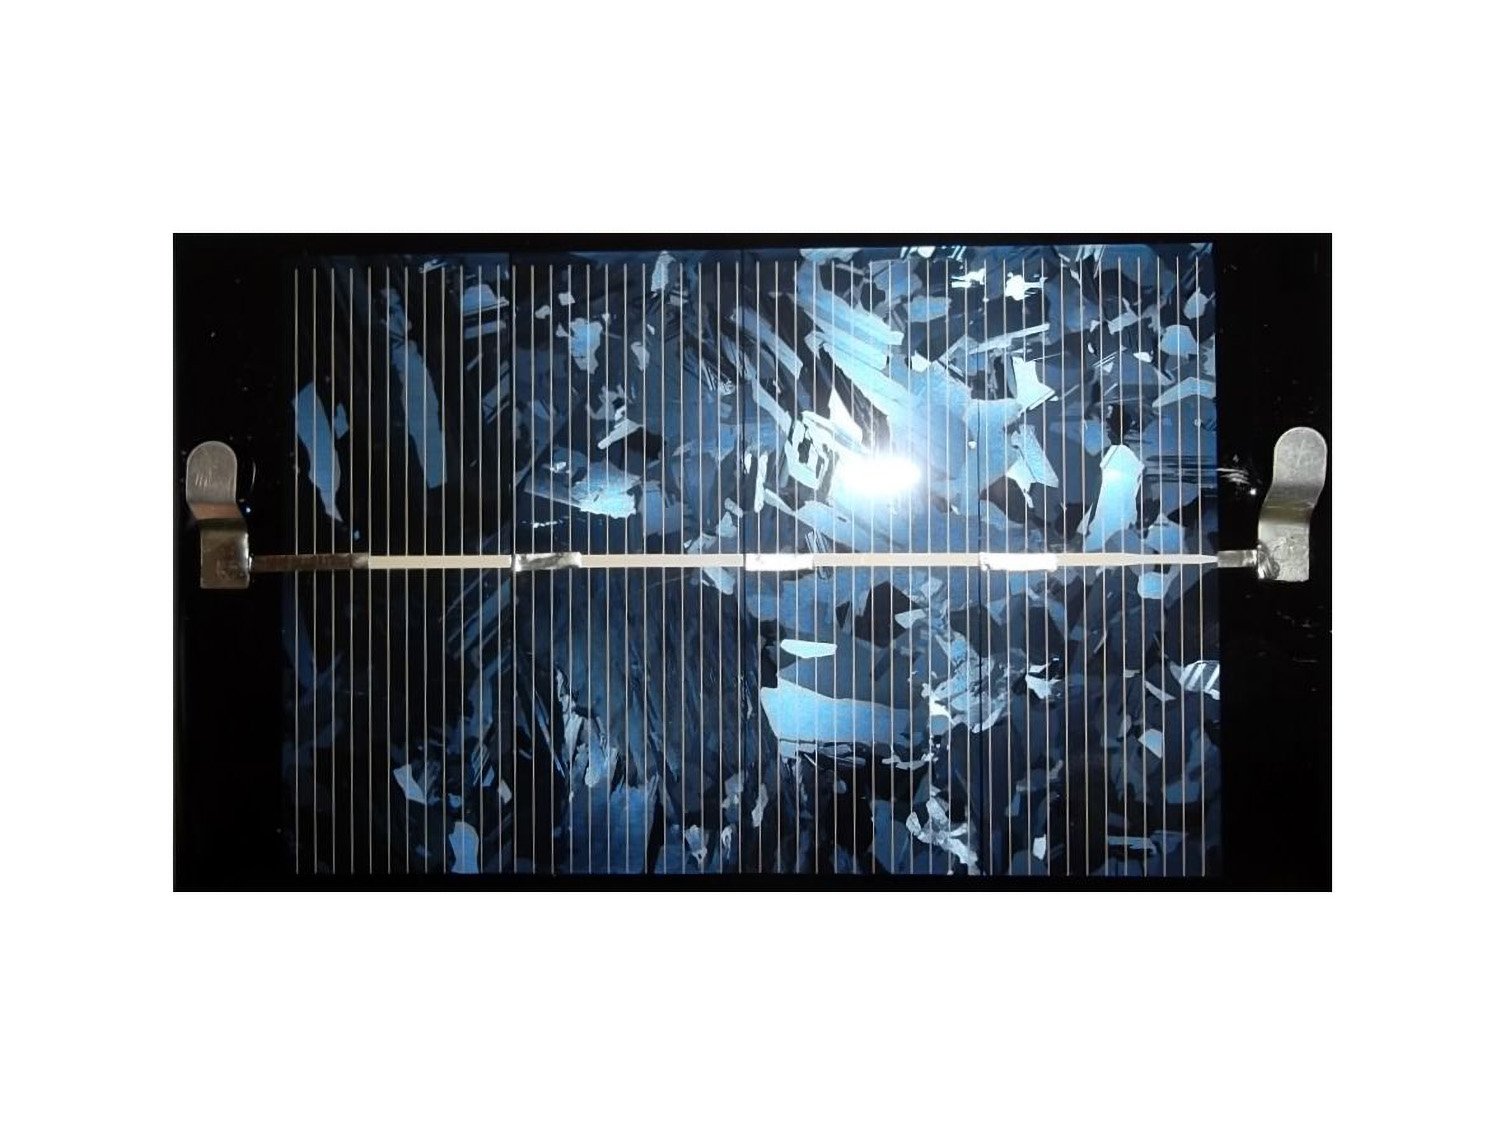
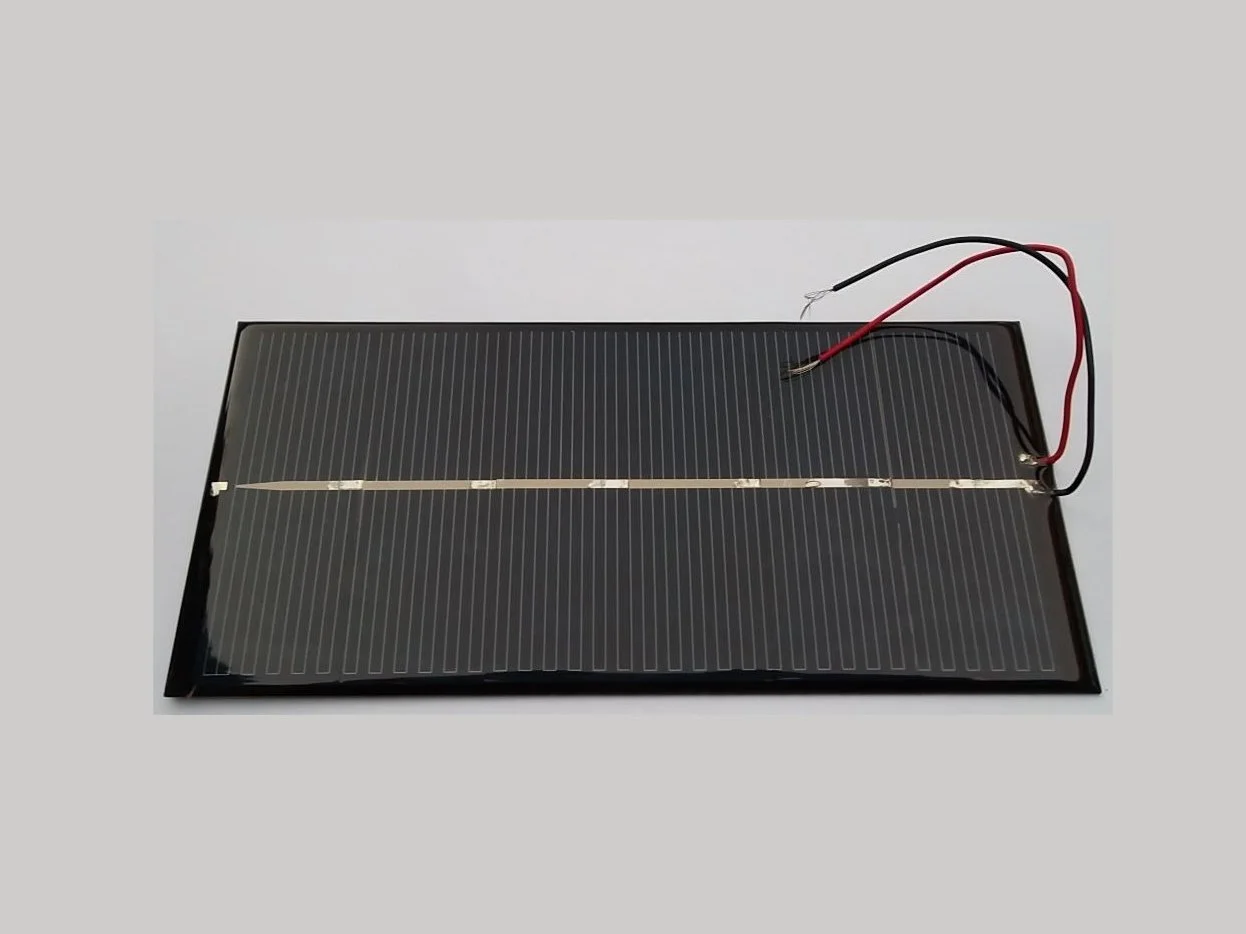
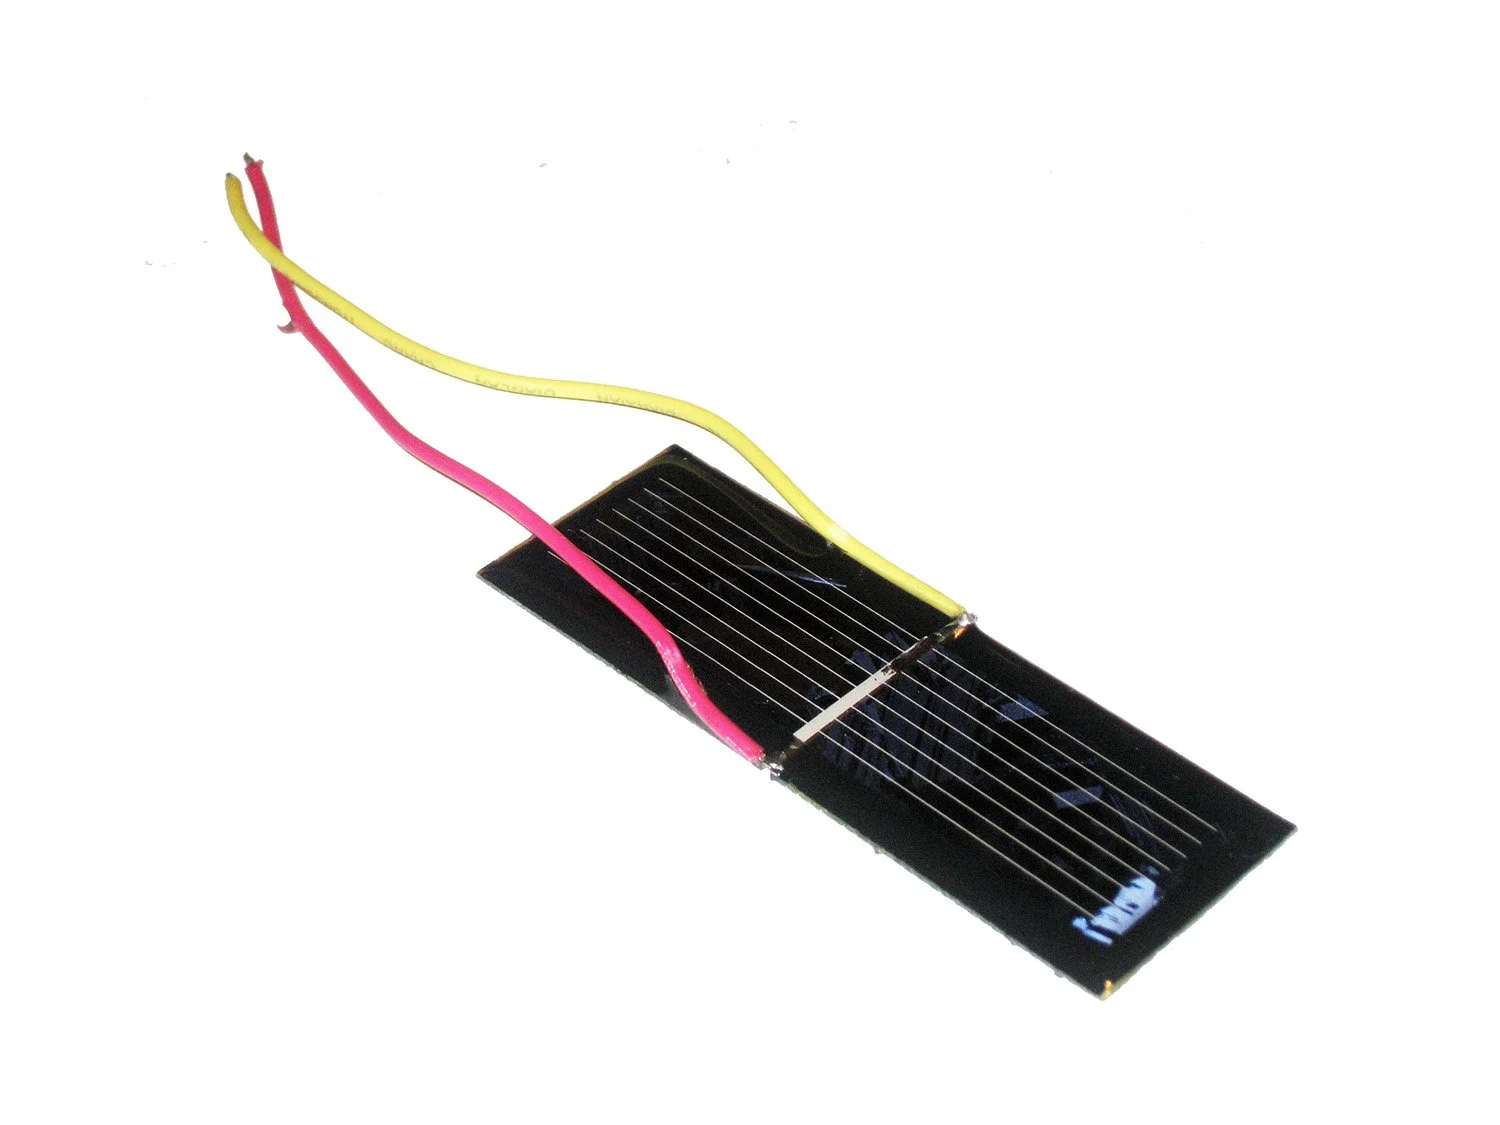
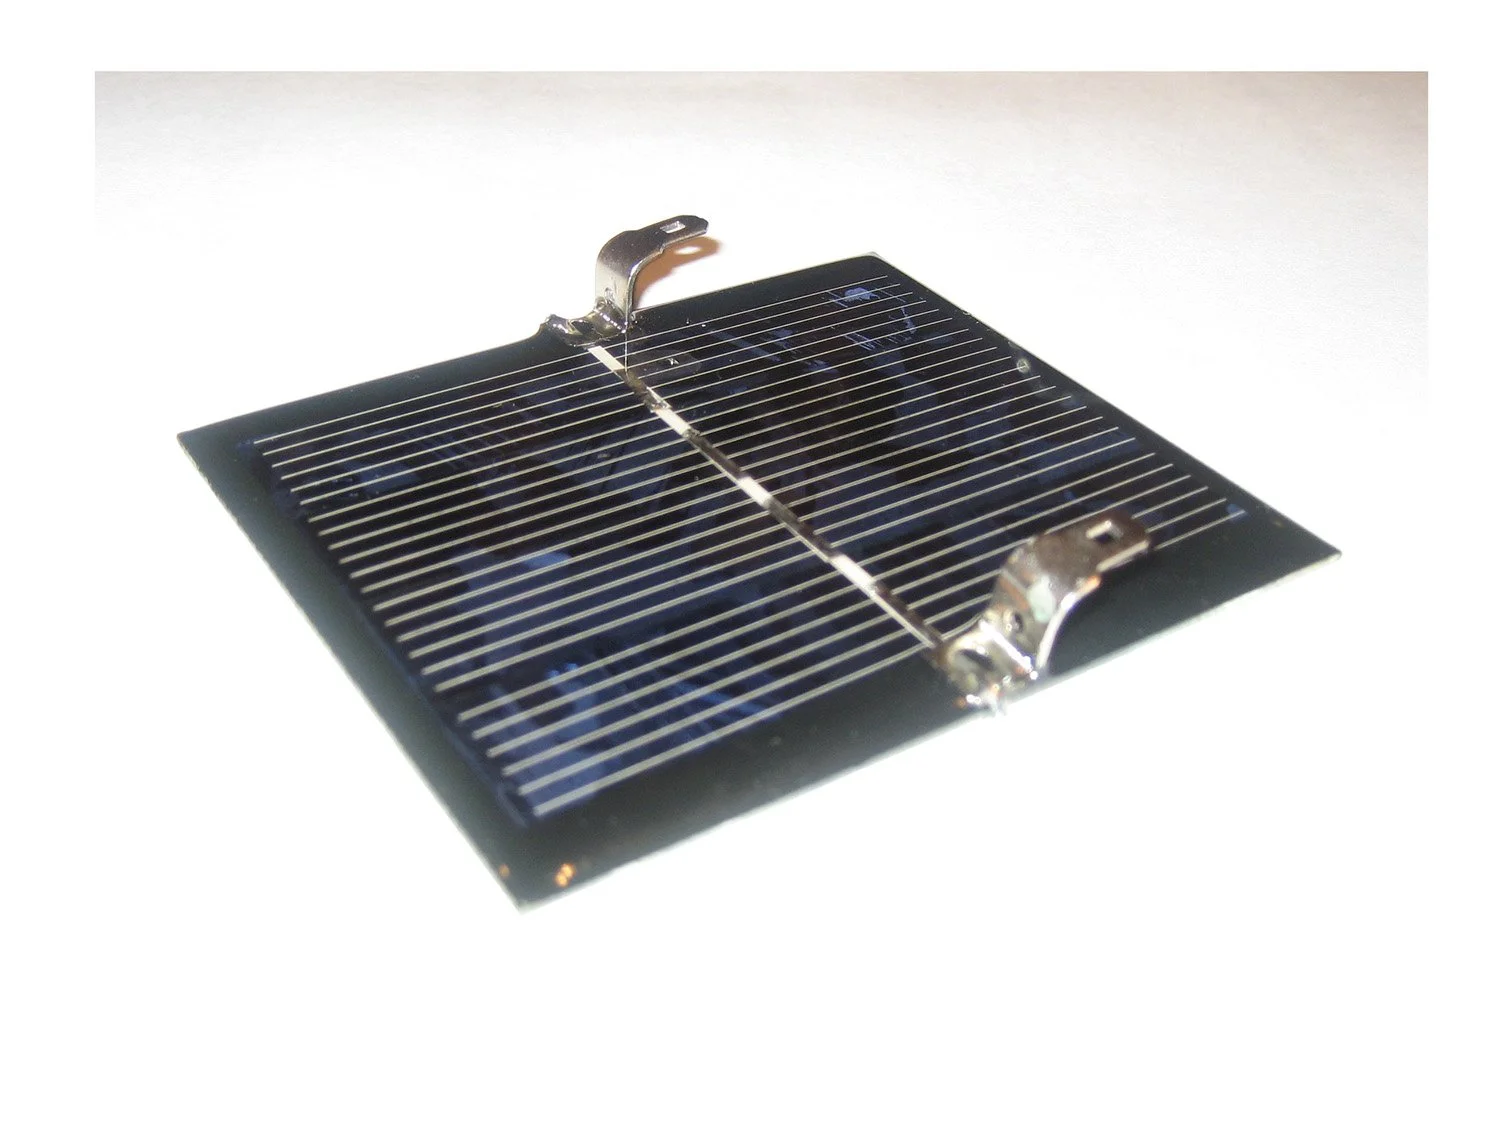
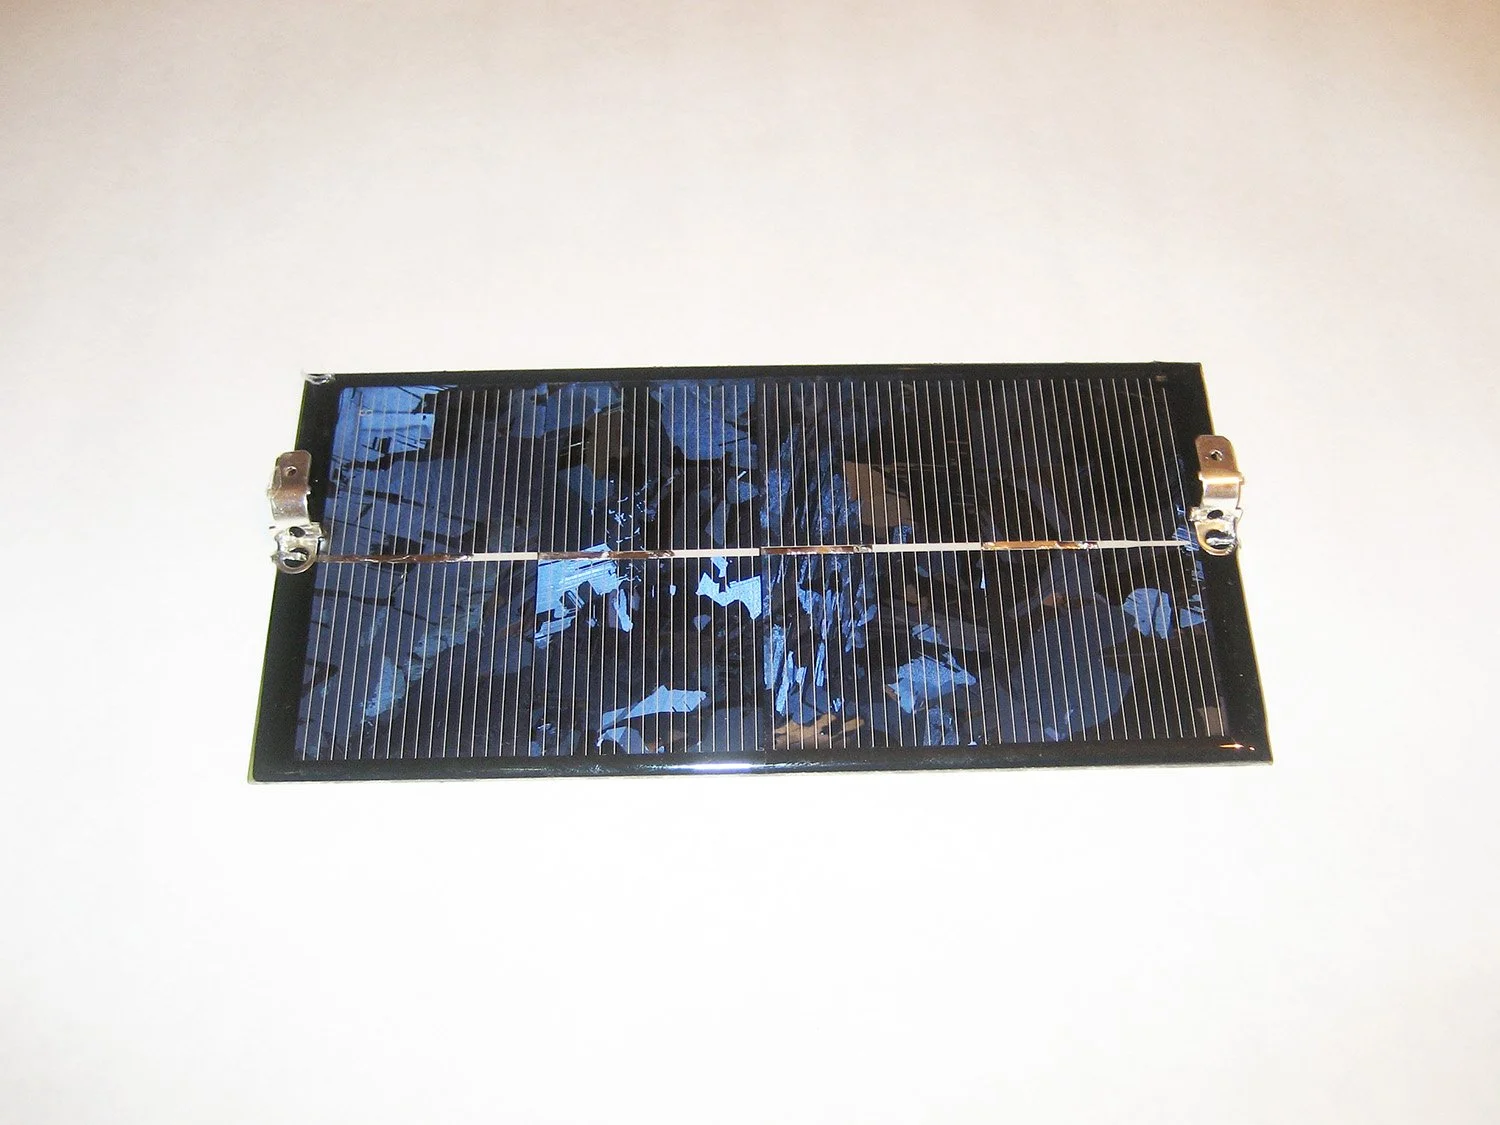
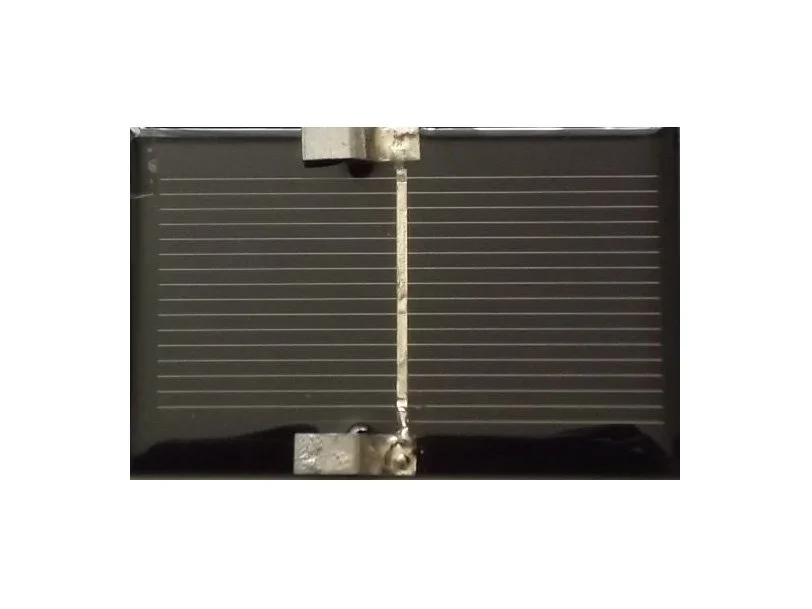
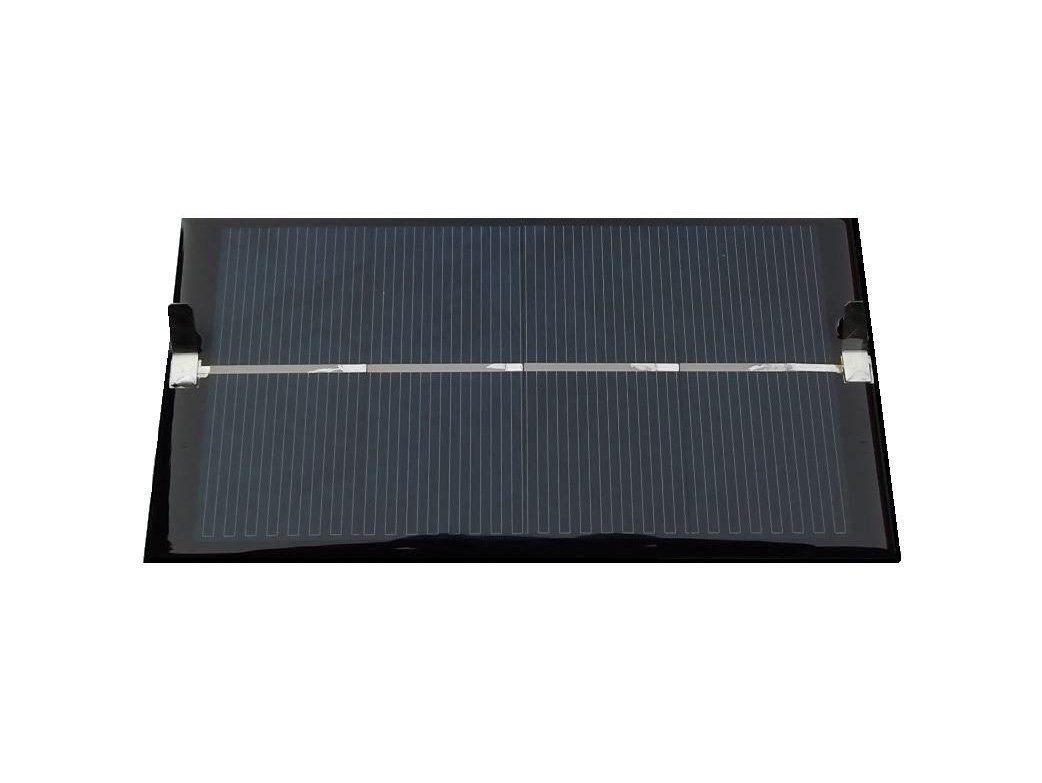
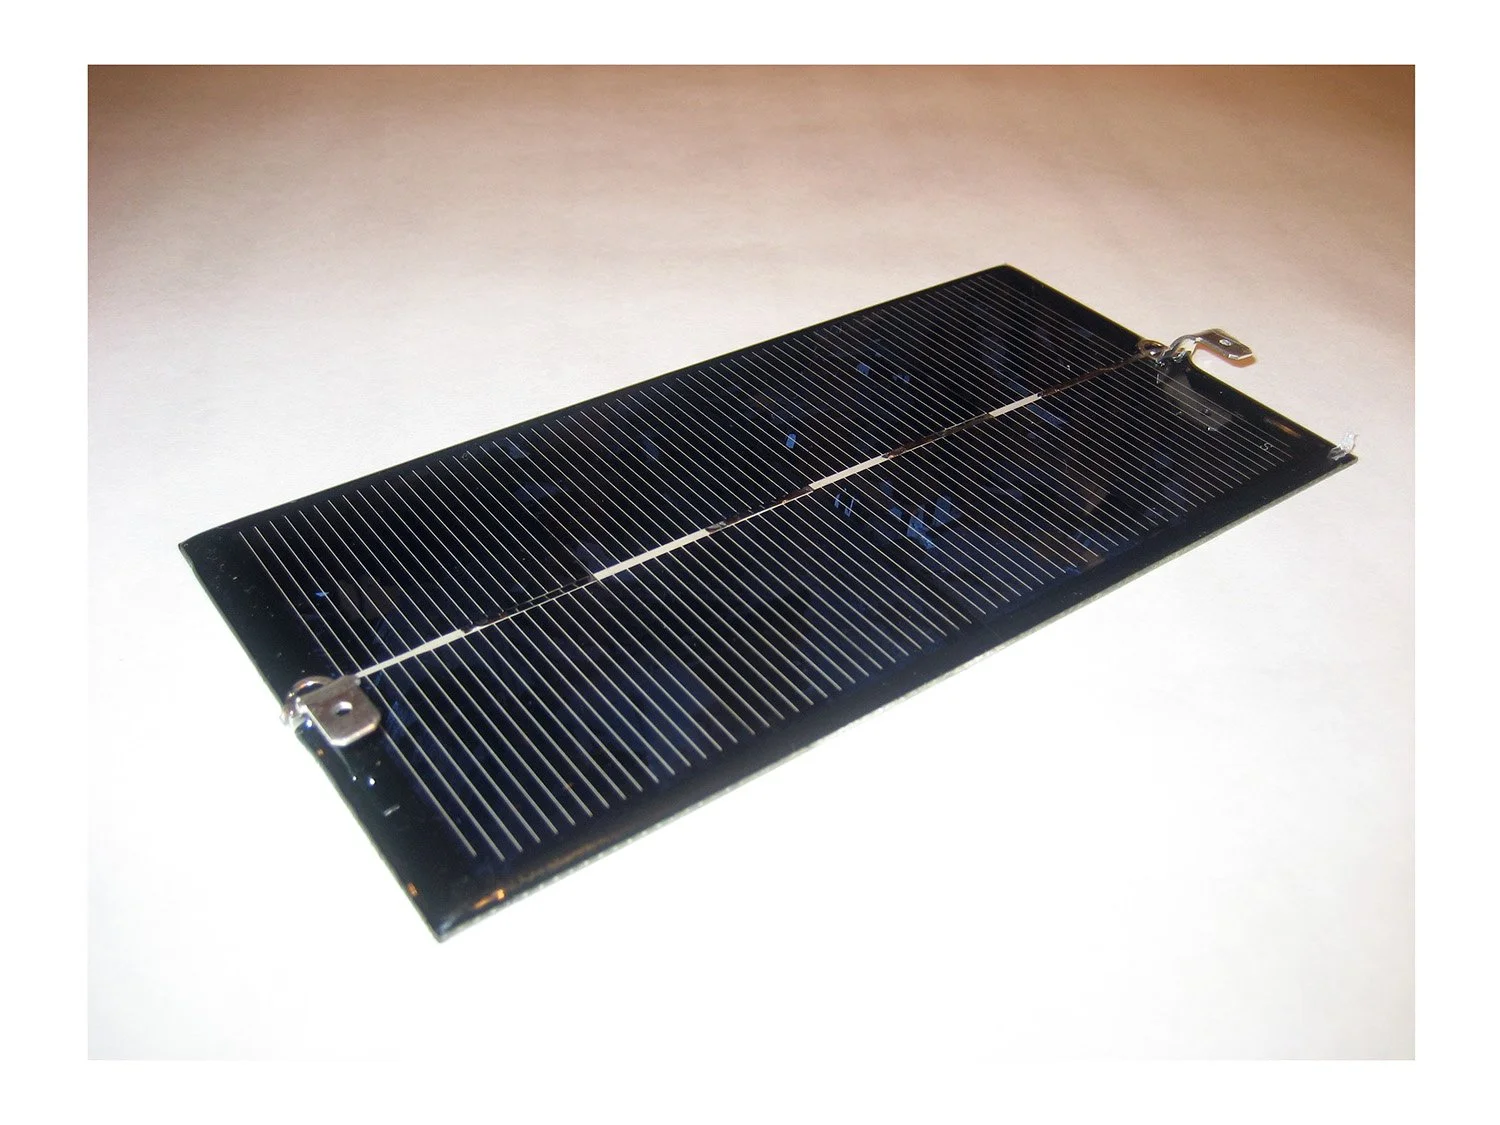
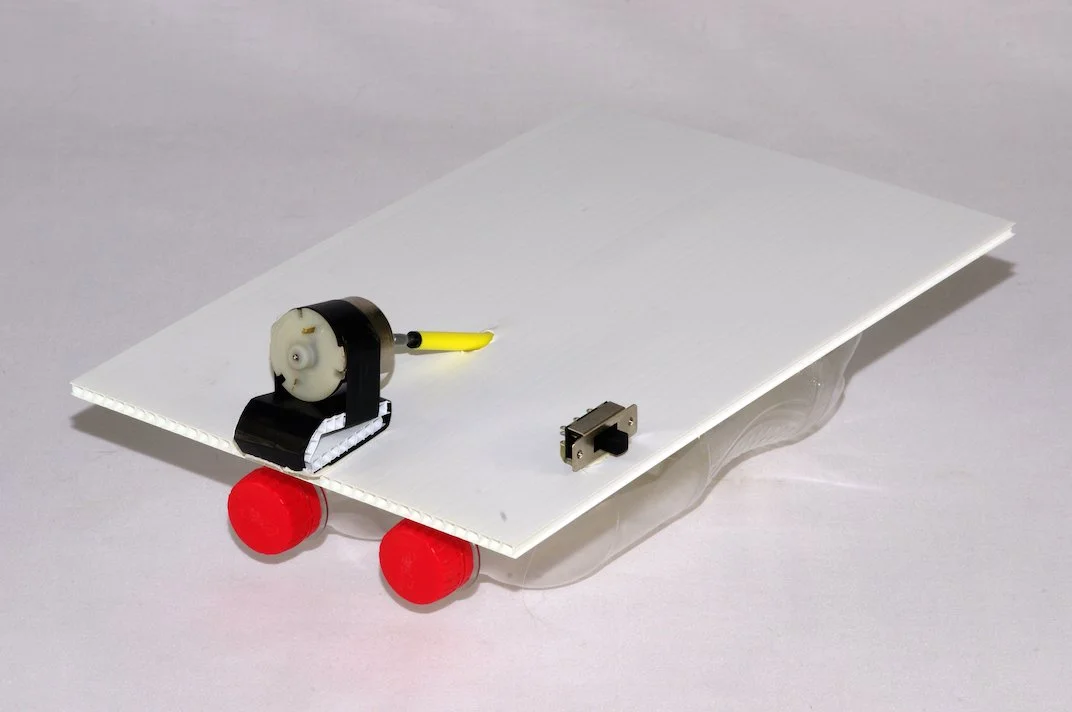
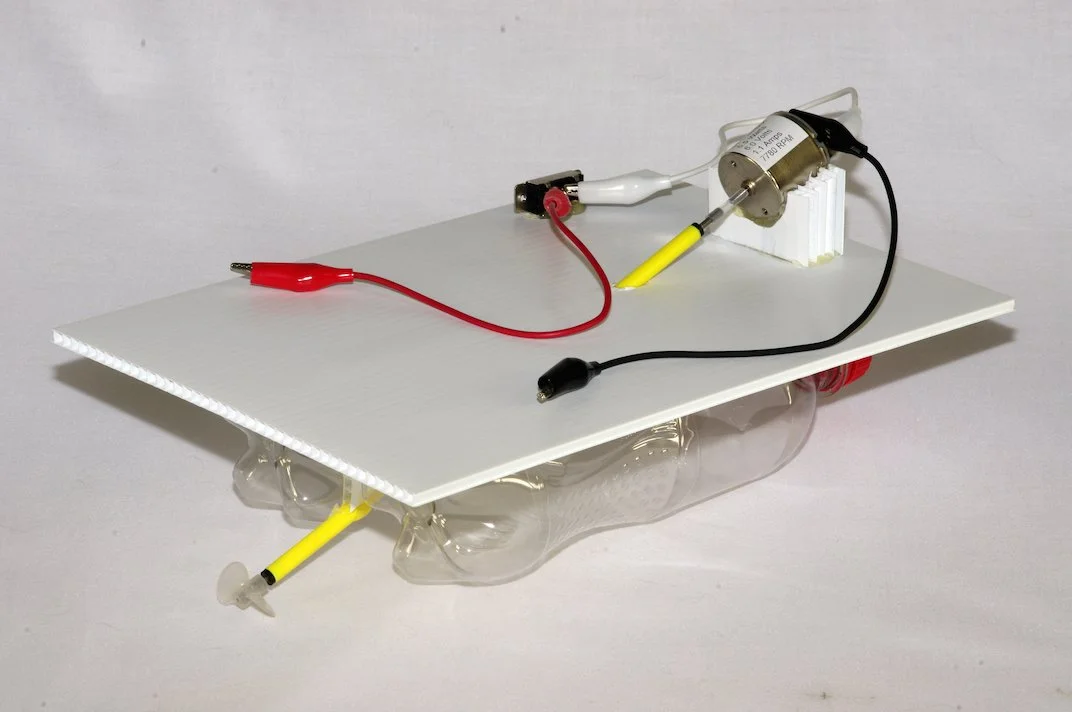
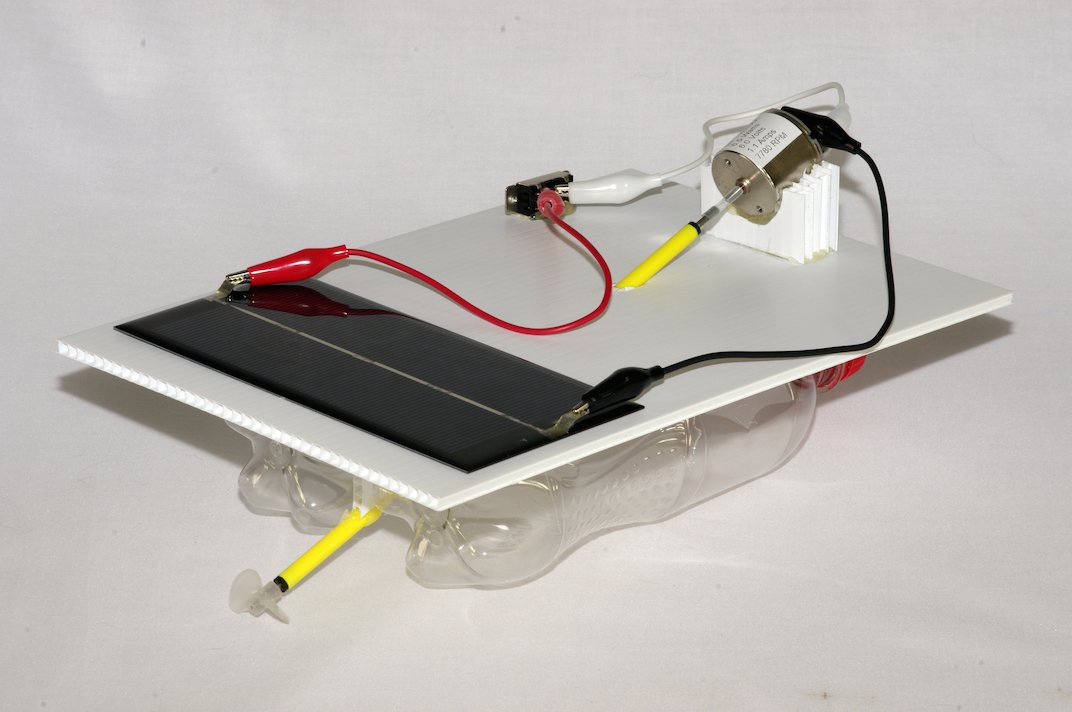
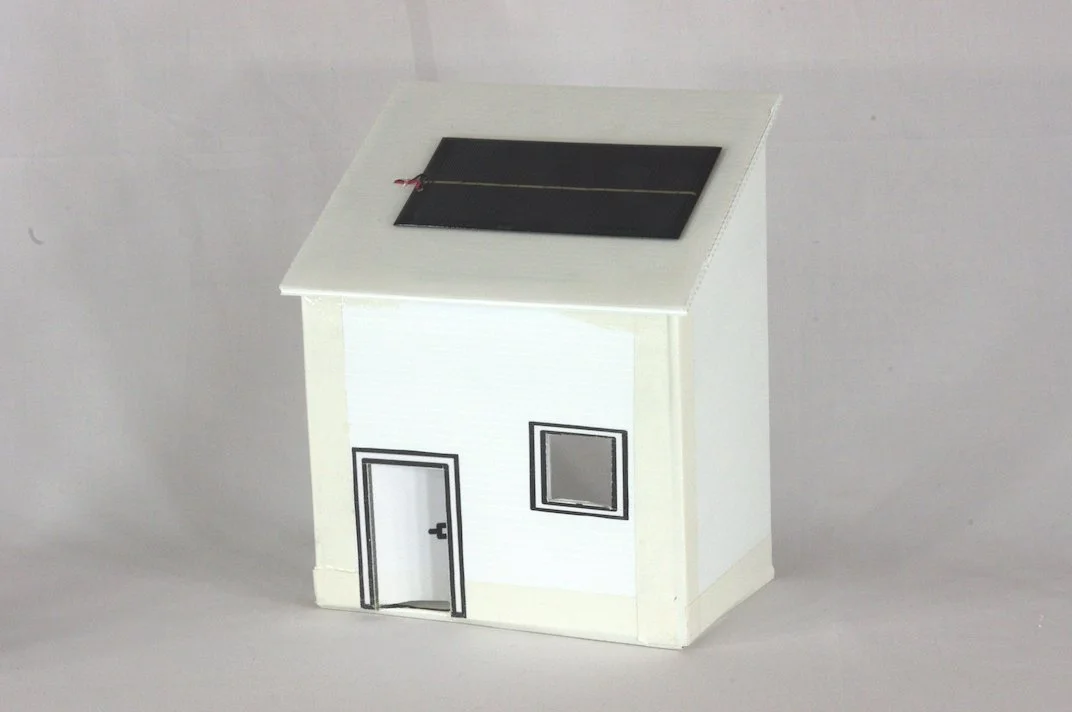
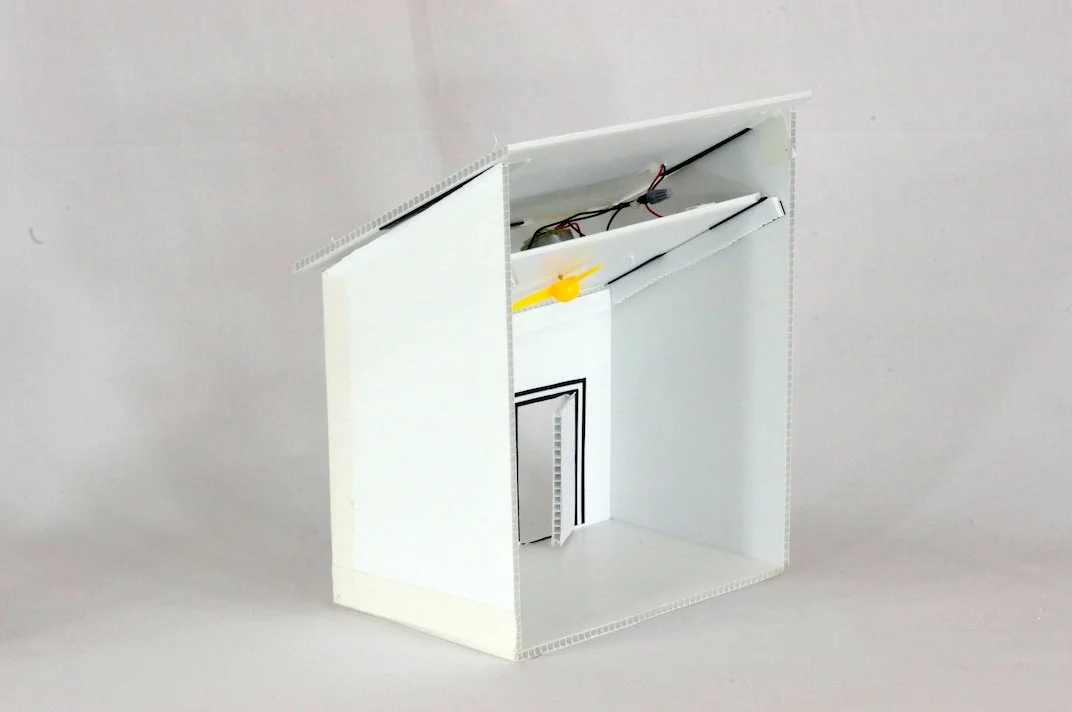
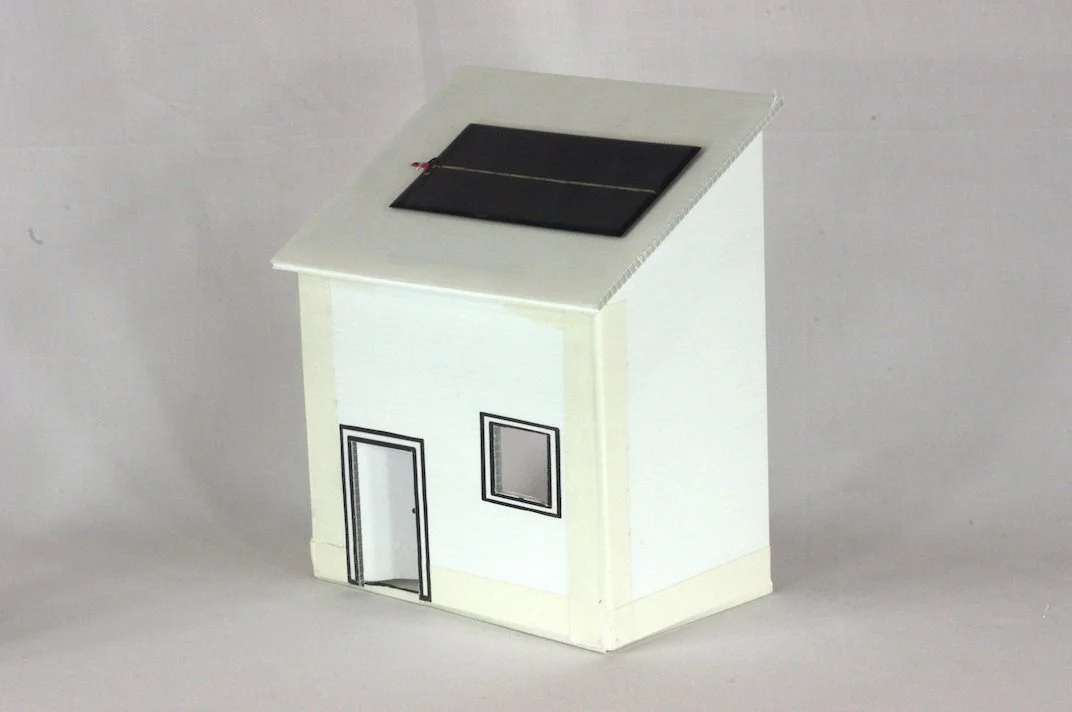
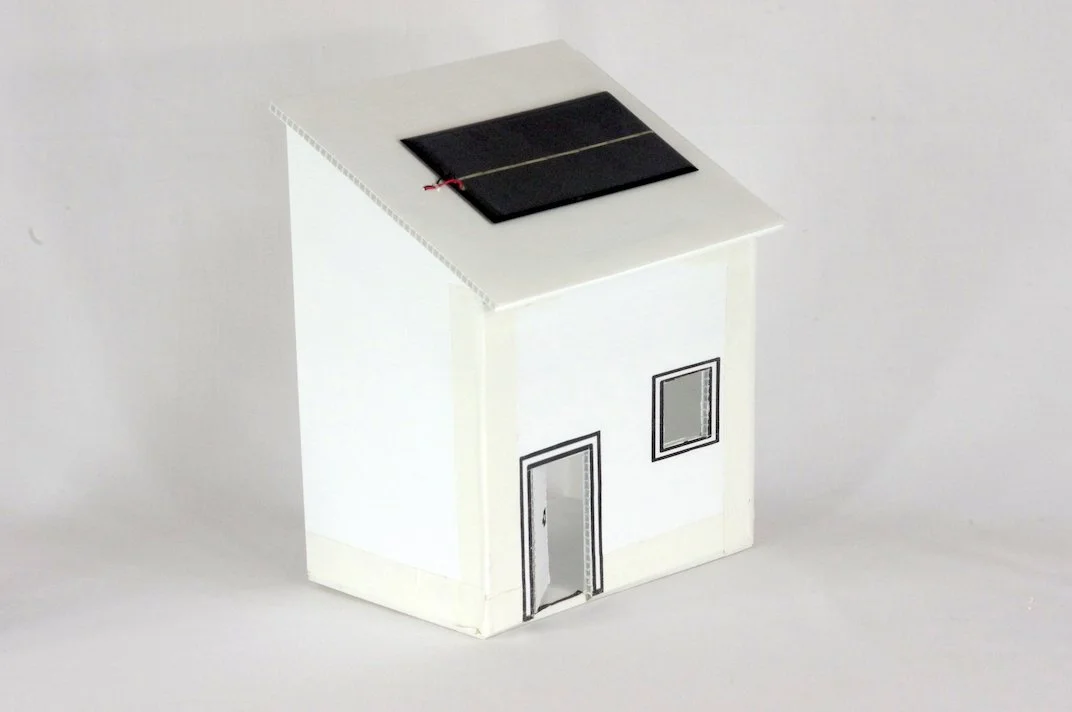
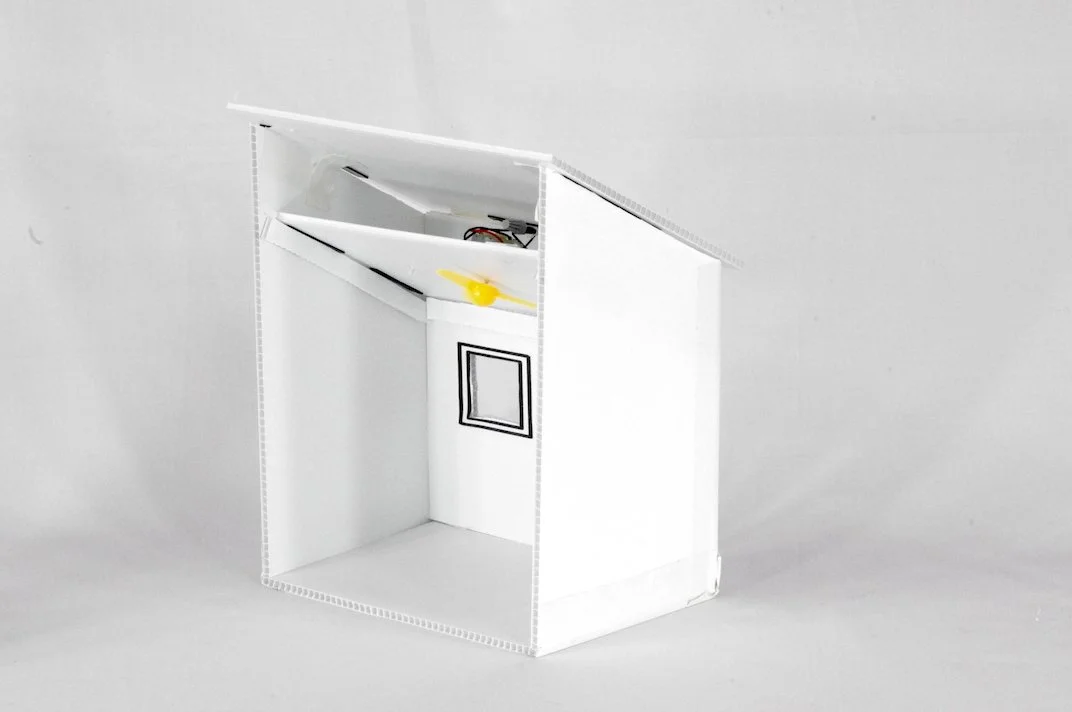
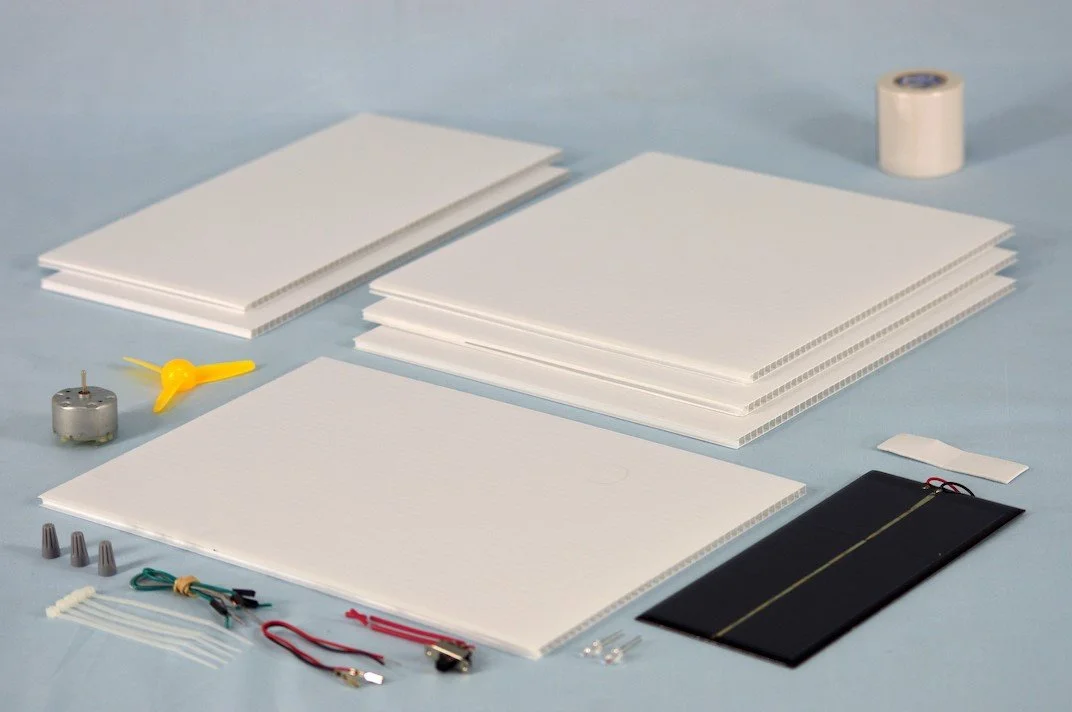
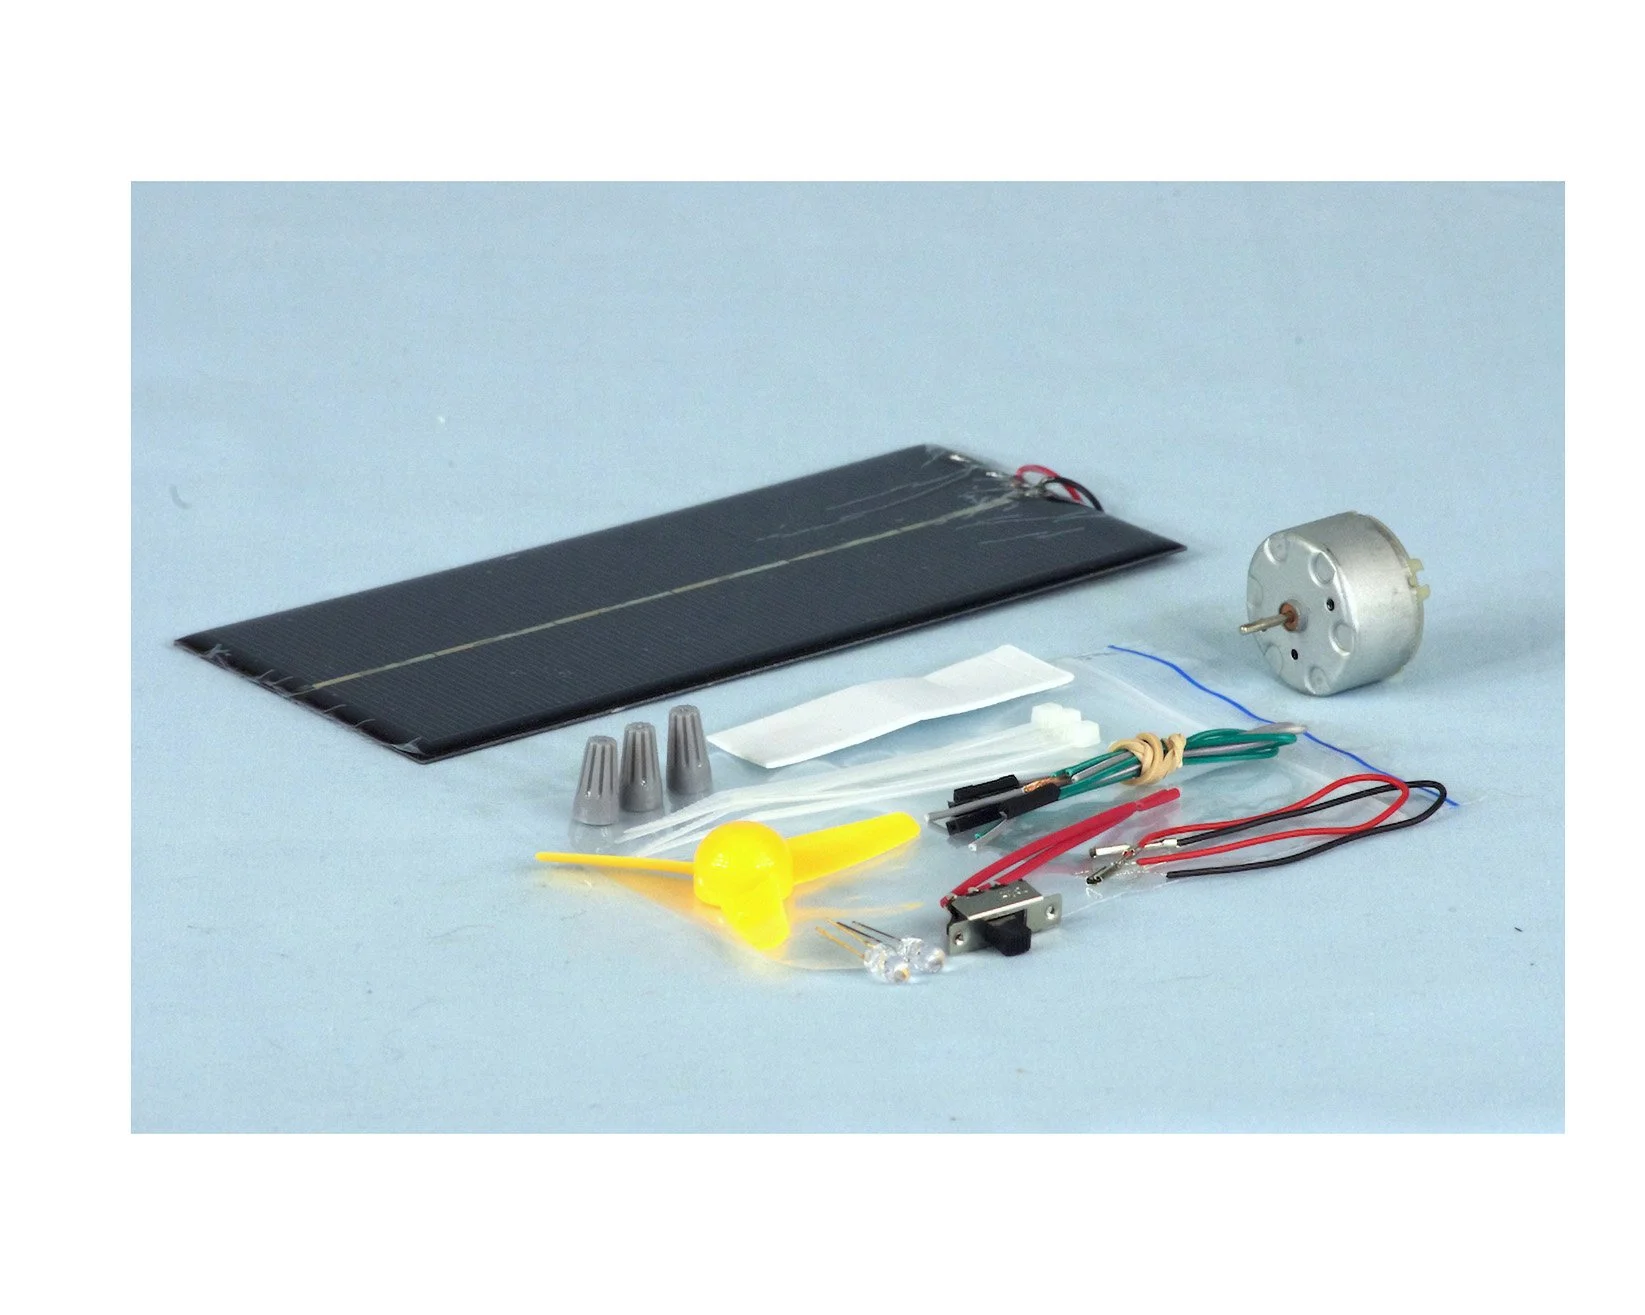
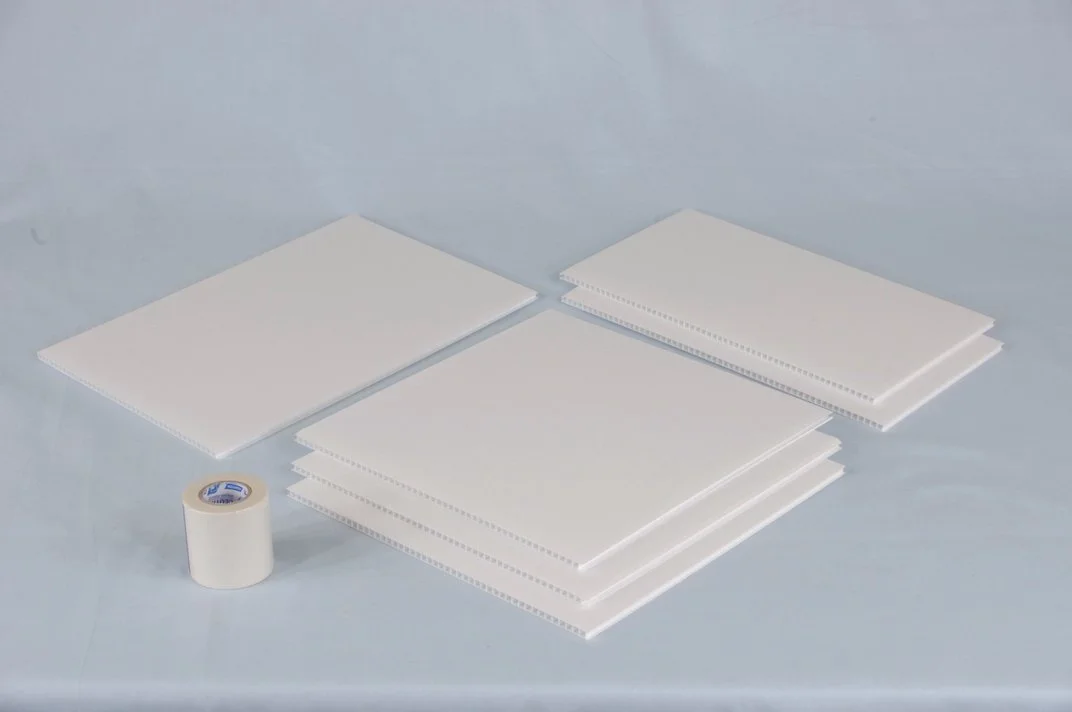
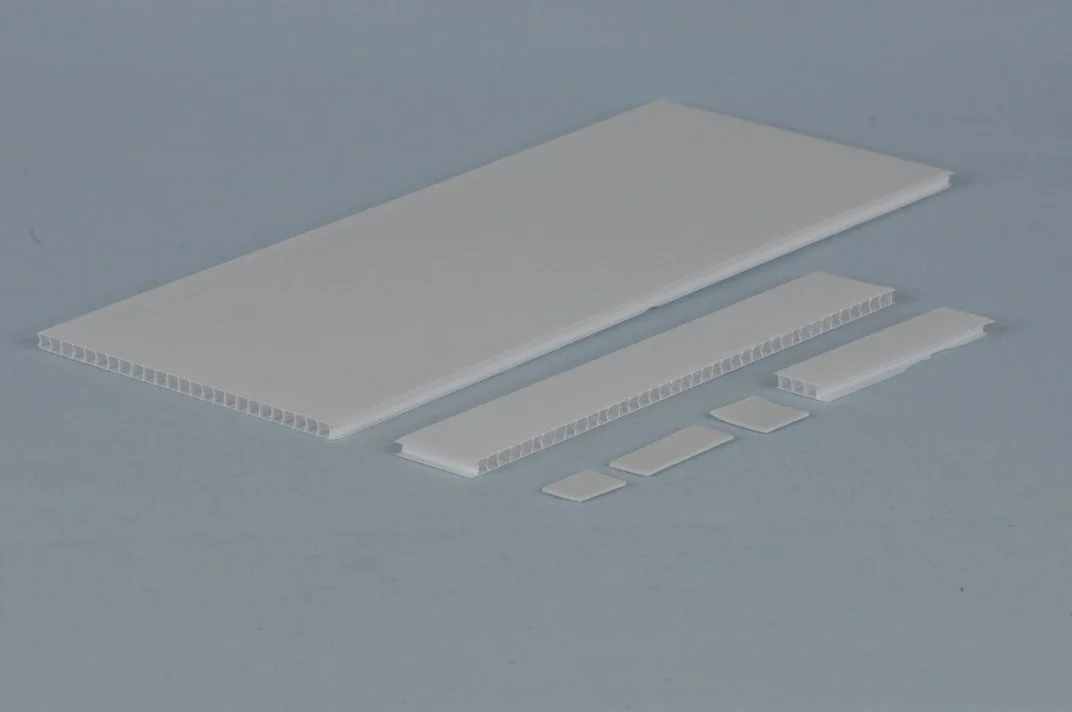
SOLAR ENERGY

GENERAL INFORMATION

We are interested in getting some solar kits but not sure where to start? Could you recommend what we would need?

There are different approaches to using solar power / solar powered kits in the classroom:

 Demonstrations: the “Introducing solar projects” is basically a Solar house demo kit, that can be used to introduce the concept and lead to discussion and research e.g. who has solar panels at home, what did they cost, what differences has it made to the family’s power usage and power bills etc.

  • We have a calibrated panel – SOLAR10 – which is used with a multimeter to measure percentage of sunlight. I suggest that this is a worthwhile tool in your toolkit (only one required, as it is only used for measuring sun, to evaluate performance etc.)

Kits for students to make: we have a number of kits available. If you’re just starting out we suggest one of these 3 kits. Your choice will depend on what year level you will use them with, what you want to do and how deep you want to delve (the others are more complex):

  •  The BASIC SOLAR CAR – a simple basic vehicle, large panel and goes quickly. Good to demonstrate solar power generation of electricity, and can be used for racing

  • The SOLAR CAR V2 – this has a smaller solar panel, and the panel is a 2 piece panel. While not as fast as the Basic, this allows students to see the use of connecting the 2 parts of the panel in either series or parallel, depending on either sun, shade etc.

  • The INTRO SOLAR BOAT – the water borne version of the Basic solar car (same panel and motor, but introduces hydro dynamics and hull design)

Why are there different motors in the Solar Catalogue than in the Technology Catalogue?

The two motors listed in the Solar catalogue are different types of motors, and are suited to the Model Solar Challenges, as these have a much higher efficiency than the “hobby” type motors in the Technology Catalogue.

  • The Faulhaber motor is an industrial motor which is seen by many as “the” motor to use in competition

  • The SM403 was developed by a motor manufacturer for us, to get an affordable motor with good efficiency that matched in with the Junior Solar competition or Sheridan car needs.

Can you explain what the Solar Panel Wiring Harness is for? We’re planning on sharing solar panels between groups. Is a separate harness needed for each group?

We suggest using one harness (Code: HARNESS26) on each Solar Panel but you may choose not to use them. The advantage of using the harness is to minimise the risk of solar panel breakages when swapping panels from one model to another.

 You can assemble the solar panel, the harness and the 3 position switch as a unit. This is the simplest, as then you only need to disconnect the 2 wires going to the motor – the use of twist on connectors, Deans micro plugs or terminal blocks make this an easy swap.

I want to make a Radio controlled Solar powered boat or car? Will that work?

You can use a solar panel to power the boat or car. BUT the solar panel will NOT power a radio control unit – the solar panel does NOT provide consistent power for the Radio control unit to operate.

What is Solar Panel Power Controller (SPPC)? Will it work with 40Watt panels, pumps, or other devices?

The SPPC we have is a small unit, designed to work with a solar panel to multiply starting current, to help small electric motors to perform better. The SPPC is connected to small solar panels mounted on Model solar cars in competitions.  Both the electronics units were designed specifically for a 10 watt panel. While they can handle a bit more than this, we’ve never tested them to determine maximum / destruction, as our customer base is restricted to the use of 10 watts in the model solar car competition.

 We have 2 units available:

  • The SPPC (Standard voltage) will work with any solar panel or combination of solar panels whose Voltage Open Circuit (VOC) voltage is between 13 and 23 volts (a rated 12V panel at VOC will be higher than 12V).

  • The SPPCL (Low voltage)  will work with any solar panel or combination of solar panels whose Voltage Open Circuit (VOC) voltage is between 6.5 and 12 volts (a rated 12V panel at VOC will be higher than 12V).

  • For both the Energy consumption by the circuit is 0.04 W (approximately).

 We can’t advise you if it will power what you need, as we have never tested anything like that.

 Reference: The number of watts is equal to amps multiplied by volts

Can Solar Panels charge phones or make an LED display if we use a SOLAR PANEL CONTROLLER?

Firstly the use of the SOLAR PANEL POWER CONTROLLER, we have tested a low voltage unit down to 5.5 volts, theoretically it should function all the way down to 5.2 volts but we have not tested it at this voltage.

 This unit is designed to control the input voltage which is solar panel voltage not output voltage. Consequently the output voltage will vary from about 2.0 volts all the way up to the solar panel open circuit voltage depending on the resistance of the load on the output. Unfortunately, this makes it unsuitable as a battery charger, it is however very suited to driving a motor which was its intended function.

 A couple of things to consider, the SOLAR PANEL POWER CONTROLLER is at best about 85% efficient and with a typical motor being about 60% efficient, overall you can only expect 55% of the power available from your solar panel to be available on the motor shaft.

Now to battery charging. we feel you should work backwards from what battery you intend to use, determine the charging circuit to be used then from the voltage input requirements of the charging circuit you can estimate the number of cells wired in series you need in your solar panel. Use 0.5 volts per cell as a rule of thumb then possibly add a couple of cells to allow for the voltage drop which occurs when solar cells get hot.

 As for the current required from your solar panel, again consider what the charging circuit requires together with the battery capacity, how quickly you wish to charge the battery and the expected Sun levels. Having determined both voltage and current required for the charging circuit it is relatively easy to choose a suitable solar panel.

 A word of caution about lithium batteries, if you are considering their use be aware that they must be charged and discharged under strictly controlled conditions. Overcharging or over-discharging by as little as 0.1 volt per cell can totally destroy the battery. A multi cell battery must be balance charged, by which I mean each cell is monitored during charging and the charge current/voltage to each cell individually controlled. Mishandling of these batteries can result in a battery fire which is all but impossible to extinguish, it goes out when all the active material has been consumed.

We wish to adapt a kit that contains a small solar panel to run a DC motor that would turn a 100mm diam. blade fan. Any kit suggestions?

Our technology solar kits are designed to be gear driven, but gears could be excluded, lengthen the chassis and mount the motor at the front or the rear, instead of the side (depending which way you connect the wiring). We have a propeller driven car in our range, and that works well (even though it has a smaller motor, and runs our 74mm propeller).

 We also suggest testing with an anemometer (which would be useful for students to carry out real comparison testing of their propeller designs, before racing them).


SOLAR PANELS


Does the solar panel or motor have storage capacity?

The solar panel is a direct power source - switch it on, put it in the sun and it will generate electricity (given a sufficient level of sun intensity - the intensity can be measured using one of our Calibrated No.10 panels). Neither the panel nor the motor has any storage capacity.

Which solar panels would be most suitable to use for STEM Projects? We only need them to power LEDS, buzzers, DC motors etc.

Components have different specifications which affects the amount of power (voltage and amperage) they use. You may like to experiment with some of these ideas.

  • SOLAR7 as it puts out 3.0 volts and 0.8 amps at full sun. This is the one we use in our solar house project. It powers 2 LEDs as well as a motor (our Generator GENDC).

  • Solar11 wired in series will give 3.0 volts, but a lower amperage

  •  Many of the smaller solar panels in our range will provide enough power to turn over some of our motors BUT that is without any load – it demonstrates that it works to generate electricity, but it won’t drive a model car or anything. To demonstrate Solar power turning over a motor - put a propeller on the motor, as you can also see how fast it turns in different light conditions.

  • If you want to power a small car, the Solar7 works in our Basic Solar car (no solder) with our MOT22. Or, if you do want to make cars, a more economical option is MOT22 and our Solar8 panel (it’s just not as fast as the Solar7 option).

  •  Components such as buzzers are available in a range of voltages. Lower voltages will work better with Solar panels.

What can I use as a light source for the solar panels?

Ideally, the best thing is the Sun itself. However, when it’s winter or overcast, to test your car or boat indoors a good substitute for sunlight is a powerful halogen lamp.

 A 500 watt halogen lamp directly facing the panel and about 300mm away, will produce a light level equivalent to about 50% Sun. CAUTION: The lamp puts out more heat than the Sun, so to avoid panel damage only illuminate the panel for about 40 seconds, then allow the panel to cool down.

 A safer option is a low voltage 100 watt handheld halogen spotlight. This type of lamp is available from automotive accessory stores and is usually 12 volt rated. You will need a suitable battery or power supply. This lamp is suitable to demonstrate power generation (that is – to turn the wheels when the car is off the ground) but is not sufficient to run a vehicle.

 Note: In the classroom, the light may appear very bright to our eyes but the car does not run as the light level is far too low for the solar panel to produce useful quantities of power. Fluorescent lights are a poor substitute for sunlight, as the frequency of light they produce is very different from the sun. Incandescent lamps are much better. However, remember that full sunlight is around 1000 Watts per square metre. In a typical room at home you might have 500 Watts of light in a room of 15 square metres, this is only about 3% of the energy provided by full sunlight, so it is no wonder solar panels do not work well inside.

 Another option for testing a car or boat in winter is using a battery pack delivering the correct voltage. Choose a battery holder that provides enough voltage to power the motor. The easiest way is to connect a switched battery holder to the motor. This option at least tests that the car or boat is assembled correctly and functions.

Can a Battery holder be used instead of a solar panel when there’s not enough sun?

Yes, a battery holder will run the solar car or boat to test that the device has been properly put together. Choose a battery holder that provides enough voltage to power the motor.

Note: if doing so, the suggestion is that the car / boat is wired up to run from one power source or the other at any time. The easiest way is to connect a switched battery holder to the motor.

Why is the SOLAR26 so expensive and what is so special about it?

This is a specially made solar panel for the Model solar competitions:

a)    encased in fibreglass to be lightweight (approximately 50 grams)

b)    maximum allowable size of 350 square cm.

c)    it uses cells of as high an efficiency as are available at the time.

What size solar panels I should get to power a 6 watt motor?

While your question seems very simple it is in fact quite complex. We will try to explain simply but will start with some basics about motors and solar panels.

 Firstly:

Power (in a DC circuit) in Watts = Voltage multiplied by Current.

For this type of permanent magnet DC motor the RPM (Revolutions per minute) varies directly with voltage.

Double the voltage and the motor RPM will double.

  • Torque varies directly with current. Double the current and the motor torque will double.

  • The current that the motor requires depends on the load it is required to drive. Increase the load on the shaft and the current required goes up.

 Mechanical power is calculated by multiplying torque by RPM for a solar panel.

 At the solar panel maximum power point, voltage per cell is about 0.5 volts so if you have 10 cells in series you have 5.0 volts.

  • Current produced varies directly with light intensity. Double the light intensity and double the current is available.

  • Current also varies directly with cell area. Double the area and twice the current is available.

A low ohm (resistance) load will pull take all the current available at the prevailing light level and pull the panel voltage down to near zero. i.e. power to the motor is now near zero. It is critical not to overload the panel.

 Unfortunately, all of the above interact to control the performance of any motor connected to a solar panel. It is really a very complex system highly dependent on load on the motor, solar panel size and light level.

As for what size panel is required to run a 6 watt motor. If we assume you want 6 watts out of the motor, you need to input about 12 watts to the motor as they are only about 50% efficient. If you want 6 watts at low sun levels you need a panel with a much larger surface area than required for 6 watts at full sun. 

This is a simplified explanation but we hopes gives you some insight into the operation of motors connected to solar panels.

What is the difference between the two solar panels provided in the SCRINT / SBTINT kits, and the SOLAR26 panel?

The SCRINT / SBTINT solar panels are made in the conventional way (1.6mm board and resin coated) and are comparatively heavy

 The SOLAR26 panel is fibreglass encased to be light weight and is a high performance panel for use in the model solar competitions.

Our solar panels have lost connector prongs. Is there a way to fix these?

Unfortunately, through handling the tabs can come off.

SOLAR26 pANEL SHOWING CONNECTOR PRONGS

SOLAR26 pANEL SHOWING CONNECTOR PRONGS

 To repair it, you need to:

  • Scrape any plastic covering of the top and bottom of the tab using a Stanley knife

  • Tin the underside of the tab with solder

  • Put the tab in place on the panel

-          Put a soldering iron in place on top of the panel, to melt the solder on the underside

-          When cooled, put on Araldite or 5 minute epoxy on top of the tab and panel to reinforce the solder

 Otherwise, if you return the panels and tabs we can do the repair for you.

Why do the Solar panels crack?

Some types of solar panels have a far greater tendency to cell cracking than others. Cell cracking does not always result in a drop in power output, but often will. The power drop due to cracking can be intermittent depending on how slight movements within the panel position the crack edges. Consequently, the power output of a cracked panel often varies in a random way. We have seen panel power of 8.5 watts drop to 6.75 watts due to cracking. A crack in a critical location can reduce power to zero.

 What causes this problem?

In the panels typically used in model solar applications there are two major causes, one being straight out mechanical stress due to deflection (bending) of the panel and the other being thermal stress created by the differential expansion of the materials used in panel construction.

 Mechanical stresses can be managed by careful handling, but thermal stress is another matter. In order to produce power, the panel must be exposed to sunlight and consequently will heat up causing thermal stress. The practice of cooling panels with ice can increase the thermal stress.

 What type of panel is most at risk of thermally induced cracking?

From our observations any panel with hard front cell encapsulation is likely to be at risk. Modules that have a soft front encapsulation do not display any of these crack due to thermal stress.

 They have been tested by cycling them from a freezer to full Sun many times without inducing any cracking. However, just by exposing panels with hard front encapsulation to the Sun moderate levels of cracking have been observed. Testing from the freezer to sunlight produces significant levels of cracking. 

 The fibreglass encapsulated car and boat panels from Scorpio Technology while having a hard front encapsulation do not suffer from thermally induced cracking due to the fact that the front and rear encapsulation are both fibreglass which has similar thermal expansion rates to the silicon solar cells so there is little or no differential expansion occurring to cause thermal stress and crack the cells.


SOLAR MOTORS

Will any electric motor work with any solar panel?

No – the voltage and amperage generated by the solar panel must be enough to power the motor. It also depends on what you plan to do with the motor – is it just to demonstate that solar power works, or will it drive a model car?

  • if you want to drive a car or boat, we can advise which motor / panel combinations work well together (and which kits we use them in).

How do I work out what motor to use?

To get the best combinations you need to look at the motor’s Current (Amps) and the Voltage it requires, and compare that to the solar panel.

Remember that:

  • solar panel ratings are rated at “100% sun”, and under lower sunlight will not provide that power.

  • the solar panel generates its maximum power when angled at 90 degrees to the sun – the ideal time is midday, when the sun is directly overhead.

NOTE: the “No load” current is not what you need: as the name implies it should spin the wheels - if you have the car in the air! As soon as you put it down it won’t go anywhere, as it needs the current (Amps) in the “Under load” row.

Is the SM403 motor suitable for the Model Solar Car?

No, the SM403 will not work well due to the large diameter of the motor casing. The ST403 motor is designed to fit into the Junior Solar Boats’ market (it is not a Senior class winner but works well in the Junior boat segment).

  • The ST-403 motor has a large body diameter, which is not an issue with boats but for cars that won’t work well with our normal range of gears.

We have some 4.5 V hobby motors can we use these instead of 6V motors. Will this just shorten the motors lifespan?

Our SM403 motor was specifically engineered to match in with the SOLAR26 panel. Generally, putting more voltage into a motor will increase the motor’s speed and shorten it’s life. However, over short running periods that shouldn’t be much of an issue.

 There is no guarantee your motor will work with our solar panels. When matching panels and motors both Voltage and current (how many Amps / milliamps the motor consumes) have to be considered. The volts and amps quoted for the solar panels are maximum performance, and will vary depending on the sunlight conditions on the day.

Which motors operate using only a small amount of current?

The MOTJ2 motor has a low current-usage suited to work with small solar panels (starting current being the issue). If using solar panels, the MOT17 and the MOT30 are both powered by solar panels in different kits (respectively one No. 4 panel and 2 No. 4 panels). The motor needs to match the panel, in this case, not just which motor has the lowest current consumption.

The MOT22 is the motor with the next lowest current consumption and is a part of the Versatile gearbox assemblies, in either Jouster or Bubble variants. If the motor suits, you still need to consider if the gear ratios are acceptable for your usage.

What is the maximum volts the motor can take in The Solar Car V2?

The Electric motor 1.5-6V (MOTJ2) will take more but that will drastically reduce its operating life.

  • This is not a problem as the solar panel in the SolarV2 puts out 3.0 volts maximum

 If you’re looking for higher voltage motors we do have on in our range, that has an operating range of 3-12 volts (MOT17).


SOLAR BOATS

We want to introduce Solar boats to our programme. We do not have a large budget. What do you suggest?

You can buy the motor and small solar panels from us separately. Alternatively, you might like to consider our "Intro Solar Boat kit". This is specifically aimed at schools that want to try making solar boats but don’t have the budget for hundreds of dollars per boat - those are for class efforts, not individual students.

 We work with the Victorian Model Solar Vehicle Challenge organisation to further the aims of ensuring our youth / future citizens are learning about responsible energy consumption.

The "INTRO SOLAR BOAT KIT" (Code: SBTINT) allows students to gain experience and learn while developing the boat - without competing in Model Solar Challenges. It is great value for money as it includes all the parts needed for a small solar boat – except for hull material. The hull could be made from foam blocks that can be carved and shaped to make a hull or catamaran design.

The JUNIOR SOLAR BOAT KIT (Code: SBTJUN) provides the basis of a solar boat for use in the Junior Solar Boat Challenge (Primary). It includes a motor (that complies with the regulations for that level, and is well matched to the competition panels), a different guide tube and bearings (to reduce friction on the propeller shaft), 2 shafts and 2 propellers etc. No panel is provided as this allows the school to re-use previous years’ panels, or share panels between boats.

What are the advantages of using the INTRO SOLAR BOAT kit?

The INTRO SOLAR BOAT KIT to introduces the concept of both solar and boats to your students – it provides all the parts (except for hull) that you need to make a boat. It is not a complex kit, but the students need to work on the hull design and fabricating that (this makes the most difference to a boat’s performance). They can also get involved in testing such things as:

  • what is the best angle of the propeller shaft for performance

  • the effect of hull shape / design on performance

  • measuring speed over a known distance, working out average speed, top speed, acceleration etc.

  • Depending on time and budget, you can also introduce additional concepts by buying additional parts, such as getting 3 blade props (to do comparison testing between 2 and 3 blade props); additional solar panels and large switches (to see how series and parallel works, and how differing sun levels affect the performance), etc.

How much of the solar boat kit is reusable?

Many of the parts can be re-used, but there are a couple of items to consider:

·         The coupling might or might not survive if you keep removing it and remaking a new boat (it might split – but coupling is cheap and you don’t need much)

  • If the propellers are removed from the steel shaft repeatedly the hole in the propeller will get enlarged and will not grip (it is a press fit)

  • Depending on how far you dismantle the hull, the corflute may or may not be re-usable

Please clarify how these components are used in the boats?

Steel rod and guide tube: Guide tube reduces friction of the shaft to a minimum (that is – at two places only). Guide tubes with the larger ID and bearings are better.

 Coupling: Usually about 10-15mm is used to join the motor shaft to the drive shaft (the two shafts should almost be touching)

Propeller: There isn’t much performance difference between 2 or 3 blade propellers.

Switch: No advantage to using the slide or toggle switches. It’s down to personal preference (if using a two piece panel or 2 panels, the switch should be a 3 position switch for switching between Series-Off-Parallel)

Connector: The terminals are crimped onto hook up wire (as in the attached harness kit instructions) – small terminals go to the switch, large terminals to the solar panel. This allows for easy use with the solar panels.

Calibrated solar panel (SOLAR10): A calibrated solar panel (SOLAR10) which, when used with a multimeter, allows you to measure sunlight at any given time.

Do Drive line bearings make a difference in performance in a solar boat?

The question is based upon your usage. If you are simply creating a boat to demonstrate that solar works they don’t make much difference. BUT if you are participating in the model solar challenge, the usage reduces friction within the guide tube, and if attached properly, the only points of contact are at both ends – not in the middle.

How does the propeller fit on the motor?

The boat propellers don't fit directly on the motor - the motor shafts are 2.0mm diameter, and the propellers have a 2.4mm hole, as they are designed to be a press fit to a 2.5mm steel shaft (rather than the motors 2.0mm shaft).

 The motor is connected to a 2.5mm steel rod via a silicon rubber tube coupling. The propeller is a press fit onto the 2.5mm steel shaft.

 When making boats, most people run the steel shaft through a guide tube (the basic one has a 2.7mm inner diameter). If you want to minimise friction to a minimum, many people use the 2.5mm steel rod with the 4.5mm inner diameter tube, together with the driveline bearings - as shown on the bottom of page 1 of the catalogue. That way if the guide tube is not mounted perfectly straight, it shouldn't touch the guide tubes inside wall.

 However, we found that a BIC refill’s plastic end fits over the motor shaft, and its outside diameter was 3.0mm. We drilled the propellers hole out to 3mm, and the propeller fitted over the refill on the motor shaft. A drop of superglue on each joint should keep it in place.

 NOTE: Check and measure refill as there is no guarantee that all refills are exactly the same size as what we used.

We are building solar powered boats SPPCL. What are the dimensions?

The PCB is 50mm long (65mm to the tip of the switch) and 40mm wide. Assembled height is approx. 17mm.

 You also need to allow for:

  • the wires

  • the inductor (if you are using it)  - this is approx. 25mm diameter, 10mm wide with 2 legs

The kit contains parts we do not require. Can we order only the parts we require?

Our kits are designed for teachers who want to take a ready designed kit for a device that does certain tasks. We have a range of components for those who wish to design their own projects, which also means that you can also make things like the solar boat a different size than we have allowed for. These components are available on our web Component catalogue.

 We can pack special kits for you. Once you have notified your requirements and quantity required we can provide you with a quote. The price will include costs associated with packing.

Can we use recycled material for the hull?

Yes, definitely. This is a great sustainability idea.


SOLAR CARS

What is the difference between the Solar Car kits?

We have four Solar cars in our range. They cater for different audiences:

BASIC SOLAR CAR (Code: SOLARB) Demonstrates that solar power generation works by powering a fast vehicle.  Utilises a single one piece panel (No. 4 panel) and the SM17 motor combination. Suitable for junior students. Also available in a No-solder variant Code: SOLARB-NS).

SOLAR CAR V2 (Code: SOLARv2) is  slower performing vehicle that the above due to the panel used. Uses a two-piece panel (No. 11) and the MOTJ2 motor. Instead of providing only power, this panel is used to allow the teacher and student to experiment with wiring panels in series and parallel and how the power generated is affected by those changes, under changed lighting conditions (as the sun goes down, or on an overcast day).

ADVANCED SOLAR CAR (Code: SOLDV) uses a larger (4 piece panel) and has electronics (a Solar Panel Power Controller). This kit allows more complexity and versatility for experimentation.

INTRO SOLAR CAR (Code: SCRINT) introduces concepts that are needed to participate in Model Solar Challenges (but is not suitable for competition). This car uses 2 No. 4 Solar panels (usable in series and parallel) and has wheels with a low rolling resistance.

CHALLENGER SOLAR CAR (Code: CHALLENGER) is designed to be competitive – used in Model Solar Challenge events.

SHERIDAN KIT CAR (Code: SHERIDAN) is designed to be competitive – used in Victorian Model Solar Vehicle Challenge. A great kit if you’ve never made a Solar vehicle. Kit is to made using provided components, plan and instructions.

How do I test the electronics on the Solar car?

For testing the electronics on the car there are a couple of really simple functional tests that will prove the system is OK or not as the case may be. They are detailed below. (NB. ** All tests should be performed at the same panel illumination level).

  1. Test the open circuit voltage of the panel it should be above 6 Volts. If not, there is a panel fault.

  2. Check the short circuit current direct out of the panel with nothing else attached to it but the Amp meter directly across the panel output terminals. Remember this reading.

  3. Now connect the electronics unit to the panel and connect the Amp meter directly to the output terminals of the electronics (motor connections) adjust the electronics according to obtain the highest current reading. This reading is expected to be over three times the current measured in 2 above. **

** All tests should be performed at the same panel illumination level. We obtained the following test results in Sun at 4% Sun level.
a)         Open circuit volts 6.2 Volts
b)         Short circuit current from panel 0.006 Amps
c)         Current out of electronics unit 0.035 Amps

We can make no suggestions as you need to work out the desired gear ratios for your own car. The gear ratio depends on your car's wheel diameter and the solar panels power as well as other factors. Please check the Victorian Solar Association’s website for a simulator. That will allow you to calculate gear ratios.

How can we make a basic solar car run to its fastest capacity?

A solar panel will provide the maximum power at 100% sun (explanation below). Maximum power output is determined by the size and design of the panel

Note: it is possible to measure the sunlight intensity, by using our SOLAR10 calibrated panel and a multimeter.

 However, if you feel that the car is not running as fast as it could, check that the motor has been mounted to allow the gears and wheels to turn freely – if they are too close together it will generate extra friction, and slow down the car.

 Solar panels generate power (volts and amps) when exposed to the sun. The voltage produced from a certain panel will always be the same, but the amount of Amps generated will vary according to the level of sunlight available.

  • on a cloudy day, the sunlight level could easily be as low as e.g. 20% sun

in full sunlight (100% sun) the panel will be generating its maximum amperage.

What motor upgrade would be suitable for the Advanced Solar car?

 The ADVANCED SOLAR CAR kit (Code: SOLDV) is intended to demonstrate solar panel and motor performance variations under differing Sun conditions and panel wiring configurations i.e. changing between series and parallel. Then, when using the Electronic Panel Controller, the value of matching the solar panel output to the load is clearly demonstrated by the performance increase.

Unfortunately, just changing the motor will not improve performance as the limiting factor is the panel power. The panel only puts out 1.2 watts in full Sun.

 If you wish you can put together an upgraded version of this car using an MOT30 motor and two No. 4 panels (2.0 volt 0.8 amps at full sun) with these panels connected in parallel you could expect the car to start running at about 15% Sun and for faster running with the panels in series the car should start running at just over 30% Sun. Obviously, you need a larger chassis to mount these larger panels and they do not have sufficient voltage to run the electronics unit which requires > 6 volts. It is also still necessary to keep weight low as these panels together in full Sun still only produce fractionally over 3 watts in full Sun.

 Note: this is effectively our Intro Solar Car kit (although that doesn't have an electronics kit).

How do I decide what gear ratio to use for my model car?

The gear ratio depends on your car's wheel diameter and the solar panels power as well as other factors. Please check the Victorian Solar Association’s website for a simulator (Design guide, Appendix B: Car energy use).

  • No, the SM403 will not work well due to the large diameter of the motor casing.

  • The ST403 motor is designed to fit into the Junior Solar Boats’ market (it is not a Senior class winner but works well in the Junior boat segment).

  • The ST-403 motor has a large body diameter, which is not an issue with boats but for cars that won’t work well with our normal range of gears.


MODEL SOLAR CHALLENGES

What do you mean by Model Solar Challenge?

To encourage students to experience solar power and team work many Australian states hold Model Solar competitions. The students make their own solar boats or cars. These are raced to find the best car or boat.

We have never entered a Solar Challenge. What is required to compete in this event?

There are different aspects to the different competitions and what is needed, and each needs to be taken separately. A good starting point is to visit the Model Solar Victoria http://www.modelsolar.org.au/and the Tasmanian Model Solar Challenge http://www.tassolarchallenge.org/ websites as they have useful reference information.

 COMMON ISSUES – REGARDLESS WHETHER BOATS OR CARS

These issues influence the choice of parts purchased:

  • Do you want to be competitive, with a chance to win or rank well, or do you want the students to have a good learning experience? Competitive vehicles require a larger budget.

  • What is your budget?

 Consider this:

  • Most components will need to be replaced at some point due to deterioration, damage or wearing out.

  • The Model Solar Challenge organisers expect that new cars and boats are made every year. You may be able to reuse motors or panels but your budget needs to include new items.

 MODEL SOLAR CARS

Three important aspects:

  • The chassis, that is the car’s underpinnings. These could be as simple as a plywood sheet with the axles attached with saddle clips, or the preferred carbon fibre rods being connected with an axle bracket kit. It also includes wheels, bearings and so on. Scorpio’s Challenger kit provides a lightweight chassis.

  • The body, which needs to conform to the current competition regulations

  • The powertrain: that is, the choice of solar panel, motor, gearing and electronics, must work together

 MODEL SOLAR BOATS

Three important aspects:

  • ·         The boat’s design – how it all goes together, how the motor is mounted, angle of the propeller shaft etc. We’d suggest having a look at our Junior Solar Boat kit for ideas

  • The hull – material, shape and size etc. affects performance

  • The powertrain: that is, the choice of solar panel, motor, gearing and electronics, must work together.

 Competitive models require a larger budget due to better performing components are usually more expensive. If your budget allows, you may choose:

  • Scorpio SOLAR26 panel is a specially designed lightweight competition panel. It is seen by many as “the” panel to use to be competitive.

  • The Faulhaber motor is an industrial motor which explains its higher performance and cost. It is used by competitors in the Open classes (Car and Boat) who wish to be competitive

  • Scorpio’s SOLAR PANEL POWER CONTROLLER improves performance. The AUTOMAX unit is chosen by others.

How can we improve the performance of the Model Solar Challenge Car?

The use of Electronics is one way to harness the solar panels power better. This results in the maximum power available from the solar panel being constantly transferred to the motor maximises the drive available to the car.

 This action of modifying voltage and current to suit the motors requirements has the added advantage of increasing the motor torque by up to 500% as the motor starts from stalled. Consequently, the car performs as though it has an automatic transmission exhibiting much greater acceleration that a car without electronics.

 Interestingly, we have found that generally one gear ratio suits all conditions, so gear changing is a thing of the past.  Just put your car on the track and turn it on, no matter what the sun level is.

 We have two units available. They are quite different in terms of design. Both work to do a similar thing, but they are totally different units:

SOLAR POWER PANEL CONTROLLER (SPPC)

  • The SPPC operates by rapidly switching the motor on and off to maintain the solar panel Voltage at the point where maximum power is produced.

  • When assembled, you put your unit in the sun and adjust it - and it stays on that adjustment. It is only in low light that requires resetting.

  • The switching action causes the inductor in the output section of the circuit to modify the current and voltage provided by the solar panel to a value that exactly matches the motors requirements.

  • This unit is only available in kit form. Takes about 20 minutes to make.

  • This is a simple cost effective way to significantly improve the performance of your Model Solar Car. It reduces set up time and complexity.

  • It will not function below about 10 Volts so consequently is not suitable for use with a single Boat Panel

Pros and Cons of using Competition solar panels

Unless competing in the Solar Challenges, we would not suggest using the competition panel. Why?

  • The competition panel is expensive

  • The competition panel is fragile (lightweight construction - especially for the challenges, where weight can be an issue)

  • Students are not always careful when removing them and can easily damage the panels internals (solar cells)

  • All of our "normal" (small hobby style) panels are robust - they have a backing board

  • To make it worth using a competition panel, you need to match it with a suitable motor etc. (these were purpose made for the challenge, to match in with the Faulhaber motor used by many teams)

Are the highest power SOLAR26 always the best panels to use?

Not always.

For the BOAT Challenge, the regulations stipulate maximum surface area of 350sq. cm. In that case the higher Performance panels will provide more power.

For the CAR Challenge, the regulations stipulate maximum power output of 10 Watts. That means that 2 of the lower rated panels are adequate, as the scrutineers will mask off some of the panel to bring the power down to the specified power output! And the car design, gearing and other factors also influence performance.

The solar panels SOLAR26 voltage is 7V and .9A. but the Faulhaber 2232 motor's operating voltage is 6.0V. Will the 6V motor support 2 solar panels?

The Faulhaber is an industrial motor and is quite capable of handling a lot more power than put out by the two panels. One Faulhaber motor and two no. 26 panels are a standard combination seen in the Model Solar challenges.

What is the best way to swap solar panels between boats in the Model Solar Competition?

When swapping panels from boat to boat, the best idea is to have the Solar Panel Wiring harness (Code: HARNESS26), the solar panel and the switch as one unit that is removed and attached to the next boat. Heat shrink over the terminal protects it when moving from one boat to another.

What is the reason for the price difference between the ST-403T1 motor and the Faulhaber 2232 motor?

The ST-403 motor is a motor specially developed for us to be a high efficiency motor, and is designed to be suitable for use in the Junior Solar boat class (which has a limit to how expensive the motor can be).

The Faulhaber is an industrial motor with high efficiency.

Can the SW70AGR or SW70EGR wheels able to support that a car of about 3kg?

The weight is not a problem –Model solar cars usually run up to 2.3 kg. Another option is our 50mm pulley which can be used with a 50mm O-ring as a tyre.

What gears should I use with a Faulhaber motor?

The gears to be used with the Faulhaber motor must be attached to the motor’s shaft by a grubscrew - that way there is no risk of damaging the Faulhaber motor by pushing the gear onto the shaft.

 We have a range of brass gears with a grub screw to suit the Faulhaber. It has been worked out that a selection of 3 different pinion gears is all that should be required to cater for differing sunlight levels.

 Based on a Model solar car weighing 800 grams, using a Faulhaber motor and SOLAR26 panel, and running 70mm wheels and an 80 tooth spur gear, the gears you would need are:

  • USING Electronics: 11 Tooth + 16 Tooth + 20 Tooth

  • WITHOUT Electronics: 13 Tooth + 16 Tooth + 18 Tooth

What is included in the SHERIDAN kit car?

The Sheridan Kit car was created for the Model Solar Challenge held in Victoria, and is a specific event held at that time.

 The Model Solar Challenge Regulations state:

  •  “This is a race for model solar cars built by students from the specified kit of parts”. 

  • “Kits as supplied contain all materials required to construct the body and chassis of this vehicle.”

  • “That the kit car is constructed using only the components supplied with this year’s, kit of components (the kit contains all the parts required except the solar panel) .”

 We are the appointed distributor for this kit, and we have kits available for purchase. You are not able to use other components.

The gear ratio depends on your car's wheel diameter and the solar panels power as well as other factors. Please check the Victorian Solar Association’s website for a simulator (Design guide, Appendix B: Car energy use).

What parts of the CHALLENGER can be re-used?

If you wish to dismantle it most of it can be re-used. We suggest that you buy new carbon fibre tubes, so that the next lot of students get to do the design of the chassis etc., rather than re-using the same car as built (that way they get the learning experience of designing and building their own car)

Additional requirements are:

  • Faulhaber motor

  • Solar panel and wiring (below)

  • Body / material

Or if you don’t want the whole kit we sell the parts and smaller kits separately

Which solar panel you would recommend for the Junior Solar Boat kit (STBJUN)?

The JUNIOR SOLAR BOAT KIT is designed to be used in the Junior Solar Boat Challenge (Primary). When competing we suggest using our No. 26 solar panel which is designed for the competition. It is a light weight, fibreglass enclosed panel (it weighs approx. 50 grams) and conforms to the 350 square cm regulation.

 Note: If you don’t intend to compete, but want to introduce solar concepts to your students, our Intro Solar Boat would be more suitable as it comes with our No. 4 panel.

Model Solar Competition guidelines

The basic intent of the Model Solar Competition is to engage students in Science and Technology. To ensure they fully engage and get the maximum educational benefit it is essential the students actually do the work. This ensures deeper understanding and maximum educational outcome. 

Considering the feasibility of providing a kit of parts for cars competing in the Model Solar Car Challenge it is acceptable to offer a kit of components say for running gear, solar panels and electronics. However, any pre designed chassis or body would not be eligible to compete as these must be the work of students. See the appropriate section of the regulations copied below (Note:  Always check your state’s current Model Solar Challenge regulations).

Original work

All teams must be able to provide evidence to the scrutineers that the car is the original work of the team members in both design and construction, performed in the current year, and not simply a restyling of a previous existing car.  This will include both the chassis and the body of the car.  Solar panels, motors, drive systems, wheels, suspension, guide systems and other similar components will not be included and may be reused.  If any school has more than one car entered, the cars must be significantly different in both chassis and body to indicate to the scrutineers that the cars are the work of different teams. This work will be verified by submission of a poster (3.6) and discussions with delegated committee members in an interview (3.7)

There is significant help already available to students in preparing their own designs and constructing a car in the form of the Scorpio Solar Car and the Sheridan kit car. Having undertaken the construction of these cars students should have gained sufficient knowledge and skill to design and construct their own car.

The Model Solar Challenge Victoria website shows details of a past winning car, assembly of components and even a Mathematical Simulation to allow students to evaluate the probable effect on performance of various design choices.

Link to Model Solar Challenge Victoria

The most important design features of a car in order of importance are:

  1. Quality components

  2. Build accuracy

  3. Aerodynamics, comparing identical cars except for aerodynamics running in full sun, a car with the best aerodynamics reasonably possible compared to a car with the worst aerodynamics would win a one lap race by 9 metres and a two lap race by 22 metres.

  4. Power to weight ratio.


INTERESTING INFORMATION

We would like to make our own solar panels to drive small projects (low voltage motors). Would you be able to supply us with the cells we require?

QUESTIONS:

Have you ever made solar Panels before? Are you aware of what is involved, and what all the requirements are? WHY?

Scorpio Technology used to make our own solar panels in house (here, on the premises). That was discontinued some years ago, and we now have our panels made overseas by companies who specialise. The reasons for discontinuing were:

  • all the careful work that was required, and still only about 50% of panels worked as expected

  • the need for proper ventilation (when using resin) and dust extraction (when cutting)

  • the level of soldering skill and experience required

  • high failure rate (and hence the cost)

MAKING SOLAR PANELS

Making solar panels requires a lot of care and experience, as well as special items and tools:

  • the cells are very thin and fragile. They require a lot of care and delicacy, or the result is a box of broken bits

  • special silver solder (3%?) is required, or it will not adhere to the tracks

  • a special conductive strip is needed

  • either fibreglass or a special resin is used to coat the completed cells. If using resin for encapsulation (would you use hard or soft encapsulation?) a backboard is needed. Care is also needed to avoid air bubbles or other problems.

  • care when cutting - very fine saws (preferably diamond) are needed.

  • Otherwise, lasers can also work for cutting.

  • care and experience / good soldering skills are essential

  • you require a way to test completed panels (usually a light box and test equipment)

Thus, as you can understand, making your own solar panels is not an easy job, nor is it recommended. We spoke to two people who have experience in this field. Neither recommended tackling it.