

Click here for a Decision table to determine the kits best suited to your students' needs.
For more detailed information about each kit please refer to the individual kit's overview. If the unit is not downloadable please contact us and we will email you a copy.
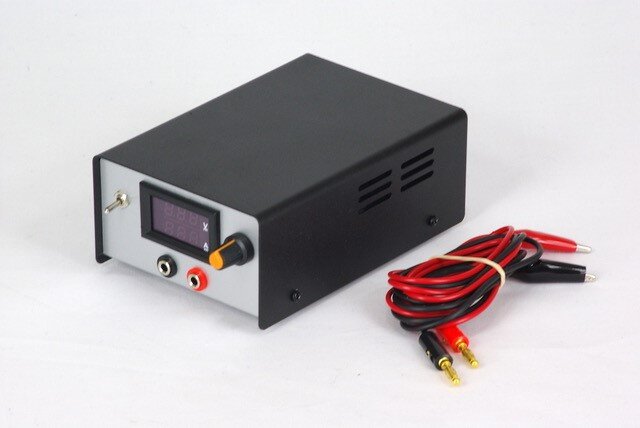
Adjustable Power Supply (10-12 hours)
Code: POWADJ
Click here for teaching unit Overview
The ADJUSTABLE POWER SUPPLY consists of a Printed Circuit Board, a Digital Panel meter for measuring both Voltage and Current and a Voltage adjustment control. The voltage can be adjusted from 1.2 volts upwards.
The ADJUSTABLE POWER SUPPLY can operate from either an AC or DC plug pack with a voltage range between 12 to 18 volts.
It has a control switch that allows adjustment of the voltage to the required level, before connecting the ADJUSTABLE POWER SUPPLY to whatever you wish to power.
Also available in the following bundle packs:
POWADJBUND1: Adjustable Power Supply Kit, 12V DC 1A Power Pack, Enclosed Metal Case (case illustrated in photo)
POWADJBUND2: Adjustable Power Supply Kit, 16VAC 1.25A Unregulated Power Supply Power Pack with Bare Ends, 2.1mm DC Power Line Connector Plug, Enclosed Metal Case (case illustrated in photo).
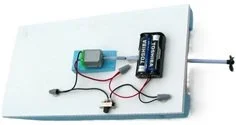
Battery Powered Boat (4-5 hours) ***new***
Code: BATTBOAT
Click here for teaching unit Overview
This kit contains all the components needed to construct a functional battery powered boat and its propulsion system. This unit includes suggested ideas for hull construction as well as instructions on how to use and assemble these components, in order to build a complete basic boat that works.
By building and experimenting with this boat, students will gain a significant insight into simple circuits, electricity from batteries, motors and energy conversion from the batteries to power the motion of their boat.
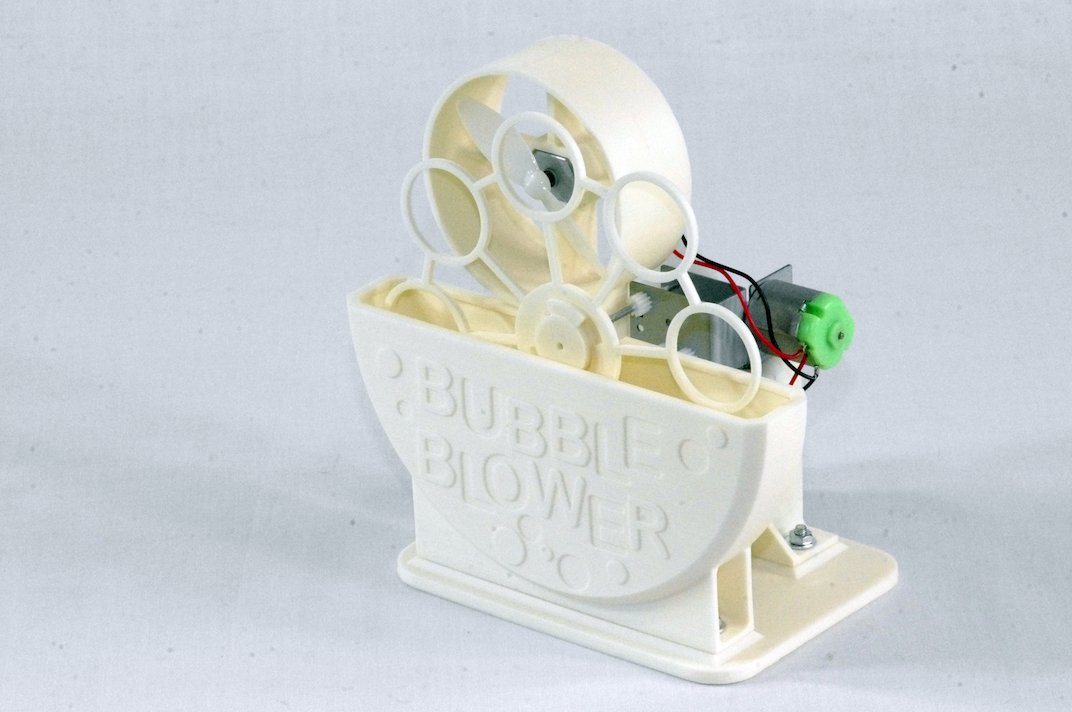
Bubble Blower v2 (8-12 hours)
Code: BUBBLEV2 solder version
Click here for teaching unit Overview.
Code: BUBBLEV2-NS no solder version
Click here for teaching unit Overview
This device is designed to automatically blow bubbles! One motor, driving through a gearbox, constantly rotates 6 wire hoops, which continuously dip into a vessel holding the bubble mixture. The propeller (driven by a second electric motor) blows air into the hoops, producing a constant stream of bubbles. Design your own unique tank and housing and create your own workable bubble blower!
PLEASE NOTE: The original version of the Bubble Blower kit has been phased out and has been replaced by the v2 model containing an unassembled gearbox.

Dragster (10-14 hours)
Code: DRAG solder version
Click here for teaching unit Overview
Code: DRAG-NS no solder version
Click here for teaching unit Overview
The DRAGSTER is a simple motorised vehicle, for students to design and construct. It is powered by a small electric motor, and students are able to select the vehicle’s gearing, dependent upon the speed and acceleration required. The vehicle has been designed to provide an easy introduction to electro-mechanical devices. It is also intended that a number of DRAGSTERS can be used to compete in a class environment. This puts the additional requirement on students to look into the effects of gearing on speed and acceleration, and to consider these factors in their vehicle design.

Electricity Generation Demonstrator (6-7 hours)
Code: ELGENDEM
Click here for teaching unit Overview
The ELECTRICITY GENERATION DEMONSTRATION kit is designed to show that: (1) a generator being turned at speed will generate electricity and (2) increasing the generators revs (rpm - revolutions per minute) increases the electrical output.
This is easily demonstrated, as this kit lights up LEDs –as the motor’s rpm increases, lights up more LEDs: a good visual demonstration
Explorer (22-24 hours)
Code: EXPLORER
Click here for teaching unit Overview
The EXPLORER is a small autonomous vehicle that changes its direction of travel when it bumps into an object. Two independent motors drive the EXPLORER, each through its own gearbox. The front of the EXPLORER has a bumper bar, which is used to actuate either one or both pairs of the bumper bar's microswitches. Each pair of microswitches controls the rotation of the wheel on the opposite side. When either DPDT is triggered, the corresponding wheel drives backwards, to get the EXPLORER away from the object. The freely swinging trailing wheel introducing a random element to the direction it turns, as well as providing stability. A flashing lamp indicates the approach of the EXPLORER.

Ferris Wheel V3 (12-15 hours)
Code: FERRISV3 solder version
Click here for teaching unit Overview
Code: FERRISV3-NS no solder version
Click here for teaching unit Overview
The FERRIS WHEEL project allows the student to design and construct their own working version of the popular fairground ride.
The project leaves plenty of opportunities for the student to use their imagination and display their design and construction skills.
It is powered by a low speed motor gearbox powered by a 3 volt battery pack.
It can be operated momentarily by a pushbutton switch.
It also allows the student extra scope to add additional buildings (ticket box, etc.) and lighting and sound to the project using additional circuitry.
PLEASE NOTE: These v3 versions of the Ferris Wheel kits with unassembled gearboxes are replacing the v2 models containing an assembled gearbox. Limited quantities of the v2 versions are still available. Please contact us for stock levels before placing an order.

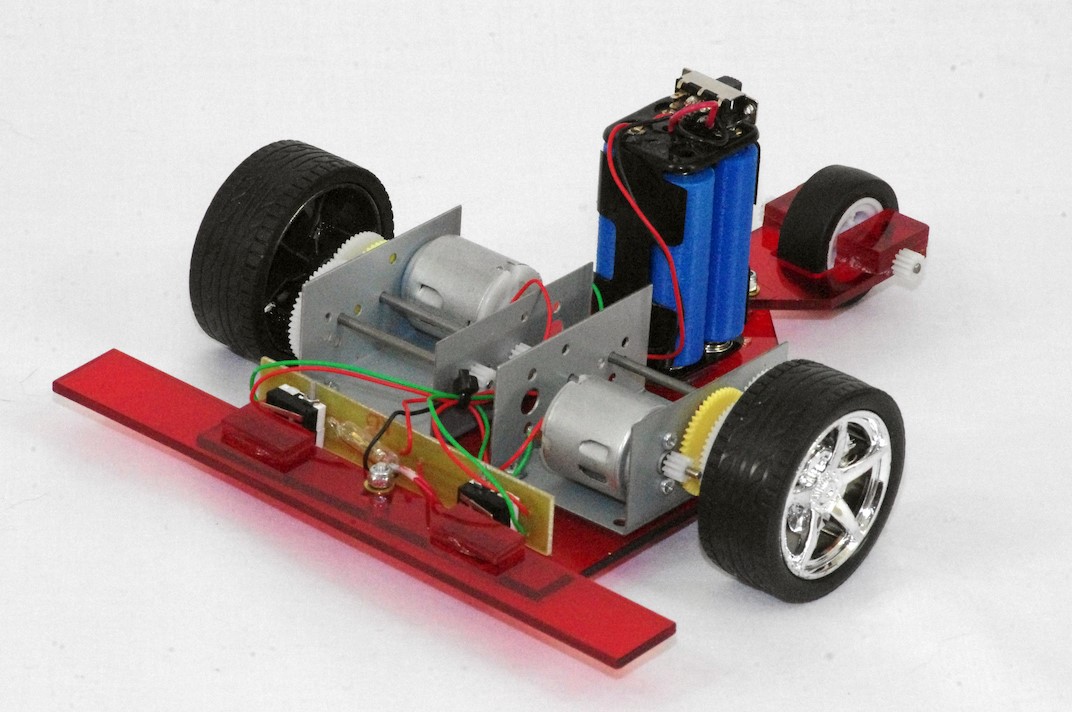
Formula Scorpio (10-15 hours) ***new***
Code: FORMULASCOR
Click here for teaching unit Overview
The FORMULA SCORPIO is a simple motorised vehicle, for students to design and construct, providing them with an introduction to electro-mechanical devices. It is powered by a 4.5 volt to 6 volt electric motor, and students are able to select the vehicle’s gearing, dependent upon the speed and acceleration required.
Several FORMULA SCORPIOS can be used to compete in a class environment. This puts the additional requirement on students to look into the effects of gearing on speed and acceleration, and to consider these factors in their vehicle design.

Hovercraft (2-4 hours)
Code: HOVER
Click here for teaching unit Overview
The HOVERCRAFT moves quickly on a stream of air captured under the foam tray body. Can be manually steered with a rudder system.
Intelligent Line Tracking Car (3-5 hours)
Code: LINETRACKER
Click here for teaching unit Overview
The LINE TRACKER is an Intelligent Line Tracking Vehicle that can follow a dark track either drawn, printed or taped on a white background. Light produced by two LEDs is reflected onto two LDR’s. The LDR’s are the controlling circuits inputs. This information is used to control the operation of the LINE TRACKER to keep it following the along the track.
Some soldering required. Batteries not included.

Intro Solar Boat (3-5 hours)
Code: SBTINT
Click here for teaching unit Overview
This kit contains the required electrical and mechanical parts to build a small simple solar powered boat.
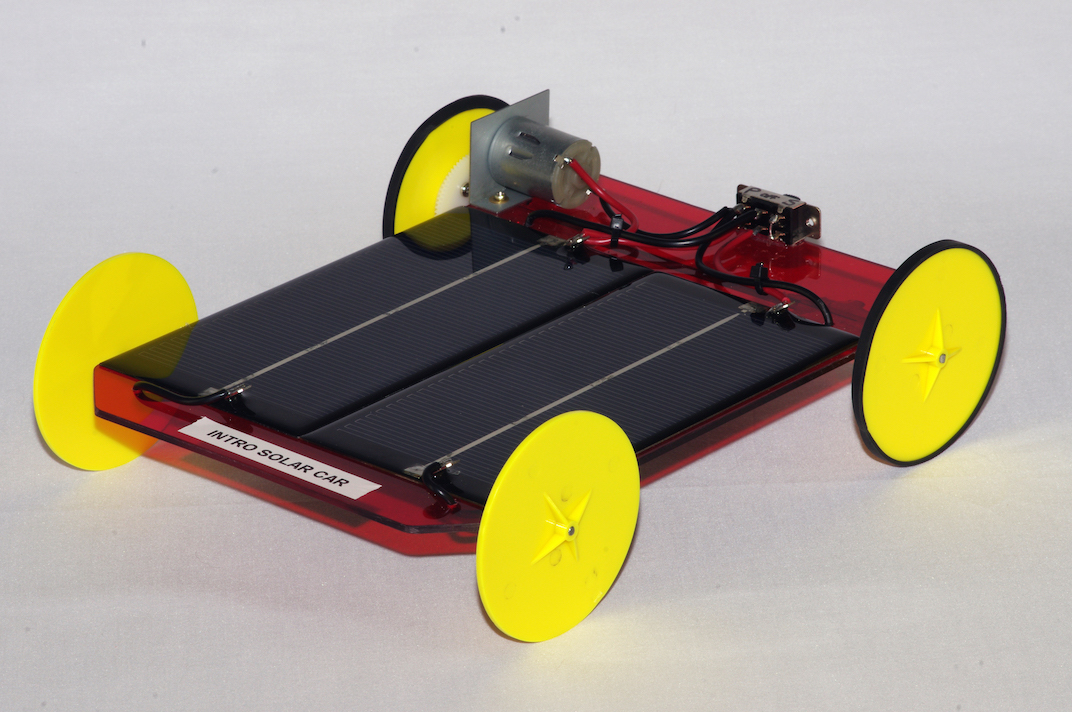
Intro Solar Car (3-5 hours)
Code: SCRINT
Click here for teaching unit Overview
This is a basic four-wheeled vehicle which is powered by 2 no. 4 solar panels. Suitable for introducing the concept of solar power and low friction to students.

Junior Solar Boat (5 hours)
Code: JUSBT
Click here for teaching unit Overview
This kit contains the required components (except a solar panel) to build a solar powered boat for competing in the Junior division of the solar challenges.
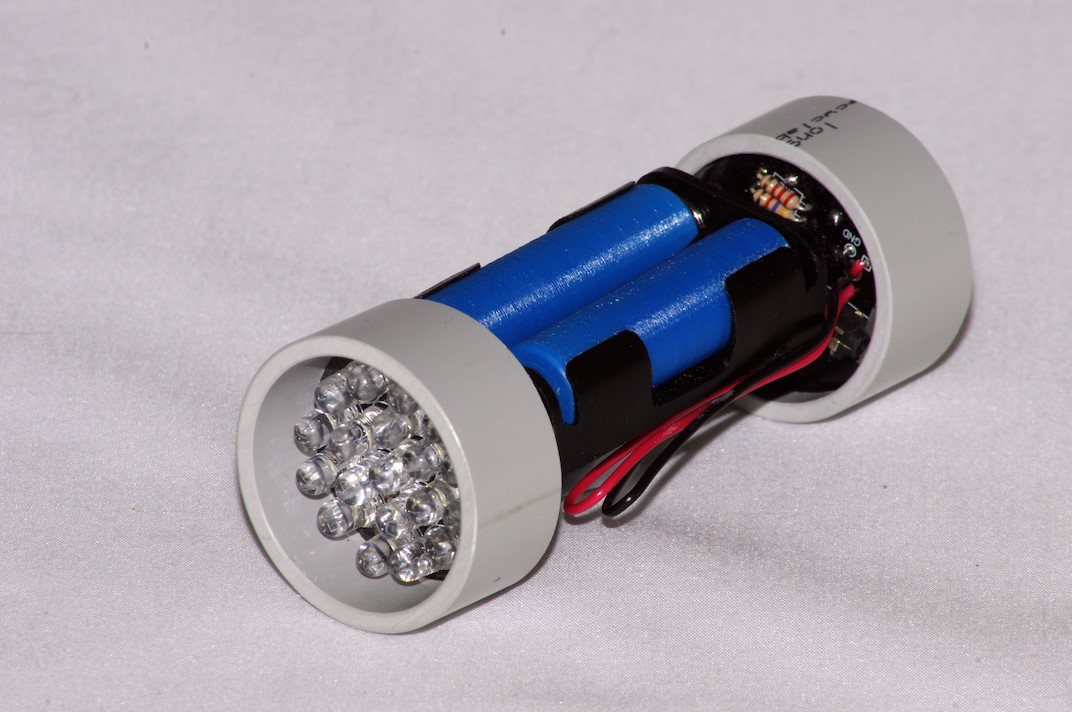
Led Torch (6-8 hours)
Click here for teaching unit Overview
PicoBright is an electronic flashlight kit suitable for beginner solderers – 19 ultra-bright LEDs, 3 PCBs.
Led Touch Lamp (10-15 hours)
Code: LEDTLK
Click here for teaching unit Overview
Make a touch sensitive desk or bedroom lamp. No switches involved – touch turns the lamp on and off. Uses super-bright LEDs.

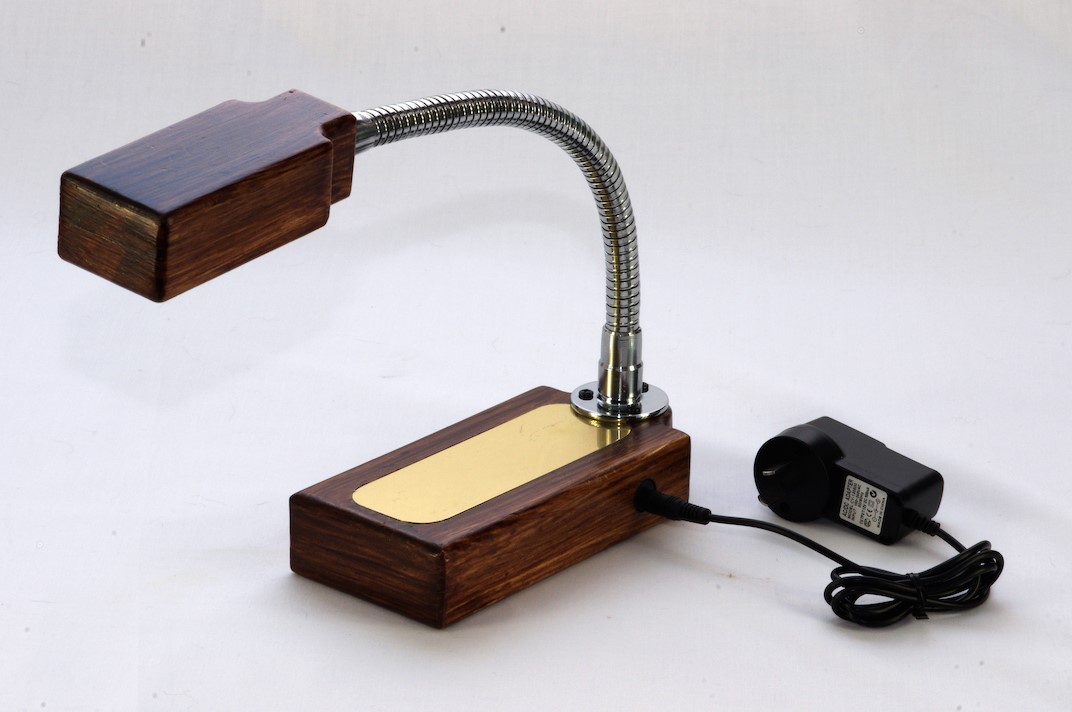
LUMA LED Desk Lamp (12-18 hours)
Code: LUMA
Click here for teaching unit Overview.
The LUMA LED DESK LAMP has a cantilever and is an articulated design. Students may use the included design or use it as a starting point for their own design. The project is suitable for different secondary year levels and abilities.
This is a hands-on STEM project that incorporates the concepts of sustainability and reuse (repurposing) of materials.Click here

Mark's Monster (8-10 hours)
Code: MARK solder version
Click here for teaching unit Overview
Code: MARK-NS no solder version
Click here for teaching unit Overview
MARK’s MONSTER is a small agile vehicle that responds to a wired hand held controller, which is used to steer the vehicle, using two push buttons to move forwards, left or right. MARK’s MONSTER has two independent motors and gear-drives, each controlled by its own push button switch. If both buttons are pushed simultaneously the vehicle travels forward in a straight line, but if only one push button switch is pushed the car turns in the desired direction.
Pre cut bodies for Mark's Monster are available.

Mark's Monster with the Lot (7-9 hours)
Code: MMWTL
This variation to the traditional no solder MARK’s MONSTER kit includes wiring and pre-cut plywood parts for the body and handheld controller.
MARK’s MONSTER is a small agile vehicle that responds to a wired hand held controller, which is used to steer the vehicle, using two push buttons to move forwards, left or right. MARK’s MONSTER has two independent motors and gear-drives, each controlled by its own push button switch. If both buttons are pushed simultaneously the vehicle travels forward in a straight line, but if only one push button switch is pushed the car turns in the desired direction.

Mr Walker (14-18 hours)
Code: MRWALK
Click here for teaching unit Overview
MR WALKER is a walking robot with waving arms and glowing eyes. The walking motion is achieved by cams and linkages and uses an easily constructed motor and gearbox assembly.

Jouster Infra-Red controlled vehicle (assembled 9-11 hours) (unassembled 11-13 hours)
Code: JOUSTU with PCBIR6-A (assembled PCBs and unassembled gearbox)
Code: JOUSTU with PCBIR6-UN (unassembled PCBs and unassembled gearbox)
Click here for teaching unit Overview
The JOUSTER is a small agile vehicle that is controlled and steered by infrared remote control. There is a receiver PCB assembly mounted on the vehicle and a Transmitter in a hand held control box. The INFRARED CONTROL UNIT (IRCU) can transmit on four (4) bands, which allows four JOUSTERs to be operated at the same time, by selecting one of the 4 bands. The JOUSTER has two independent motor driven gearboxes, each driving one wheel. The remote control unit controls the vehicle through the use of push button switches – for each motor there are 2 push button switches, one to apply forward and the other to apply reverse motions. If both forward motion buttons are pushed simultaneously the vehicle travels forward in a straight line. However, if one forward push button switch and one reverse switch are pushed, the vehicle turns on the spot! The infrared controls are for indoor use only – it is not suitable for outdoor use. It requires line-of-sight and can operate up to a distance of approximately 20 metres.
Please note that the Jouster with assembled gearbox (JOUST) has phased out and is now only available in the unassembled gearbox variation (JOUSTU).
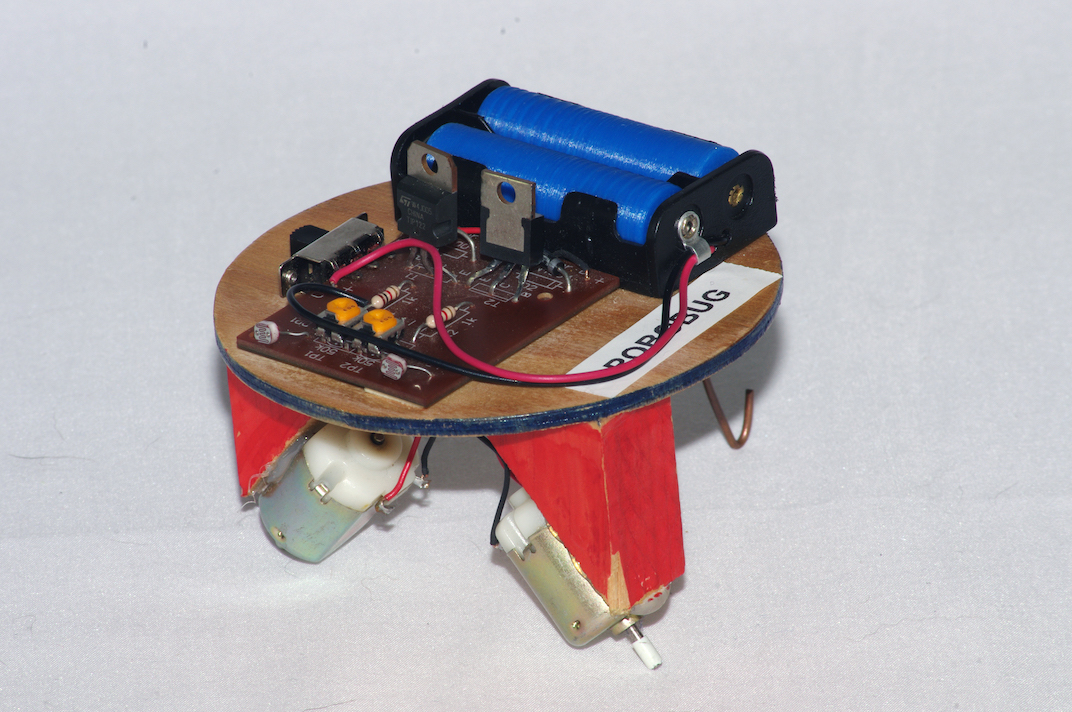
Robobug v2 (10-14 hours)
Code: ROBOBUGV2
Click here for teaching unit Overview
The ROBOBUG is a small light-sensing robot that can be controlled by shining a torch on to its sensors. When light is shone onto one of the sensors, the motor controlled by that part of the circuit starts, causing the robot to change direction. If light is shone onto both sensors the robot will move forward in a straight line. By using a torch as the light source the robot can be steered.
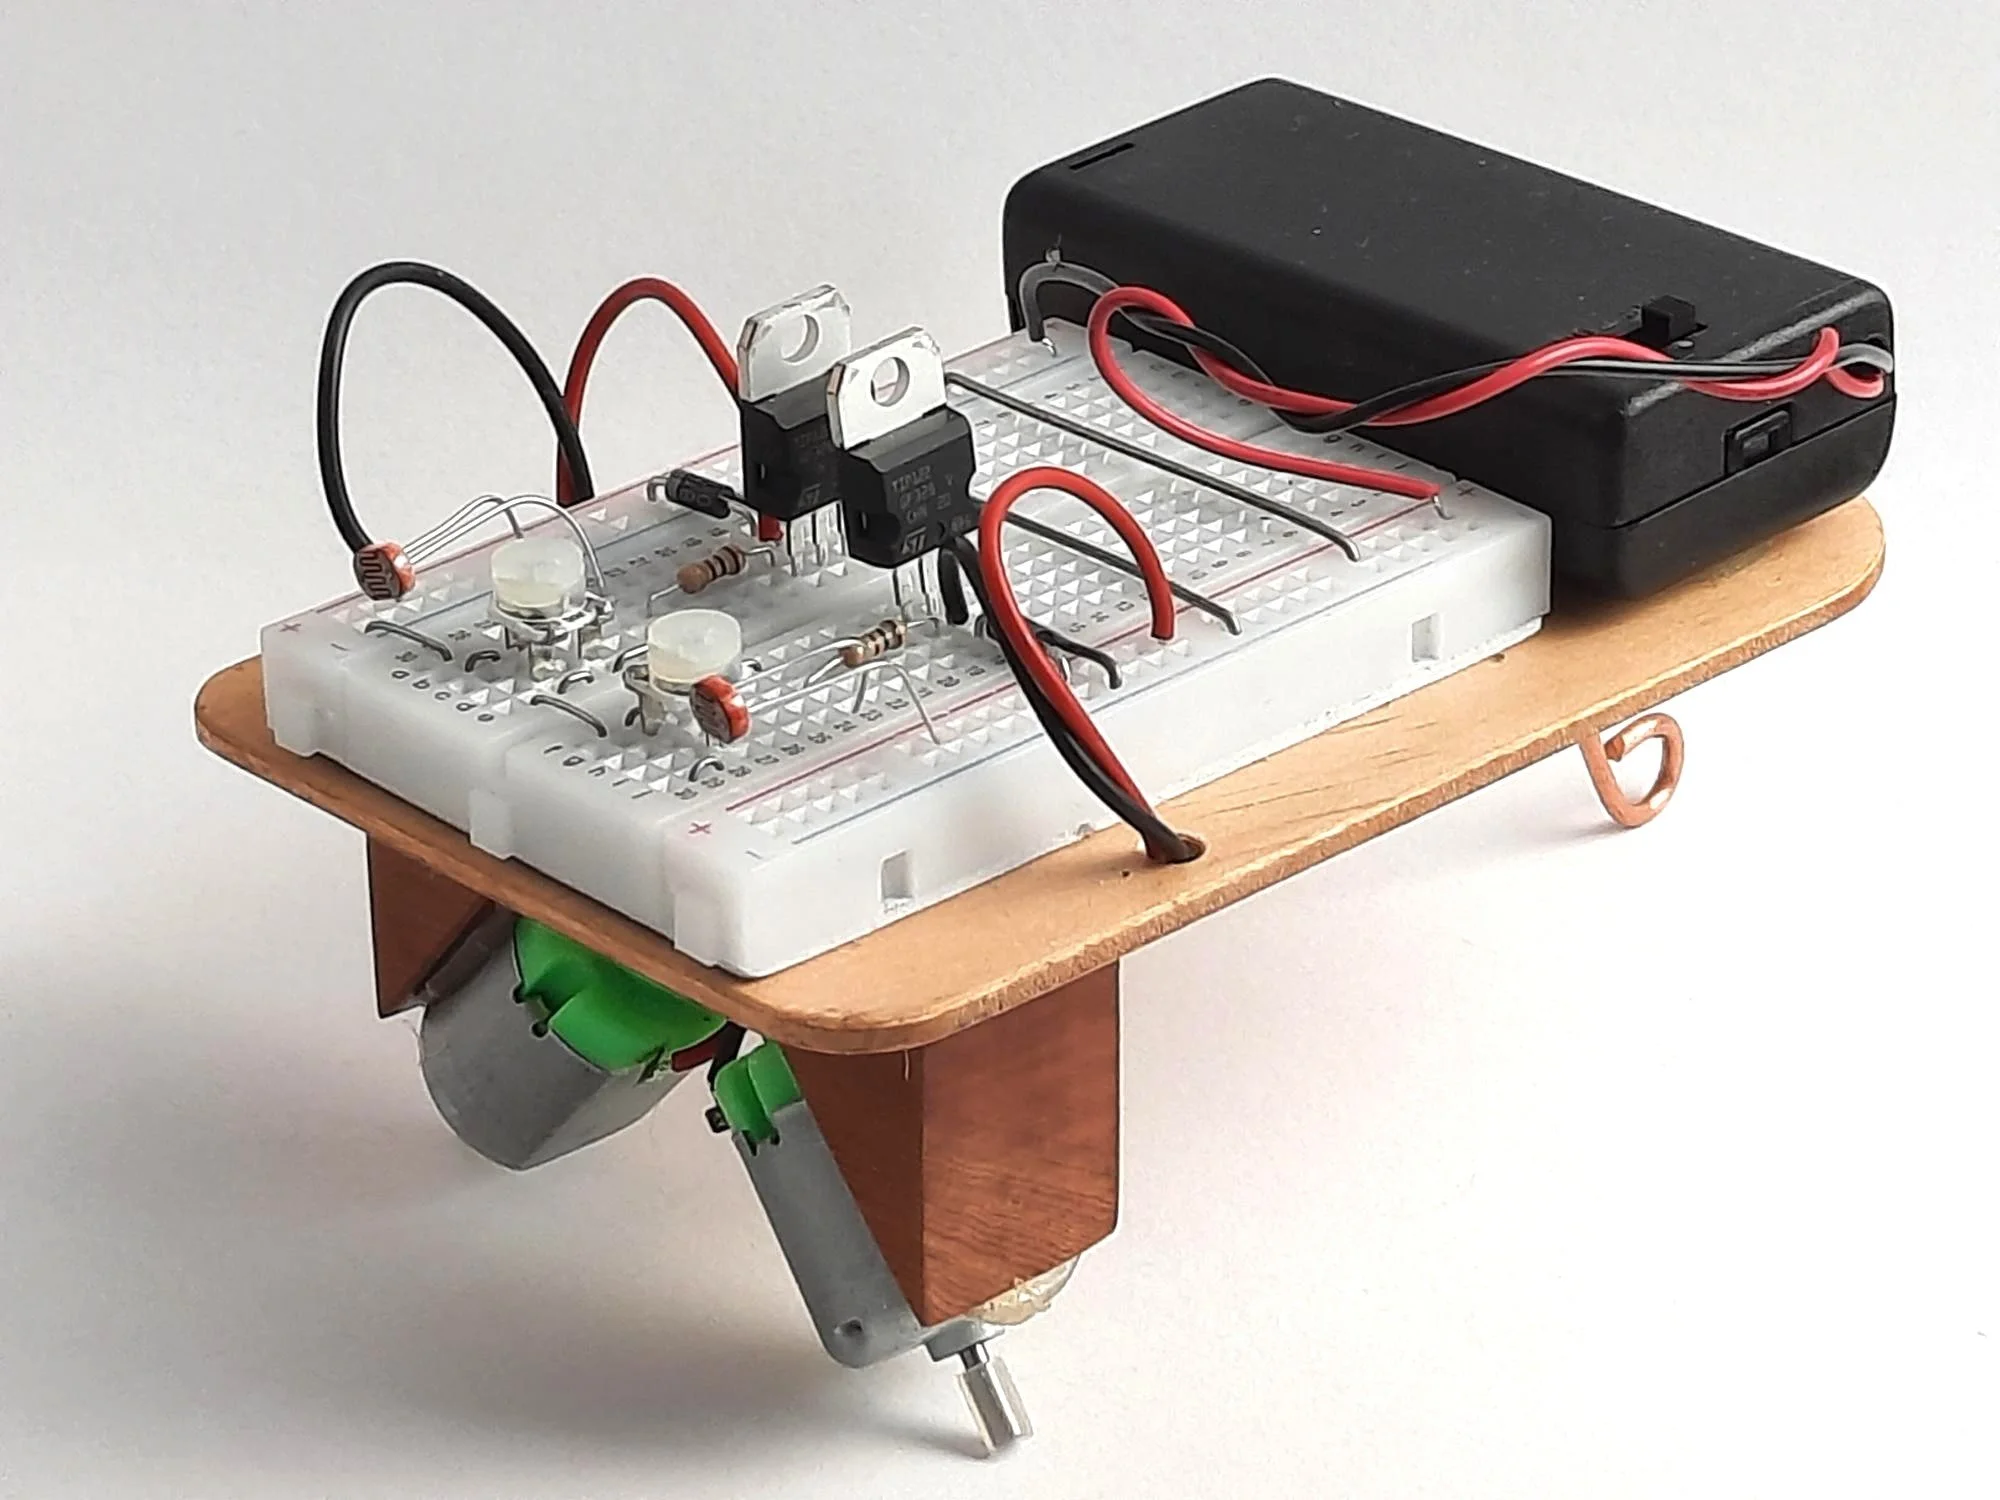
Robobug v2 - Breadboard Version (10-15 hours) ***new***
Code: ROBOBUGV2BRBRD
Click here for teaching unit Overview
The ROBOBUG is a small light-sensing robot that can be controlled (steered) by shining a small torch or mobile phone (as the light source) on to its sensors.
When light is shone onto one of the sensors, the motor controlled by that part of the circuit starts, causing the robot to change direction. If light is shone onto both sensors the robot will move forward in a straight line.
The kit provides the breadboard and components. A breadboard is a great solution for anyone unable to access a soldering iron. NO SOLDERING REQUIRED.

Scorpio Constellation (2-3 hours)
Code: SCOR
Click here for teaching unit Overview
Scorpio is an appealing member of the zodiac. The Scorpio PCB has an LED positioned on the location of the major stars in the Scorpio constellation. The LEDs flash in a set sequence.
We also have Project Sheets that use the Scorpio Constellation for the basis of other projects. (See “Teaching Units - Project Sheets”

Seeker V2 Yellow (16-22 hours)
Code: SEEKERV2YEL
Click here for teaching unit Overview
The SEEKER V2 YEL is a three wheeled vehicle. Depending on your design you can have the two drive wheels mounted at either the front or rear of the vehicle. Each wheel is driven by a separate gearbox/motor. The third wheel is a castor mounted wheel, allowing the vehicle to change its direction of travel easily.
The SEEKER V2 YEL is controlled by two light dependent resistors (LDR’s) mounted at the front of the vehicle. When the LDR’s encounter a change in light level caused by an object or changed lighting, one or both LDR’s will react and cause the SEEKER V2 YEL to reverse and turn away from the object. The reverse time for each motor can be adjusted to your requirements.
A PCB and a variety of electronic components are responsible for the control of the vehicle.

Simple Vehicle (10-15 hours)
Code: SIMPLE
Click here for teaching unit Overview
This project requires the student to design and build a SIMPLE VEHICLE. This is the most basic vehicle possible, and is suitable to introduce students to Technology and Electrical components.
After completion of the vehicle, it can be used for a variety of experiments (physics or otherwise) or even paired with another vehicle for racing and performance tests.
This is a basic four wheeled vehicle, with both front and rear wheels on fixed axles. This vehicle:
- Is capable of forward and reverse motion (the direction of travel being controlled by a two-way switch)
- Has a choice of three gearbox ratios when assembling the gearbox.

Solar Car - Advanced (15-20 hours)
Code: SOLDV
Click here for teaching unit Overview
The ADVANCED SOLAR CAR is a four-wheeled basic vehicle, driven by an electric motor and powered by a purpose designed solar panel. This vehicle also has a SOLAR PANEL POWER CONTROLLER – LOW VOLTAGE (SPPC-LV), which helps your vehicle to achieve maximum performance, by the use of an electronic device. Motion from the motor to the wheels is transferred by the use of gears.

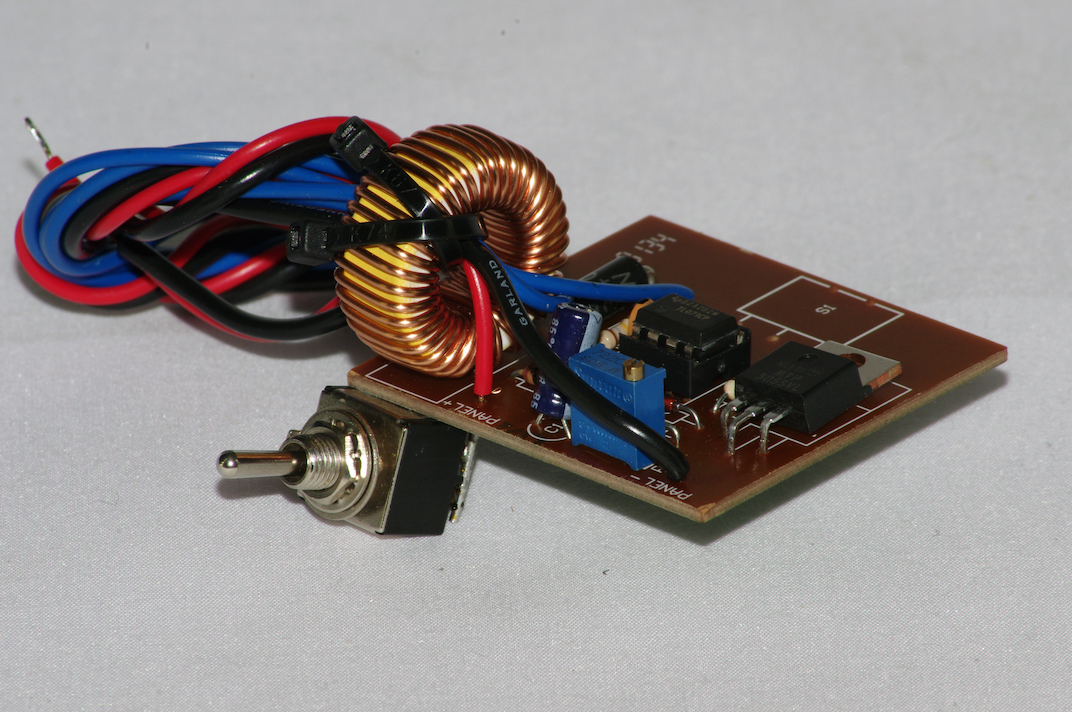
Solar Panel Power Controller Low Voltage Unit - VOC 6.5-12V (3-5 hours)
Code: SPPCL
Click here for teaching unit Overview
The SOLAR PANEL POWER CONTROLLER (SPPC) multiplies the solar panel’s starting current for motors. Normally, powering an electric motor directly from a solar panel can be quite inefficient, especially during start up and at low motor speeds. The SPPC allows the motor to start and operate at a much lower light intensity than is possible with the motor directly connected to the solar panel. This SPPC circuit holds the output of the solar panel at its maximum power voltage point. Thus it is able to substantially boost the starting current available to the motor. NOTE: This circuit regulates the input voltage rather than the output voltage. The SPPC will work with any solar panel or combination of solar panels whose Voltage Open Circuit (VOC) voltage is between 6.5 and 12 volts (a rated 12V panel at VOC will be higher than 12V). Energy consumption by the circuit is 0.04 W (approximately). The SPPC’s weight is approximately 45 grams (including the inductor).
Solar Panel Power Controller Standard Voltage Unit - VOC 13-23V (3-5 hours)
Code: SPPCS
Click here for teaching unit Overview
The SOLAR PANEL POWER CONTROLLER (SPPC) multiplies the solar panel’s starting current for motors. Normally, powering an electric motor directly from a solar panel can be quite inefficient, especially during start up and at low motor speeds. The SPPC allows the motor to start and operate at a much lower light intensity than is possible with the motor directly connected to the solar panel. This SPPC circuit holds the output of the solar panel at its maximum power voltage point. Thus it is able to substantially boost the starting current available to the motor. NOTE: This circuit regulates the input voltage rather than the output voltage. The SPPC will work with any solar panel or combination of solar panels whose Voltage Open Circuit (VOC) voltage is between 13 and 23 volts (a rated 12V panel at VOC will be higher than 12V). Energy consumption by the circuit is 0.04 W (approximately). The SPPC’s weight is approximately 45 grams (including the inductor).

Stomper (16-22 hours)
Code: STOMPER
Click here for teaching unit overview
The STOMPER is a six legged device that is driven by two electric motors through a number of gears. It is controlled by two two-way switches, each controlling the legs on one side. This project requires the student to build a STOMPER – a simple robotic device. The student will learn and use a variety of skills – in marking out, cutting materials, drilling, assembling and soldering.
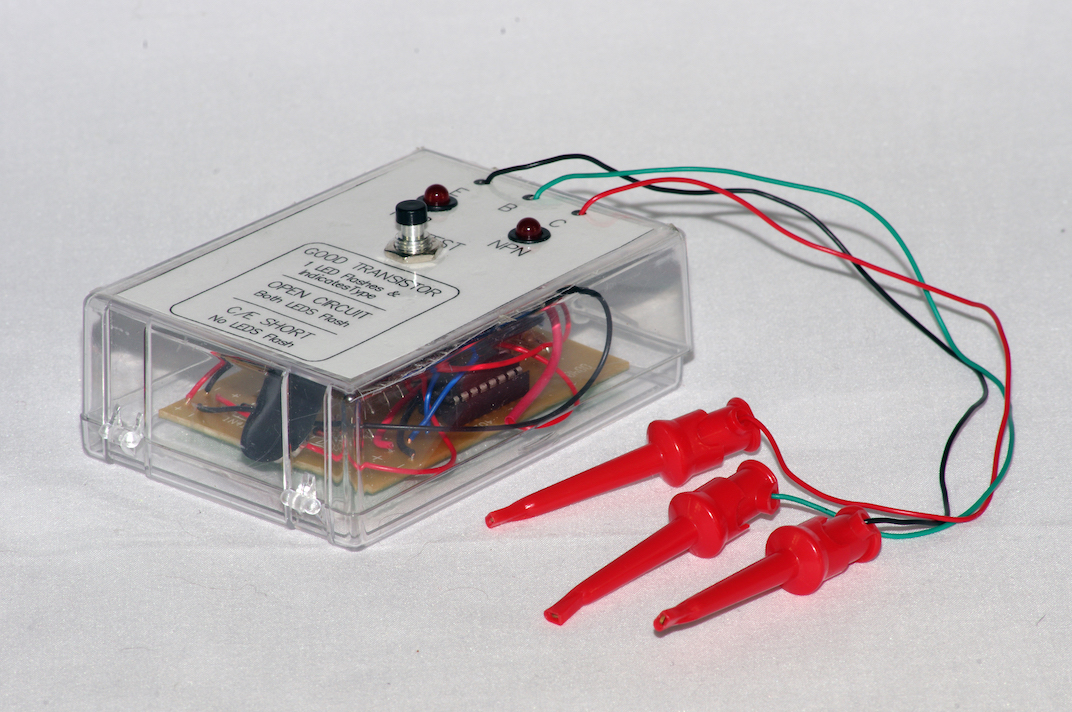
Transistor Tester (3-6 hours)
Code: TRANT
Click here for teaching unit overview
This device is used to detect a faulty transistor, within an assembled PCB. The testing can be carried out on the PCB's components, so that only the faulty transistor needs to be removed and replaced. The TRANSISTOR TESTER PCB and components are small enough to fit into a small plastic box, making it very portable.

Wind Generator (5-10 hours)
Code: WINDGEN
Click here for teaching unit overview
The WIND GENERATOR project allows the user to construct a model Wind Generator that can be used to demonstrate how wind energy is used to create electrical energy. By connecting the printed circuit board (with a graduated LED display) to the generator, it allows visual monitoring of the Wind Generator’s electrical output.
NOTE: This kit can be converted to a no-solder version using an 830 tie point circuit board (breadboard), jumper wires and 2 alligator clips with wires (see WINDGENBRBD below).

Wind Generator - Breadboard Project (5-10 hours) **new**
Code: WINDGENBRBD
Click here for teaching unit overview
The WIND GENERATOR project allows the user to construct a model wind generator that can be used to demonstrate how wind energy is used to create electrical energy. By connecting the Breadboard to the kit’s components and using Jumper wires, and alligator clips with wires to the generator, it allows visual monitoring of the Wind Generator’s electrical output, by using the graduated LED display.
The use of the breadboard, instead of the PCB (Printed Circuit Board), means that the project can be made without the need for soldering.
This kit is suitable for home-based learning.

Wind Up Torch (20-26 hours)
Code: WINDT
Click here for teaching unit
The WIND-UP TORCH provides light, using 3 super bright LEDs. The torch has a 3 stage gearbox connected to a small DC generator, which is turned by hand. The power provided by this generator is used to charge a small Lithium ion battery. The battery provides power for illumination, and a switch allows selection of low level lighting (a single LED) or a bright light (3 LEDs). When discharged, the battery is recharged by turning the handle for approximately one minute. The electronic components provided for the WIND-UP TORCH include a Printed Circuit Board, the circuitry components, the generator, gears and other components to construct the gearbox. To complete the project, the student is required to design and make the torch’s housing and handle.
Looking for more of a challenge for your students? Click here to view our Advanced kits